azyeoman Posted October 25, 2020 Author Share Posted October 25, 2020 A new addition to a former Indian Army sepoy who was unfortunately captured in Singapore after hard fighting in the Malayan Campaign. This is a Calcutta Mint issue IGS with the clasp NW Frontier that was minted after the war. A group of five to 14434 Sepoy Mohd Sadiq, 2/12th Frontier Force Regiment 1936 India General Service Medal (Clasp - North West Frontier 1937-39) named to 14434 Sep. Mohd. Sadiq, 2-12 F.F.R. 1939-45 Star unnamed as issued Pacific Star unnamed as issued War Medal 1939-45 unnamed as issued Pakistan Independence Medal 1947 named to 3442323 PA/NK Mohd Sadiq 12 F.F.R. The 2/12th F.F.R. was part of the Bannu Brigade and was sent to Malaya in 1941 as part of the 22nd Indian Brigade. It fought a successful but costly rearguard action on the east coast of Malaya and surrendered when Singapore fell on 15/2/42. The C.O., Lt-Col. A.E. Cumming*, received the Victoria Cross for bravery at Kuantan on 3/1/42 when his battalion held out against a strong Japanese attack, allowing the rest of the Brigade to withdraw. *For more information on Brig. A.E. Cumming see, http://www.vconline.org.uk/arthur-e-cumming-vc/4586316447 Link to comment Share on other sites More sharing options...
azyeoman Posted November 17, 2020 Author Share Posted November 17, 2020 Another Boer War acquisition to a sergeant Cyril Reuben Twigden who was captured twice; the first time on 12 February 1901 at Klip River and the second time on 31 March 1901 at Boschbult. QSA: CC, OFS, TR, SA01 - 5675 Serjt. C. Twigden, Lanc Fus. (C 28th MI) Dehli Durbar 1911 – unnamed as issued Cyril Reuben Twigden Twigden C 5675 Sergeant 28th Mounted Infantry Source: QSA roll Twigden C 5675 Sergeant Prisoner. Boschbult, 31 March 1902 1st Battalion. 28 Ml. Released Source: South African Field Force Casualty Roll Twigden C R 5675 Sergeant Prisoner. Klip River, 12 February 1902 1st Battalion. 28 Ml Source: South African Field Force Casualty Roll Battle of Boschbult farm Another important battle for the Canadians was the Battle of Boschbult farm — also known as the Battle of Harts. It took place on the 31st of March 1902 as the war was drawing to a close. The British, along with 21 Canadian riflemen, found themselves facing a surprise attack while out on patrol in the Transvaal area. The British were outnumbered. They tried to defend themselves from their positions around the farm buildings. The battle was intense, and they eventually surrendered when they had used all of their ammunition. A total of 13 Canadians was killed and 40 wounded at the Battle of Boschbult, which was one of the fiercest battles on the Boer War. Hart's River (Boschbult) 31 March 1902 By late March 1902, the character of the war had changed dramatically. The British had sectioned off large portions of the veldt with long lengths of barbed wire strung along railway lines, connected by as many as 8000 specially-built blockhouses. More than 23,656 square kilometers of the Transvaal and 27,358 square kilometers of the Orange Free State had been thus enclosed. Some 50,000 troops manned these lines, while another 80,000, all mounted, pursued the Boers, attempting to trap them against the blockhouse lines. There were, however, a number of gaps in the network of blockhouses. One of these was the desert-like western Transvaal, an area half the size of New Brunswick. The 900-strong 2nd Regiment, Canadian Mounted had arrived in the region in mid-March 1902, and already had taken part in a major offensive involving 16,000 troops. The operation drove 2500 Boers into the desolate far western reaches of the Transvaal. The British were soon on their trail again. Early on the morning of 3 March, a column that included the 2nd Regiment embarked on a 65-kilometre search for Boers along the bed of the practically dry Brak Spruit, which ran off the much larger Harts River. By mid-morning, the scouts had struck a fresh trail, apparently made by a small number of Boers. Sensing an easy victory, the column went off in pursuit, leaving the 2nd Regiment to follow, escorting the slow-moving baggage train. Prospects seemed good, but the Boers, in fact, outnumbered the British force, and had the advantage of terrain. The British commander decided to set up a defensive position around a farm called Boschbult. By the time the Canadians arrived with the baggage train, the Boers were beginning to push back the British defenses. All during the afternoon the Boers shelled the camp with artillery, while their riflemen on the surrounding ridges poured down a steady fire. They also made a series of mounted charges during one of which a party of 21 Canadians, under Lieutenant Bruce Carruthers, was cut off by a vastly superior force. Rather than surrender or run, the men fought until their ammunition was exhausted and their position was overrun. 18 of the 22 were killed or wounded. At 5:00 p.m. the Boers suddenly broke off the engagement and withdrew. The battle was a British defeat. Out of a total force of 1800 men, the British lost 33 killed, 126 wounded, and over 70 missing. Canadian casualties were 13 killed and 40 wounded. With the exception of the first engagement at Paardeberg on 18 February 1900, Harts River was the bloodiest day of the war for Canada. London Gazette 13 July 1918 (8272) R. Fus. – Clr. Sjt. Instr. (acting Sjt.-Maj.) Cyril Reuben Twigden to be 2nd Lt., and To be sedc. For emplt. As Adjt., Ind. Vols. 18th May 1918. Link to comment Share on other sites More sharing options...
azyeoman Posted November 18, 2020 Author Share Posted November 18, 2020 (edited) QSA with Relief of Kimberley, Paardeberg. Driefontein to: 2344 Pte. W. Speck, Glouc Regt taken PoW 25 November 1900 at Dewetsdorp. Entitled to the SA1901 clasp. Walter Speck an 18-year-old laborer from Gloucester joined the Gloucester Regiment at Bristol in 1888, having previously served in the 1st Gloucester Royal Engineer Volunteers, He served in South Africa from January 1900 and was taken PoW at Dewetsdorp on the 25th of November 1900. He left South Africa in June 1901 and was discharged from the army in August 1901 after 12 years’ service Speck W 2344 Private Prisoner. Dewetsdorp, 23 November 1900 2nd Battalion. Released 5 December Source: South African Field Force Casualty Roll In November, three companies of the battalion were part of a garrison at Dewetsdorp, which came under siege on the 17th. The garrison were short of water, which had to be carried in each night by volunteers. "November 23 was the hottest day of the siege. The men's tongues began to swell from thirst, and their situation was pitiable, as the enemy's fire was coming from every direction. Major Massey decided that it was impossible to continue the struggle and at half-past 5 the white flag was hoisted. De Wet congratulated Major Massey on the plucky defence made by the garrison and Steyn said that the losses of Boers in killed were greater than those of the British in wounded. The Boers had lost their best men at Dewetsdorp and would never again attempt to take a fortified post." (The Times). In his history of the war Conan Doyle wrote: "The thirst in the sultry trenches was terrible, but the garrison still, with black lips and parched tongues, held on to their lines." Speck is confirmed among the prisoners. The prisoners, except officers, were released 5th December. 2nd Battalion In the summer of 1899, the 2nd Battalion was stationed at Aldershot and was commanded by Lt Col Lindsell. They sailed on the Cymric on 1st January 1900, and arrived at Cape Town on the 21st. Along with the 2nd East Kent Regiment, 1st West Riding Regiment, and 1st Oxford Light Infantry, they formed the 13th Brigade under Brigadier General C E Knox, and part of the VIth Division under Lieutenant General Kelly-Kenny. (See notes under 2nd East Kent) The whole division did splendid work in the advance from Modder River to Bloemfontein. At Klip Kraal the East Kent, Gloucesters, and Oxford Light Infantry had sharp fighting with Cronje's rear-guard. On the 18th at Paardeberg the Gloucesters were not so seriously engaged as many other battalions, but between the 18th and 28th they did good work in seizing positions of importance, and driving back the Boer reinforcements. Their losses were about 6 killed and 20 wounded, including Colonel Lindsell. The correspondent of the Press Association, whose work was generally very reliable, telegraphing from Paardeberg on 26th February said: "Last Monday night (19th) a brilliant piece of work was performed by the Gloucesters. During the afternoon they approached within a short distance of a Boer kopje and contained the enemy until nightfall, when 120 men charged the kopje with bayonets and drove off the Boers with loss, bayoneting several". On 28th February Lord Roberts wired: "Cronje with his family left here yesterday in charge of Major General Prettyman, and under an escort of the City Imperial Volunteers' Mounted Infantry. Later in the day the remaining prisoners left under the charge of the Earl of Errol, and escorted by the Gloucester Regiment and 100 City Imperial Volunteers". The Gloucesters soon rejoined the main army to take part in some further hard marching and fighting. At Driefontein on 10th March 1900 the 13th Brigade had the toughest of the work, and although the Gloucesters were not in the original first line, they did their part splendidly, and had again about 5 killed and 20 wounded. Three officers were mentioned in Lord Roberts' dispatch of 31st March 1900. On 22nd November 1900, when De Wet made his famous rush south, he snapped up on his way the garrison of Dewetsdorp, consisting of three companies of the 2nd Gloucesters, one company of the Highland Light Infantry, and some of the 2nd Royal Irish Rifles, so that both battalions of the regiment have had the nasty experience of losing a large proportion of their men in surrenders. Three men of the battalion were mentioned in Lord Kitchener's despatch of 8th March 1901, presumably for gallantry at Dewetsdorp. In 1901 the battalion furnished about three companies as the infantry of a column which operated in the Orange River Colony under Colonel Henry. The Mounted Infantry company of the battalion saw a good deal of fighting, and gained several "mentions". In the final dispatch of Lord Kitchener 4 officers and 6 non-commissioned officers of the battalion were mentioned. Edited November 18, 2020 by azyeoman Link to comment Share on other sites More sharing options...
azyeoman Posted November 19, 2020 Author Share Posted November 19, 2020 QSA with RoK, Paard and TR to: 3046 Tpr. H. R. McLeod, Kitchner’s Horse PoW 18 Feb. 1900 Paardeberg Medal with original long length of ribbon On 18 February, Lord Kitchener ordered Colonel Hannay to take his men in the dark on to Koedoesrand Drift close to the main Boer laager. It became the prelude to the battle. Kitchener’s Horse were ambushed and a company of 7th Mounted Infantry crossed at Paardeberg Drift and engaged the Boers some two miles from the main laager. In this ambush Kitchener's Horse had 7 officers and 28 other ranks killed wounded or taken POW. McLeod H 3046 Trooper Prisoner. Near Paardeberg, 18 February 1900 Source: South African Field Force Casualty Roll Mcleod Harold Reuben 3046 Trooper Source: Nominal roll in WO127 https://www.britishbattles.com/great-boer-war/battle-of-paardeberg/ In the dispatch of 6th February 1900 Lord Roberts, after referring to the organization of the Colonial Division under Brigadier General Brabant, said: "Two other regiments, designated, at the particular request of the members, Roberts' Horse and Kitchener's Horse, have also been formed, chiefly from men who have found their way to South Africa from various parts of the world". These corps were at first intended to be called 'The second and third regiments of the South African Light Horse', but the names were changed as a compliment to the new Commander-in-Chief and his chief of the staff. Both Kitchener's Horse and Roberts' Horse were employed in the operations undertaken by Lord Roberts in February 1900 for the relief of Kimberley and in his advance to Bloemfontein; but one squadron of Kitchener's Horse was left on the lines of communication, and was utilized as part of the force with which Lord Kitchener and General Settle put down the rebellion in the Prieska district, March and April. On 9th February the Mounted Infantry Division, under Colonel Hannay, Argyll and Sutherland Highlanders, left Orange River station. After some fighting, the Division on the 12th reached Ramdam, where Lord Roberts was concentrating his army; but the bulk of Kitchener's Horse had preceded the rest of the Mounted Infantry, and had joined General French before midnight on the 11th. At 2 AM on the 12th they set out with French for Dekiel's Drift, on the Riet. On the 13th, General French, who had crossed the Riet River on the 12th, left a squadron of Kitchener's Horse at Blaauwbosch Pan, about eight miles north-east of Dekiel's Drift, on the Riet, in order to protect the wells until the infantry, who were following, should arrive. Unfortunately the infantry took a different course, and instead of them a large force of Boers turned up, who attacked the squadron and compelled their surrender after they had made a very creditable defense in a farmhouse for two days. Lieutenants Carstens and Buchanan were killed in action about this time. Another squadron was part of the slender escort of the convoy which was lost on the Riet on the 13th. The convoy is said to have been seven miles long, and the escort, left to see it over a most difficult drift with Boers all round, was 300 strong. The escort was not captured. Notwithstanding this bad luck, the corps did excellent work before Bloemfontein was reached. About one half of the regiment was with Colonel Hannay when Cronje was discovered to be trekking across the front of the Vlth Division on 15th February, and they took part in the pursuit and the other operations which led to his capture. On 7th March they were engaged at Poplar-Grove. Five officers and five non-commissioned officers and men gained mention in the dispatch of 31st March for good work on the way to Bloemfontein. According to the official statement, the strength of the corps when it entered Bloemfontein on 13th March was 26 officers, 402 men, 270 horses, and 2 maxims. About the beginning of March Kitchener's Horse had been, along with the 6th and 8th Regiments of Regular Mounted Infantry, the City Imperial Volunteers Mounted Infantry, Nesbitt's Horse, and the New South Wales Mounted Infantry, put into the 2nd Brigade of Mounted Infantry under Colonel P W J Le Gallais, 8th Hussars,—a splendid officer, who led his brigade to victory on many occasions, but who afterwards fell at Bothaville, 6th November 1900, in the moment of success. The regiment fought with Le Gallais and General Tucker at the battle of Karee Siding on 29th March 1900, and they were attached to Ian Hamilton's force, which, towards the end of April, set out first to clear Thabanchu and thereafter take part in the northern advance, during which the regiment, along with the 2nd Mounted Infantry Regulars and Lovat's Scouts, was in the 6th corps under Colonel Legge, who was afterwards killed at Nooitgedacht. Mr Churchill, in his 'Ian Hamilton's March' relates that on 26th April Kitchener's Horse and a company of regular mounted infantry were told to hold a kopje near Thabanchu for the night, but about dusk they were ordered to retire. This the Boers endeavored to prevent, attacking the force with great determination: however, the attack was driven off, and the little body got into camp during the night. Captain F J Warren was severely wounded, 1 man killed, and several wounded. On the 30th, at the battle of Houtnek, the regiment, with great boldness and skill, seized Thoba Mountain, and it was during the enemy's attempt to regain this commanding position that a party of about 12 Gordon Highlanders and 13 of Kitchener's Horse under Captain Towse of the Gordons made the famous stand and bayonet charge. The incident is admirably described in 'Ian Hamilton's March' by Mr Churchill, who was a spectator. Captain Towse, blinded by a bullet in the hour of triumph, got the VC. Lieutenants Parker and Munro and 5 men of Kitchener's Horse were killed, and Captains Ritchie and Cheyne and 8 men were wounded at Houtnek. In his telegram of 2nd May Lord Roberts remarked: "Kitchener's Horse is spoken of in terms of praise". On 4th May Ian Hamilton was again engaged, "and succeeded in preventing a junction of two Boer forces by a well-executed movement of some of the Household Cavalry, 12th Lancers, and Kitchener's Horse, who charged a body of the enemy and inflicted serious loss. They fled leaving their dead on the field, and their wounded to be attended by our doctors" (see Lord Roberts' telegram of 2nd May). In this affair Lieutenant Patrick Cameron was mortally wounded. The 'Standard' correspondent drew attention to the good work of the regiment at the crossing of the Zand River on 10th May. The regiment was present at Ian Hamilton's other actions on the way to Pretoria and at Diamond Hill (11th and 12th June). They started as a portion of Hunter's force designed to surround Prinsloo, but like Roberts' Horse were detached to pursue De Wet. On 24th July the regiment lost 9 men wounded at Stinkhoutboom. but about the same date they captured 5 of De Wet's wagons. When De Wet left the Reitzburg Hills Kitchener's Horse again crossed to the north of the Vaal and operated under Ridley, Hart, Clements, and other commanders in the district west of Johannesburg and Pretoria. In the despatch of 10th October 1900 Lord Roberts mentioned that "De Lisle's corps of mounted infantry was withdrawn from Clements' column and moved by rail on 17th September to Rhenoster, where it was joined by 250 men of Kitchener's Horse from Kroonstad". The work of De Lisle's men is briefly sketched under the 1st and 2nd New South Wales Mounted Infantry. This portion of Kitchener's Horse took part in the pursuit of De Wet on the south side of the Vaal and other operations under General C Knox in the Kroonstad district during September, October, and November, and were present on 27th October when 2 guns were captured at Rensburg, and in the very successful action of Bothaville on 6th November when 6 guns, a pom-pom, a maxim, and 130 prisoners were taken. Another portion of the corps was employed in the Eastern Transvaal, and frequently had odd casualties about Brugspruit in September and the first half of October. They took part in French's march from the Delagoa Railway to Heidelberg in October 1900,—a march which only a great leader could have brought off successfully, having regard to the strength of the enemy in the district at the time. The fighting was continuous and the strain on all most severe. In Lieutenant Colonel Watkin-Yardley's 'With the Inniskilling Dragoons', page 217, speaking of the arrival of the force at Heidelberg, he says: "Lieutenant Elphick, with his troop of Kitchener's Horse, which had requested to be attached to the Inniskillings at Machadodorp, and fought gallantly with us throughout the march, also left the column". On this march the troop lost Sergeant Hunter killed, 2 wounded, and 2 missing. A detachment which had remained in the Gatsrand and Krugersdorp district on the north side of the Vaal operated throughout September with Clements and Ridley, and had sharp fighting under General Hart on 23rd and 24th November 1900, when they lost 2 men killed. This portion of the regiment was with General Clements when he was attacked and met with disaster at Nooitgedacht in the Megaliesberg on 13th December 1900. It will be remembered that a high hill commanding the camp, and which was garrisoned by 4 companies of the 2nd Battalion Northumberland Fusiliers, was assaulted by the enemy in great force and was captured. Kitchener's Horse and the 2nd Battalion Mounted Infantry were on the west or left front of the camp; the enemy attacked upon this side in the most determined manner, and although some pickets were captured or wiped out entirely, the attack on the west was driven off, the enemy losing very heavily in his endeavor to push into the camp from that direction. When, however, it was seen that the high hill commanding the camp had been captured by the enemy, the General decided to retire. With difficulty General Clements got away his guns and most of his ammunition, but the camp was left standing and some stores were lost. The losses of Kitchener's Horse were severe: Lieutenant Skene and 8 men were killed, and Captain Stevenson and about 12 men wounded and about 40 taken prisoners. Some of the latter were wounded. Several mentions were gained by the corps on this occasion, and those who were present praised very highly the conduct of Kitchener's Horse and their old comrades the 2nd Battalion Regular Mounted Infantry, also the 2nd Battalion King's Own Yorkshire Light Infantry. The regiment, sadly reduced in numbers, operated in the second phase of the war chiefly in the Western Transvaal, and had a few casualties on various occasions. A reference in the dispatch of 8th May 1901 to a very valuable bit of work by men of Roberts' Horse and Kitchener's Horse has already been quoted under the former corps. Both regiments were for a time in a column under Colonel Hickie (dispatch of 8th July 1901), and continued to do good work in the Transvaal. On 8th and 9th July both Roberts' and Kitchener's Horse were sharply engaged and suffered casualties. They were, during the next few months, constantly in touch with the enemy, and often suffered losses, as on 4th November 1901, when Kitchener's Horse had 5 men wounded at Vaalbank. Link to comment Share on other sites More sharing options...
azyeoman Posted November 20, 2020 Author Share Posted November 20, 2020 (edited) Queen’s South Africa Medal 1899-1902, 3 Clasps: Relief of Ladysmith, Transvaal, South Africa 1901; (3888 SGT. W. MANSELL. 5TH. DRAGOON GUARDS) Hansell W H 3888 Sergeant Missing - released at Volksrust. 15 Aug 1900. Source: Natal Field Force Casualty Roll, page 2 line 14 Mansell W 3888 Sergeant QSA (3). Missing - released, Volksrust, 14 Aug 1900. Source: QSA medal rolls Queen’s South Africa Medal 1899-1902, 3 Clasps: Relief of Ladysmith, Transvaal, South Africa 1901, awarded to Sergeant W. Mansell, 5th Princess Charlotte of Wales’s Dragoon Guards, who saw service during the Boer War on operations leading to the relief of Ladysmith in late February 1900, and was later present in the Transvaal, and was taken prisoner of war on 15th August 1900, and released on 13th September 1900 at Barberton. William Henry Mansell was born in Finchley, London, and having worked as a clerk, then attested for service with the British Army at London on 15th November 1892, joining as a Private (No.3888) the 5th Princess Charlotte of Wales’s Dragoon Guards. Posted out to India on 6th September 1893, he was promoted to Corporal on 1st December 1894, and to Sergeant on 20th June 1895, before being appointed Orderly Room Sergeant on 20th June 1895. Having then returned to duty as a Sergeant on 1st May 1898, he was posted to South Africa after the outbreak of the Boer War on 4th December 1899. Mansell then saw service during the Boer War on operations leading to the relief of Ladysmith in late February 1900. Subsequently present on operations in the Transvaal, Mansell was taken prisoner of war on 15th August 1900, and released on 13th September 1900 at Barberton. Mansell was posted home on 2nd June 1901 and transferred to the Army Reserve, being fully discharged on 14th November 1904. The regiment arrived in Natal from India before the war broke out. They took part in the battle of Elandslaagte on 21st October 1899l. The regiment was not present at Rietfontein, 24th October, but on the 30th in the battle of Lombard's Kop they were engaged. Lt. Norwood gained the VC on that day for galloping back 300 yards for a wounded man, carrying him on his back, at the same time leading his horse, all under a heavy and incessant fire. After the investment of Ladysmith was complete the regiment was frequently engaged, particularly on 3rd November 1899 and on 6th January 1900, the day of the great attack. In his dispatches of 2nd December 1899 and 23rd March 1900 General White mentioned 3 officers. In the northern advance from Ladysmith to the Transvaal the 5th Dragoon Guards were brigaded with the 1st Royal Dragoons and 13th Hussars under Brigadier General Burn-Murdoch. When General Buller moved north towards Lydenburg from the Standerton line Burn-Murdoch's brigade was employed in the south-east of the Transvaal. In General Buller's final dispatch of 9th November 1900 4 officers and 3 non-commissioned officers and men of the 5th Dragoon Guards were mentioned for gallant work while the regiment was under him, the cause of mention in the case of Captain Reynolds being, "on 15th August with a party of 20 men of the 5th Dragoon Guards surprised and routed a commando of 400". In Lord Roberts' dispatch of 4th September 1901 8 officers and 5 non-commissioned officers and men were mentioned. In the first quarter of 1901 the regiment had arduous work in the south-east of the Transvaal while General French was driving Botha's forces into that angle. They frequently had skirmishing, but perhaps their hardest work was the escorting of convoys from the railway to French's men during a time when the weather scarcely ever faired up for weeks at a time, and the endless spruits could only be crossed with great difficulty. The regiment was afterwards taken to the Western Transvaal, and did much work in the Klerksdorp district. They were for a time in columns under Colonel Western and Brigadier General G Hamilton, and they afterwards operated under Brigadier General G Hamilton east of Pretoria. The regiment sailed for India shortly before peace was declared. History of the 5th Dragoon Guards in the Boer War The regiment were stationed in India from 1893. They were one of the last regiments to sail from Portsmouth to India as a complete unit on a Government transport, because in the following season the use of transport was discontinued. In 1899 they were sent direct to South Africa, arriving in Natal before war broke out. They were posted to Ladysmith, the first arrivals being C and D Squadrons, arriving on 12th Oct. The remaining two squadrons arrived on 26th Oct making a total of 18 officers and 476 other ranks. The commanding officer was Lt. Col. Robert Baden Powell but he was kept busy at Mafeking. Major St. John Gore was the actual commander and was regarded by Sir Henry Rawlinson as, 'a long-nosed jabbering ass, with none of the qualities for a cavalry leader'. The journey from Bombay had been a difficult one because of storms, and the three trains that they had to take from Durban were even worse because wet weather caused the horses to slip around disastrously in their open carriages. Several animals were lost through injury in this way. Elandslaagte 21st Oct 1899 The role of the 5th Dragoon Guards at Elandslaagte was that of pursuing the defeated Boers at the end of the battle. Elandslaagte, situated northeast of Ladysmith was occupied by 1,200 Boers under the aged General Kock. Major-General French was sent out with a force from Ladysmith to clear the Boers from the area. This force was made up of Imperial Light Horse, half a battalion of the Manchester Regiment plus gunners and sappers. But the force was too small and French called for reinforcements. These included the Devons, Gordon Highlanders, two squadrons of the 5th Lancers and two squadrons of the 5th Dragoon Guards. The mounted troops had the task of riding alongside the train that transported the infantry to Elandslaagte. They were kept busy driving large numbers of Boers away from the track. The Boers entrenched on the heights were subjected to an assault by the infantry which turned into a horrendous ordeal for the Manchesters, Gordons and the dismounted Imperial Light Horse who were pinned down by accurate rifle fire and were also soaked in a tremendous thunderstorm. Theirs was a flanking attack which was intended to distract the Boers from a frontal assault made by the Devons who went in vigorously and achieved success but the Boers regained the heights again in a desperate fight. More hand-to-hand fighting took place and the British finally forced the retreat of the Boers who took to their horses and fled as the light of day began to fade. It was here that the Lancers and Dragoon Guards began their pursuit of the enemy. The ground was difficult for the cavalry at first, as St John Gore relates: 'At last I saw the Boers apparently coming down...by twos and threes: great uncertainty in the bad light as to what they were doing. Then "They're off!" "No, they're not!" "Yes, they ARE!" I sent back word to my two squadrons to "advance in line at extended files" [ie. 4 yards interval between each horse]. After half a mile our heads rose over a fold in the ground, and showed us a long stream of Boers going leisurely away from the position at right angles to my line of advance, and about 300 yards off. I gave the word "gallop". When they saw us, the Boers broke in every direction and galloped away. The ground was very stony in most parts, but there were some good grassy bits along which I was able to pick my way (being one single man), while most of the men had to go over the bad places as they happened to come to them in their line.' They made three charges against the Boers. There was much blood spilt in these charges and the Boers harbored a deep hatred of the British after this 'massacre', especially the Lancers. They swore that any lancers they captured in the future would be killed. But there are conflicting accounts from those that took part in the charges at Elandslaagte. One lancer wrote home: 'They threw up their arms and fell on their knees for mercy; but we were told not to give them any, and I can assure you they got none. We went along sticking our lances through them - it was terrible thing: but you have to do it in a case like this.' The accounts written by men of the 5th DG all talk of taking prisoners. Troop Sergeant Savage said, 'The pace increased, on and on, until we could see and pick out our man. After this I no longer tried to follow my Troop leader, but rode as hard as I could for that one man. As I approached him, he dropped off his pony (a grey) and fired at someone to the right. I overtook him and rode on for another who was some little distance in front. This fellow, by the time I got up to him, was laid on his back, and looked so helpless and so much like a civilian, that I took his arms and ammunition, and as by this time the troops were rallying, I marched him up a prisoner and handed him over to Corporal Howard, who was taking over the prisoners. This man, whilst I had my lance to his breast, asked for no mercy, but handed over his arms like a soldier who could do no more. I took the precaution to make him hand me the butt first. There was nothing of the coward about him.' This narrative is interesting as it indicates that the 5th DG were using lances. Lieut Philip Reynolds wrote, 'Men were dismounted by twos and threes to make a single Boer prisoner, and our ranks were soon thinned out. At last we came to a spruit and the whole line halted. A few Boers here were dismounted, and fired a few shots without doing any damage. I took a few men, and we surrounded them and made prisoners of them.' Thus it becomes obvious that the taking of prisoners was detrimental to the pursuit. Lombard's Kop 30th Oct 1899 The battle of Ladysmith, or Lombard's Kop was General White's attempt to take the offensive against the combined forces of General Joubert's Boers, General Lucas Meyer's force, and a commando from the Free State. The British were outnumbered and the Boers had powerful artillery building up to besiege Ladysmith, especially their Long Tom positioned on Pepworth Hill. White's forces were split into three and concentrated their attacks on the hills ranging around Pepworth in the north and Lombard's Kop 5 miles east of the town. The cavalry was made up of the 5th DG, 5th Lancers, 18th and 19th Hussars and the Natal Carbineers. They were all jammed into a nullah one and a half miles long and 10 or 20 yards wide and came under heavy fire from the Boers who had out-maneuvered the British completely. They were forced to retreat in a disorderly manner described by an infantry officer as 'very nearly a stampede' It was only the brave and efficient actions of 53rd Battery RA under Major Abdy that saved the cavalry from serious casualties. As it was, they came off lightly compared to the infantry who had many men taken prisoner, 954 in all, and 320 casualties. It was during the scramble to get away from Lombard's Kop that 2nd Lt John Norwood won the VC and Private William Sibthorpe was awarded the DCM. Norwood galloped back 300 yards under fire to help the wounded Private Mouncer. He carried him on his back and led his own horse. Sibthorpe came to assist him and helped carry Mouncer, still under heavy fire. Norwood made a report about Sibthorpe's bravery but omitted his own part in the action. When Sibthorpe was asked by the Squadron commander why he did what he did he said, "I only followed my officer's example." thus revealing Norwood's part. When the Squadron commander sent in his report he wrote, 'It is against the expressed wish of 2nd Lt Norwood that I report his share in this act of gallantry'. Edited November 21, 2020 by azyeoman Link to comment Share on other sites More sharing options...
azyeoman Posted February 13, 2021 Author Share Posted February 13, 2021 Another new QSA for a small but sharp action to a PoW in the 12th Lancers. Queen’s South Africa Medal, 4 clasps, Cape Colony, Orange Free State, Transvaal, South Africa 1901 officially named to 4701 Pte A. Smith, 12 Lancers who was severely wounded in action while engaged with Commdt J.J. Smith’s Rebel Commando at Wilgebosch Drift 1901. Wounded in action and captured on 17th October 1901 at Wilgebosch Drift near Hopefield, Cape Colony. On this day Major Capper’s Column of the 12th Lancers and Colonial Light Horse had a short but sharp engagement with Commandant J.J. Smith’s Rebel Commando at Wilgebosch Drift, near to Hopefield. Due to the dense high shrubs and trees present as well as difficult terrain on the riverbank it gave excellent cover to the Boer Rebels who suffered no casualties for the action. The British however having been picked off by the marksmen suffered three men killed and four wounded, these four men, including Pte. Smith were then taken as Prisoners of War, but after they were stripped of their horses, rifles and ammunition they were released. It is additionally noted on the roll, as with many of the 12th Royal Lancers men that he also served with the “Provisional Regiment of Lancers.” Smith A 4701 Private QSA (4). Severe Wound, Hopefield CC, 17 Oct 01. To Prov. Regt. of Lancers. Source: QSA medal rolls Smith A 4701 Private Severely wounded. Hopefield, CC, 17 October 1901 Source: South African Field Force Casualty Roll The regiment sailed on the City of Vienna and the Mohawk, and arrived at the Cape about 16th November 1899. They joined General French about Naauwpoort, and after doing a fortnight's patrol work and skirmishing in that district they were sent to Modder River about 2nd December, a few days after the battle of that name (see 3rd Grenadier Guards). The regiment, along with the 9th Lancers, did much valuable service on 11th December at Magersfontein (see 2nd Black Watch). Both cavalry regiments were on the right flank and had a great deal of dismounted work to do, being heavily engaged from early morning till dusk. Lord Methuen's dispatch of 15th February 1900 gives but few details regarding their task. He says, "Lieutenant Colonel the Earl of Airlie did excellent work with two dismounted squadrons when good service was much needed". The work of the maxim under Lieutenant Macnaghten was also praised. The losses of the regiment on the 11th were approximately 5 killed and 17 wounded. On 9th January 1900 the regiment took part in a raid some distance into the Orange Free State. On 11th February they set out under General French for Kimberley, their brigadier being Colonel Broadwood of the regiment, and the other regiments in the brigade being the Household Cavalry and the 10th Hussars. The work of the brigade has been sketched under the Household Cavalry. Colonel the Earl of Airlie and another officer were mentioned in Lord Roberts' dispatch of 31st March 1900 for good work up to the entry into Bloemfontein. The regiment did not accompany their brigadier towards Ladybrand, and so escaped his mishap at Sannah's Post on 31st March (see Household Cavalry). On the 29th they had taken part under General French in the battle of Karee Siding (see 2nd Norfolk Regiment). At Diamond Hill, 11th and 12th June (see `1st Sussex Regiment), a charge of the Household Cavalry and 12th Lancers saved Q Battery, but the regiment and the army had to deplore the loss of the Earl of Airlie, Link to comment Share on other sites More sharing options...
azyeoman Posted February 15, 2021 Author Share Posted February 15, 2021 QSA: CC, TR, Witt. Officially named to: Sergeant Major Frederick Dakyn-Hockin, Border Horse, also Agent of the Field Intelligence Department and District Mounted Rifles, later Lieut in Ashburner’s Light Horse. The QSA is officially impressed: “Sjt: Maj: F. D. Hockin. Border Horse.” He may have also earned a KSA with 2 clasps, as an Agent with the Field Intelligence Department. It is noted he saw previous service with Rimmington’s Guides. A curious remark on his medal roll notes his abuse of power during the war: “This man was accused of embezzlement and fraud. he was not tried but released by the Civil Authorities at Johannesburg. His (unconvicted) crime was that of selling cattle, belonging to the Government.” However, his service with Rimmington’s Guides cannot be traced, another roll records he was later entitled to the SA 1901 clasp to his QSA to be issued separately, so it is not clear whether he was allowed the issue of the KSA. Frederick saw varied service during the Boer War in many different units, can be found on the medal rolls with the surname “Hockin” “Hocken” “Hockess” and “Hocking”. Frederick “Fred” Dakyn-Hockin, was born in England during about 1868. During peacetime he worked as a Commercial Agent, he died aged 76, on 1st May 1944 in Johannesburg, South Africa. He was the husband of Hester Dakyn-Hockin. His son Fred, born during 1894 has an Entry in the South African Sporting Encyclopedia and Who’s Who, 1949. During the Boer War, whilst serving as Sergeant Major of Border Horse, he was taken as a prisoner shortly near Hammonia during an incident on 28th May 1900, some info from War Office Records 108/372, South Africa Surrenders: “While Lt Boyes and 17 men of the Border Horse were out near Hammonia, they heard firing. They proceeded to the spot and were surrounded by about 80 Boers. They fought for three hours and then, their horses having been captured and their ammunition nearly expended, Sergeant-Major Bull decided to surrender. Lieut. Boyes was not near Sergeant-Major Bull at the time and Lieut. Boyes was still in the hands of the enemy when the Court of Inquiry was held in September 1900.” Sergeant Major Hockin was one of those who were forced to surrender and were taken as Prisoners, however fortunately for them the Boers had no interest in holding more British Prisoners, so he was released and is noted as Missing but returned to rejoin his regiment, The Boers would of course have most likely relieved him however of his horse, rifle, any ammunition. The official casualty list shows Hockin as Sergeant and the only Sergeant present, with Bull being officially a Corporal. Hocking Fred Dakyn 5936 Sergeant Major Served 07 Feb 1900 to 16 Feb1901. No 6 Co. Discharged East London completion of service Source: Nominal roll in WO127 Some information on the unit from Colonials in the Boer War by John Stirling: “The Border Horse were stationed at Aliwal North in April 1900, and were reviewed there by General Brabant, under whom they were to act in the operations for the relief of Wepener. In the advanced to Wepener they were in the forefront, and several times had sharp fighting with casualties. They work was highly spoken of by those who witness it. After Wepener was relieved, the Border Horse was a component par of the Colonial Division under General Brabant, and in the advance to the Brandwater Basin the whole of the Division often had fighting. The scouting and patrol work were constant, hard, and, from the nature of the country, very dangerous, and casualties were frequent. Of the work and the losses, the Border Horse had their full share, but they had the satisfaction of helping to hem in Prinsloo and his 4000 men. Lieut. L.G. Longmore was severely wounded near Hammonia, towards the end of May, and on the same occasion three men were killed and several wounded.” Link to comment Share on other sites More sharing options...
POWCollector Posted February 17, 2021 Share Posted February 17, 2021 Great new posts John! I particularly like the latest to Sgt Maj Dakyn-Hockin and the unusual name! Ive got a great NZ group coming soon! Best, Rob 1 Link to comment Share on other sites More sharing options...
azyeoman Posted March 21, 2021 Author Share Posted March 21, 2021 (edited) 14190 Tpr. E.R. Walker, 47th Coy. 13th Imp. Yeo. PoW Lindley 31 May 1900 QSA: CC, ODS, TR – 14190 Tpr. E. R. Walker, 47th Coy. 13th Impl. Yeo. BWM: E.R. Walker (for work with the YMCA) Defence Medal (unnamed as issued) Ernest Robert Walker was born on 10 May 1872. He was the son of Sir James Robert Walker, 2nd Bt. And Louisa Susan Marlborough Heron-Maxwell. On 10 October 1901, he married Beatrice Mary Maxwell, the daughter of Sir Hubert Eustace Maxwell of Monreith, 7th Bt and Mary Fletcher-Cambell. They had three children, Silvia Mary, James Herbert and Kthleen Elizabeth Jean. He was an architect. He died when 70 years old on 17 May 1942. E. R. Walker, an Architect by occupation, served in the 47th Company 13th Battalion Imperial Yeomanry in South Africa, 1 March-17 October 1900. Was taken prisoner at Lindley on 31 May 1900. He was one of the ‘special’ prisoners who was sent along with the officers to a prison camp at Barberton, being released on 13 September 1900 when liberated by French when he captured Barberton. (The Times for 4 Sept. 1900) Architectual Example: Walker designed the WWI Memorial a Wall mounted rectangular bronze plaque mounted onto a hopton wood stone backboard with dedicatory inscription carved above and below the plaque at St. Clements Church, Scarcroft Road, York, N. Yorks. (Church of England) History The Battalion to which the 47th Duke of Cambridge’s Own Company joined out the in South Africa, the 13th Battalion, was as one write put it, ‘the Imperial Yeomanry dream’, as Wyndham, the creator of the Yeomanry, had wanted it to represent the cream of British manhood and the ‘13th Battalion took his scheme to its ultimate extreme’. The 45th Company from Dublin had Masters of Foxhounds and the sons of much of Ireland’s legal establishment in its ranks. The 47th Company, as mentioned, came from some of England’s wealthiest families, and the 46th and 54th from Belfast represented Ulster Unionism’s commitment to the Imperial cause. The battalion’s officers included Lord Longford, Lord Ennismore, the Earl of Leitrim, James Craig, later Lord Craigavon, and Sir John Power of the Irish whiskey distilling family. Politics, money, patriotism and class, the combination was irresistible to the press and public, some of whom dubbed the battalion the ‘Millionaires’ Own’. All the Troopers in the D.C.O. were wealthy 'gentleman troopers' (aside from the officers' servants). What made them unique is that they volunteered to serve in South Africa without pay and to provide the costs of their own equipment, horses and transport to the war. They donated their yeomanry pay from the government to the war widows and orphans fund. The D.C.O. were massively oversubscribed and only 110 chosen - one rejected gentleman even asked for a medical certificate so that he could prove his rejection to his wife. Despite their wealth there was only one thing the Troopers wanted - the Queen's Shilling as reported in The Times on 25 January 1900, "The swearing in of recruits took place at Duke Street (St James's, London) yesterday under Major Morland, approving officer, and Lord Arthur Hill, in his capacity as a magistrate. The men exhibited much eagerness to be possessed of 'the Queen's Shilling' as a memento of the occasion and the wish was gratified". On arrival in South Africa, the 47th Duke of Cambridge’s Own Company, well connected as well as well heeled, only spent a week in the unpleasant surroundings of the Imperial Yeomanry camp at Maitland. Admittedly their reward was weeks of training on the edge of the Karoo Desert north of Cape Town but life there was eased by the arrival of the Dublin men to keep them company and of a spectacular array of food, drink and other luxuries which had been sent out from England. On 15th May the two companies arrived in Bloemfontein to meet the Ulstermen, who had come straight from Maitland, and just a week later he newly assembled battalion was given its first orders for active service. The 13th Battalion was then tasked with joined General Colvile’s 9th Division, which was short of mounted troops, and as such the yeomanry was detailed to link up with Colvile at Ventersburg, south of Kroonstad, but because they were delayed waiting for forage, they did not arrive in time, and Colvile had by then begun his march east to Lindley and then north to Heilbron, taking the right flank during Robert’s march on Johannesburg. The 13th Battalion Commanding Officer, Lieutenant Colonel Basil Spragge, was an experienced regular infantry officer, and he was then handed a telegram, the origins of which are still a mystery. The telegram basically ordered Spragge to join Colville at Lindley. Colvile later denied all knowledge of this telegram, and there is speculation that the Boers had tapped the telegraph lines and sent a bogus message to lure the yeomanry to destruction. It was still a risky deception, as Colvile himself was heading to Lindley with the 9th Division, and it he had done so, and then lingered long enough, the yeomanry would have caught up with him, providing much needed strength to the 9th Division. Colvile’s intelligence officer later confirmed that Colvile did not give this order, but despite the speculation it does not seem likely that the Boers did send the order, and more than likely it was just down to bad staff work at British headquarters who had issued the orders to Spragge, and failed to inform Colvile. Nevertheless, it played right into the hands of the Boers. The 13th Battalion marched for Lindley at daybreak on the 26th May, and that afternoon met a party of armed Boers who claimed to be going to Kroonstad to surrender, and Spragge naively disarmed them, invited them to lunch and then allowed them to go. The Boers promptly returned to Lindley with much valuable information. As Private Maurice Fitzgibbon of the Dublin company, son of one of Ireland’s most senior judges, recalled: “The scouts of the Boer commandos at Lindley had been permitted to enter our lines to find out our numbers, our armaments and the amount of our supplies, had even had lunch with us and all this information and hospitality at the expense of a few out-of-date rifles and a few perjured oaths.” The Boer’s now knew of the yeomanry’s approach but Colvile did not. When the yeomanry rode into Lindley the following afternoon, it quickly became apparent that all was not well. Colvile was gone, and no letter or message of any sort left, the town being ominously deserted and the people too frightened to give any information. Within an hour of the yeomanry’s arrival, the Boers opened fire from some of the houses, and the yeomanry were ordered to evacuate the town, which was commanded by hills and difficult to defend, and then retreat to where they had left their baggage some three miles to the west on the Kroonstad Road. After fighting a rear guard action they regrouped on the northern bank of the Valsh River. Spragge now made the most crucial decision of the entire Lindley affair. He could either make a run for it, or set up his defenses and send for help. His decision to do the latter was later heavily criticized, but in reality Spragge could not have ordered a move that night, although there was a window of opportunity, albeit a brief and highly risky one the following morning. By the time the entire Battalion had regrouped outside Lindley it was 5 pm, the men were tired, and so were the horses which had come 87 miles in three days. If Spragge had abandoned the baggage and tried to escape the Boer noose that night, the 13th Battalion would have probably met with disaster. These were inexperienced troops, still soft from too much good living in Britain and unfamiliar with the country; to expect them to make a successful night march on exhausted horses was unrealistic. The only time Spragge might have successfully withdrawn was early the following morning, when his horses and men had got some rest, and before the Boers had gathered about him in large numbers. But even then, if he had abandoned his baggage and ridden as fast as possible towards safety, it was a desperately dangerous course of action. The Boers loved nothing more than sweeping down on vulnerable British columns and the 13th Battalion, which had never fired a shot in anger before it rode into Lindley, would have been easy prey for the Commandos. Furthermore, Cragge knew that Rundle’s 8th Division was in the area as well as Colvile, and so his expectations of help were not unreasonable. His decision to stay where he was may have lacked the dash and drama of a gallop for safety but it was based on sound military common sense. The position which Spragge had chosen was not a bad one, although the need to incorporate grazing for the horses and for a flock of sheep which the battalion had commandeered, meant that it was rather extended. Its center was a 500-yard-wide valley running south from the Kroonstad Road to the Valsh River. On the eastern side were two strong kopjes, the keys to the entire position, which were defended by the 47th Duke of Cambridge’s Own Company under Captain Clive Keith, a former officer in the 3rd Dragoon Guards. The valley was bounded to the north-west by a low plateau rising to a ridge with two conical kopjes. Soon after sunrise on the 28th the yeomen heard the crack of the first Boer rifle shots. The ground was mostly too hard to dig trenches and they lacked the right tools but the British had managed to build a number of stone shelters during the night which provided some cover. Gradually the fire increased in intensity, and as one man of the 47th recalled: “The men on the kopjes under Captain Keith were having a hot time of it. They signaled that there was a heavy fire on them from three different points but they had managed to build breastworks and were keeping the Boers at a distance. It was evident that the Boers outnumbered us and were increasing in strength.” That afternoon Captain Keith, the DCO’s popular commander, was killed by a bullet through the head. But despite some casualties and gnawing hunger, on the 28th and 29th May the British were not under serious pressure from the Boers. However on the evening of the 29th, Piet De Wet arrived with reinforcements bringing the Boer forces up to about 2,500 men. More crucially, he brought with him four artillery pieces which were to seal the fate of the defenders. On the 30th the Boers drew the circle in more tightly and Spragge found that the grazing for his animals was becoming restricted. By the morning of the 31st the writing was one the wall for the defenders, who had acquitted themselves well despite their lack of experience. During the night the Boers had brought three guns into position south of the Valsch and the fourth onto a flat-topped kopje about a mile north of the DCO’s. Crouching in their positions the latter heard a boom followed by what one observed: “a peculiar shrieking in the air immediately above out heads” as the first shell came in. The DCO’s on the two crucial kopjes took the brunt of the artillery fire. The 47th man observed: ‘Another distant boom and a few moments of expectation. Someone had left a helmet and a greatcoat on a ledge of rock on the summit of the kopje a few yards in front. A few moments after the last boom there was a deafening crash and the piece of rock and the coat and helmet disappeared in a confused volcano of smoke and dust. They had got the range and our minutes were numbered.” As more and more shells his the DCO’s position, under cover of this fire the Boers galloped up and ensconced themselves among some boulders on the southernmost of the two stony kopjes. The DCO’s abandoned the position from the southern kopje, and as they retreated towards the northern kopje a white flag was raised by one of their men manning a picquet between the two hills, he being immediately shot in the thigh by one of his comrades. This however caused confusion, and others began to surrender, and also the northern kopje, making Spragge’s position untenable, and shortly after 2,30 pm, he ordered his force to surrender. The casualty list was a long one, Captain Keith and sixteen other ranks were killed, and later Sir John Power and three men died of their wounds, and four officers and twenty-eight men had been wounded. Another fifteen officer’s and 367 men were captured unwounded bringing the total Boer bag of prisoners to more than 400. In Britain news of the disaster was received with stunned incredulity. Questions were asked in the House of Commons and The Times called the surrender a humiliating episode. Edited March 21, 2021 by azyeoman Link to comment Share on other sites More sharing options...
POWCollector Posted March 21, 2021 Share Posted March 21, 2021 A brilliant new addition! Thank you for educating me on this extraordinary battalion! It’s interesting to see some Elphinstones amongst the prisoners.... One of their relatives, John Elphinstone, was a Captain in the Black Watch and after capture in WW2 was sent to Oflag IV-C Colditz Castle. Due to his being King George VI nephew and cousin of Queen Elizabeth, he was placed as a prominente prisoner on the orders of Adolf Hitler and was to be used as a bargaining chip should the war not go in Germany’s favour. Thanks again and look forward to the next! 1 Link to comment Share on other sites More sharing options...
azyeoman Posted March 22, 2021 Author Share Posted March 22, 2021 Here are some photos of the Lindley battlefield today. Link to comment Share on other sites More sharing options...
azyeoman Posted March 25, 2021 Author Share Posted March 25, 2021 (edited) I.G.S. 1936-39 one clasp 'North West Frontier 1936-37 officially named to: 12499 Sepoy Nazir Ullah, 6-13th Frontier Force Rifles The PoW rolls show 12499 Nazir Ullah was a Battery Havildar-Major in the Indian Artillery and was held at Stalag 315 (Przemysi) and Stalag 7a (Moosburg). This is an interesting medal as most Indian PoWs were captives of the Japanese and so a medal to an Indian who was a PoW in Germany is quite different. There is considerable information on Ullah's regiment the 6-13th FFR. 6-13th FFR After the First World War, the 59th Royal Scinde Rifles (Frontier Force) was grouped with the 55th, 57th, 58th, and the two battalions of 56th Punjabi Rifles (Frontier Force) to form the 13th Frontier Force Rifles in 1922. The 13th FFR was involved in the 1936-37 Waziristan Campaign for which its men were recipients of the IGS with clasp, The 59th Royal Scinde Rifles became the 6th Battalion of the new regiment. During the Second World War, the battalion again greatly distinguished itself, serving in the Sudan, Eritrea, North Africa, Persia, Iraq, Syria, Palestine, and Italy. Sepoy Ali Haider was awarded the Victoria Cross during the Battle of the Senio, in Italy in 1945 IGS with Waziristan 1936-37 Clasp The Waziristan campaign 1936–1939 comprised a number of operations conducted in Waziristan by British and Indian forces against the fiercely independent tribesmen that inhabited this region. These operations were conducted in 1936–1939, when operations were undertaken against followers of the Pashtun nationalist Mirzali Khan, also known by the British as the "Faqir of Ipi", a religious and political agitator who was spreading anti-British sentiment in the region and undermining the prestige of the Indian government in Waziristan at the time. In 1919–1920, the British had fought a campaign against the Wazir tribes. Minor skirmishes had continued into 1921, but after the establishment of a permanent garrison at Razmak there had been a period of relative peace in the region.[1] Throughout 1921–1924 the British undertook a road construction effort in the region that led to further conflict during the 1921-24 Campaign. In 1936, trouble again flared up in Waziristan in the form of a political and religious agitation by Mirzali Khan. For some time, there had been growing unrest in the region, fueled by a perception of a weakening of British resolve to govern following a number of constitutional changes in India; however, following a trial of a Muslim student on a charge of abducting a Hindu girl, Mirzali Khan began spreading anti-British sentiment in earnest, claiming that the government was interfering in a religious matter. In late November 1936, in order to reassert the perception of control over the region, with the approval of the Tori Khel maliks, the government of India decided to move troops through the Khaisora Valley. This would be achieved by marching a column from the garrison at Razmak to the east, to join up at the village of Bichhe Kashkai with a column from the Bannu Brigade, which would advance from the south from Mirali. By this stage of British rule in India, there were strict rules governing such expeditions on the North West Frontier, and as the purpose of the expedition was only as a demonstration to the tribesmen of government resolve, the decision was made that no offensive action was to be taken unless troops were fired upon. The Razmak column, known as Razcol, began the march without incident, but after three days came under fire while traversing a narrow valley about 10 miles (16 km) short of Bichhe Kashkai. Intense fighting ensued as the column had to fight its way through to the village, while the two Indian battalions that made up Tocol from Mirali ran into even tougher opposition and were delayed until the following day. The supply situation was desperate and casualties numbered around 100, so it was decided to withdraw both columns back to Mirali. This was achieved, but the picquets and rearguard were heavily engaged on numerous occasions before they arrived. The outcome of the expedition was the reverse of the desired outcome, as, instead of demonstrating government resolve and strength, it had in fact highlighted their weakness and Mirzali Khan's support rose dramatically. For the next year, trouble and insurrection spread throughout Waziristan, as Wazirs, Dawars, Mahsuds, Bettanis, and even Afghans from across the border rallied to support the Mirzali Khan's cause. By April 1937, four extra brigades had been brought in to reinforce the garrisons at Razmak, Bannu and Wanna and at the height of the campaign in 1937, some 60,000 regular and irregular troops were employed by the British in an effort to bring to battle an estimated 4,000 hostile tribesmen. While the British attempted to stamp out the insurrection by drawing the tribesmen into decisive engagement, Mirzali Khan remained at large (and indeed was never caught), and on the main, the tribesmen managed to avoid being drawn into battle using guerrilla tactics of ambush in order to keep the initiative. In doing so, they inflicted considerable casualties upon the British and Indian troops. An example of this occurred in April 1937, when a convoy from Wanna was ambushed in the Shahur Tangi defile. Using captured mountain guns and modern rifles, the vehicles were destroyed and the exits blocked, and in the ensuing battle seven officers and 45 men were killed, while another 47 were wounded. The tribesmen did not have everything their way, however, as the British began quartering the troubled areas and destroying hostile villages with both air and ground forces. These forces included five batteries of mechanized field artillery, two companies of MkII and MkIIb Light Tanks and six squadrons of aircraft including Hawker Harts, Westland Wapitis and Hawker Audaxs. By December 1937, the Mirzali Khan's support began to wane and following this, the decision was made to withdraw most of the additional brigades that had been brought up to bolster the garrisons at Razmak, Bannu and Wanna as it was decided that their presence would only serve to inflame the situation. Trouble flared up again in 1938–39, although to a much lesser extent. On 23 July 1938, a tribal force launched an attack on the town of Bannu, killing up to 200 civilians and damaging a considerable amount of property. As a result of this, British prestige was again weakened and support for Mirzali Khan grew once again. The British Indian Army in WWII The British Indian Army during World War II began the war, in 1939, numbering just under 200,000 men.[1] By the end of the war, it had become the largest volunteer army in history, rising to over 2.5 million men in August 1945. Serving in infantry, armor divisions and a fledgling airborne force, they fought on three continents in Africa, Europe and Asia. The British Indian Army fought in Ethiopia against the Italian Army, in Egypt, Libya, Tunisia and Algeria against both the Italian and German Army, and, after the Italian surrender, against the German Army in Italy. However, the bulk of British Indian Army was committed to fighting the Japanese Army, first during the British defeats in Malaya and the retreat from Burma to the Indian border; later, after resting and refitting for the victorious advance back into Burma, as part of the largest British army ever formed. These campaigns cost the lives of over 87,000 Indian servicemen, while another 34,354 were wounded, and 67,340 became PoWs. Their valor was recognized with the award of some 4,000 decorations, and 18 members of British Indian Army were awarded the Victoria Cross or the George Cross. Field Marshal Claude Auchinleck, Commander-in-Chief of British Indian Army from 1942, asserted that the British "couldn't have come through both wars if they hadn't had British Indian Army." British Prime Minister Winston Churchill also paid tribute to "The unsurpassed bravery of Indian soldiers and officers." The Royal Artillery still provided some of the artillery required for Indian Army formations, but the Indian Regiment of Artillery had been formed in 1935; initially consisting of four horse–drawn batteries. The regiment was expanded during the war, and by 1945, was formed of: ten field artillery regiments, 13 mountain artillery regiments, ten anti–tank artillery regiments. Three anti–aircraft brigades were also formed from the four heavy anti–aircraft artillery regiments, and five light anti–aircraft artillery regiments were created. For the regiments service during the war, it was granted the title Royal Indian Artillery in 1945. Prisoner of War Camps Stalag 315 was located in Przemsyl, Poland, would have have held a majority of Polish and Russian PoWs from the Eastern Front. However, it would have been common to have Allied PoWs transferred there due to overcrowding. Stalag VII-A (in full: Kriegsgefangenen-Mannschafts-Stammlager VII-A) was the largest largest PoW camp in Nazi Germany during WWII. It was located just north of the town of Moosburg in southern Bavaria. The camp covered an area of 35 hectares (86 acres). It also served as a transit camp through which prisoners, including officers, were processed on their way to other camps. At some time during the war, prisoners from every nation fighting against Germany passed through it. At the time of its liberation on 29 April 1945, there were 76,248 prisoners in the main camp and 40,000 or more in Arbeitskommando working in factories, repairing railroads or on farms. The camp was opened in September 1939 and was designed to house up to 10,000 Polish prisoners from the German September 1939 offensive. The first prisoners arrived while the wooden barracks were under construction and for several weeks lived in tents. British, French, Belgian and Dutch soldiers taken prisoner during the Battle of France started arriving in May 1940. Many were transferred to other camps, but close to 40,000 French remained at Stalag VII-A throughout the war. British, Greek and Yugoslavian prisoners arrived from the Balkans Campaign in May and June 1941. A few months later Soviet prisoners, mostly officers, started arriving. At the end of the war there were 27 Soviet generals in the prison. More British Commonwealth and Polish prisoners came from the North African Campaign and the offensive against the Italian-held islands in the Mediterranean. They were brought from Italian POW camps after the Armistice with Italy in September 1943, including many who escaped at that time and were recaptured. Italian soldiers were also imprisoned there. The first American arrivals came after the Tunisian Campaign in December 1942, and the Italian Campaign in 1943. Large numbers of Americans were captured in the Battle of the in December 1944. Among the last arrivals were officers from Stalag Luft III who had been force-marched from Sagan in Silesia (now Żagań), Poland They arrived on 2 February 1945. They were followed by more prisoners marched from other camps threatened by the advancing Soviets, including American officers who had been marched from Oflag 64 in Szubin, via Oflag XIII-B, under their senior officer Lt.Col. Paul Goode. During the 5½ years, about 1,000 prisoners died at the camp, over 800 of them Soviets. They were buried in a cemetery in Oberreit, south of Moosburg. Most died from illness, some from injuries during work. On 1 August 1942 Major Karl August Meinel was shifted into the Führerreserve because on 13 January 1942 he wrote a critical report to General Hermann Reinecke on the segregation and execution of Russian prisoners of war in Stalag VII-A by the Gestapo and the Sicherheitsdienst SD (security service) of the Reichsführer SS Heinrich Himmler. Stalag VII-A was captured on 29 April 1945 by Combat Command A of the 14th Armored Division. A German proposal for an armistice was rejected, followed by a short, uneven battle between the American tanks and retreating German soldiers for control of bridges across the Amper and Isar rivers. The German contingent included "remnants of the 17th SS Panzer Grenadier and 719th Infantry Divisions...which had no tanks or antitank guns, and were armed with only small arms, machine guns, mortars, and panzerfausts” Large numbers surrendered, as did the camp's 240 guards. The American force learned of the existence of the camp and its approximate location only a few hours before the attack. Because so many Allied POWs were in the area, the U.S. artillery, a major factor in any attack, was ordered not to fire, and remained silent during the attack. According to official German sources, there had been 76,248 prisoners at the camp in January 1945. For more information on Stalag VII-A see: https://www.moosburg.org/info/stalag/indeng.html Edited March 25, 2021 by azyeoman Link to comment Share on other sites More sharing options...
azyeoman Posted April 17, 2021 Author Share Posted April 17, 2021 (edited) What at first glance may appear to be a common WWII PoW group is actually a rather scarce to rare group to a soldier captured by Vichy French Forces in Syria at the battle and surrender of Kuneitra on 15 June 1941. The group consists of a 1939 Star; Africa Star; Defence Medal; War Medal and LSGC, GVI (1st type bust) officially named to 2715174 Fsr. W.E. Howick R. Fus. Howick saw service during the Second World War in the Middle East, and was initially shown as having been taken prisoner of war in Syria in June 1941 whilst fighting the Vichy French. However, by November 1941 he is shown as "now no longer a prisoner of war", he having been released at the conclusion of the Syrian campaign. The 1st Bn, with whom Howick served, was with the 5th Indian Brigade, 4th Indian Division at Jhansi in 1937. In May '37 it converted to a MG Bn. and on 23/09/1939 embarked at Bombay for Egypt and arrived there on 03/10/1939. On the 21/12/1940 it was in Abyssinia/Sudan and then back to Egypt on 13/04/1941. On 08/06/1941 it was in Syria and ten days later, on 16/06/1941 was captured by Vichy French Forces. On the 23/06/1941 the the unit was reformed in Palestine and on 15/12/1941 became part of the 17th Indian Bde. 29/05/1942 it was in Iraq and on 28/04/1943 in Palestine and on 31/07/1943 back in Syria. On 24/09/1943, the 17th Ind. Inf. Bgd. was in Italy and served there until 18/06/1945 when the embarked by sea for the UK. It arrived back in the UK in July 1945 and in 1947 was converted back to infantry. What happened in June of 1941 is of paramount importance here as that's when the 1st Bn. RF was captured. During the 15th June ten Vichy armored cars pushed back positions of the Royal Fusiliers forward of Kuneitra and eleven enemy tanks plus Senegalese and Foreign Legion infantry units were brought forward. The Fusiliers were outnumbered by around 1,000 men and their anti-tank guns had been deployed elsewhere by 5th Brigade HQ. At 1045 hours on 16th June the Vichy force attacked Kuneitra. The Fusiliers’ reserve ammunition had been dumped well back from the forward companies and Vichy firepower from the armored vehicles prevented the ammunition being moved forward; the Fusiliers fought with the rounds in their pouches and were then killed or captured. The defense failed because of its inability to deal with the Vichy armor. At around 1730 hours under a flag of truce the enemy demanded that the Fusiliers surrender, and at 1800 hours Colonel Orr complied with that demand, surrendering the remnants of ‘D’ Column. The Vichy forces then withdrew with their prisoners. In summary, part of the 5th Infantry Brigade of the 4th Indian Division this battalion was effectively destroyed by a Vichy French attack down the Damascus road on the 16th June 1941. The 600 man battalion was attacked by 1500 French troops with 40 tanks,10 armored cars and two field guns.One company had been detached and stood back from the action.The British only had one Breda AT gun, a few AT rifles and molotov cocktails to try and stop the French armor. They were driven back in the resulting street fighting and encircled in a cluster of stone houses. According to the Australian Official History "there were 177 survivors when the battalion commander surrendered at 7pm". 470 prisoners were included in the final count according to one French estimate. More can be read at: https://en.wikipedia.org/wiki/Battle_of_Kissoué The prisoners were eventually released after the the Armistice of Saint Jean d'Acre (also known as the Convention of Acre) concluded the Syria-Lebanon Campaign of WWII. The armistice was signed on 14 July 1941 and was between the allied forces in the Middle East under command of British Gen. Henry Maitland Wilson and Vichy French forces in Syria and Lebanon under command of Gen. Henri Dentz, Commander in Chief of the Army of the Levant (Armee du Levant) and the High Commissioner of the Levant. Having lost control of the Northern Desert and the Euphrates Province and being threatened with the imminent loss of Beirut, General Dentz decided to ask for an armistice. On the evening of 11 July, British Lt. Gen. Claude Auchinleck, CIC Middle East Command, received a wireless message from Dentz proposing the suspension of hostilities six hours later, at midnight. General Dentz declared himself ready to engage in talks on the basis of a memorandum presented to him that morning by the United States Consul at Beirut on behalf of the British Government. But Dentz made the reservation that he was empowered by the French Government to treat only with the British representatives to the exclusion of those of the Free French. The proposals presented by General Dentz were considered at once by the Middle East War Council. The council took into account the opinion of the American Consul at Beirut that Dentz was entirely insincere and might be playing for time in the hope of a last minute rescue by the Germans Accordingly, his conditions were rejected by the British and he was called on to send his plenipotentiaries to the British outpost on the Beirut— Haifa Road at or before 0900 hours on 12 July. Failure to do this would lead to the resumption of hostilities at that hour. On 12 July, the Vichy second in command, Lt. Gen. Joseph-Antoine-Sylvain-Raoul de Verdillac attended the talks. He went all the way from Syria to Acre in the British Mandate of Palestine and was escorted by a convoy of Australian high commanding officers. General de Verdillac represented the Armee du Levant for the Armistice talks instead of his superior commander, General Dentz. The 21 July 1941 issue of Time Magazine indicates that Dentz sent de Verdillac to the talks because de Verdillac was more pro-British and less anti- De Gaulle than Dentz. At 2200 hours on 12 July, the Armistice of Saint Jean d'Acre was initialed. The Allied forces were represented by General Wilson, by Air Commodore L. O. Brown Royal Air Force, by Captain J. A. V. Morse, Royal Navy, and by Free French General Georges Catroux. The Vichy French were represented by de Verdillac. The Armistice talks, the first between Great Britain and France since Napoleon's time, were held in the Sidney Smith Barracks officers mess, on the outskirts of the city of Acre. On this site was later founded Bustan HaGalil, an Israeli agricultural settlement. Despite the generosity of the British terms, representatives of Vichy made a brief show of refusing them, then dumped the whole mess into General Dentz's lap. On Bastille Day14 July General Dentz, Vichy's High Commissioner to the Levant States, signed Syria and Lebanon away to the conquering British and to the Free French Forces. When General De Verdillac uncapped his pen to add his signature, all the lights in the room fused out, and so a dispatch rider's motorcycle was brought into the room to light the place with its head lamp. The sepia photograph is a press photo and entitled "Freed British Prisoners in Syria". The reverse reads, Baalbeck, Syria. -- One of the clauses of the Peace Convention of Acre referred to the immediate return of British soldiers who had been taken prisoner by the Vichy Forces. A group of the returned prisoners give vent to their feeling upon their arrival here by train from prisoner-of-war camps in Northern Syria." Credit line (ACME) 9-10-41 All in all, it's a very interesting and unusual WWII PoW group. Edited April 17, 2021 by azyeoman Link to comment Share on other sites More sharing options...
azyeoman Posted May 19, 2021 Author Share Posted May 19, 2021 (edited) QSA with Cape Colony, Transvaal & Wittebergen clasps officially named to- 86484, BMBR. R. SHUKER. R.F.A. Richard Shuker was born in Shrewsbury, Shropshire & enlisted in to the Royal Field Artillery at Woolwich on the 19th of September 1891 when 18 years old. He arrived in South Africa 7-11-1899 & was captured & taken prisoner of war at Lindley 3-7-1900. He returned home from the Boer War 6-9-1902 & was discharged from the army the following day. His service papers state that he received a wound to the nose, but not while on duty, on New Year’s Eve 1891. He is also entitled to a KSA medal. The 38th Battery RFA, saw some fighting in Orange River Colony in April 1900, and near Lindley in July 1900. On 3rd July Major Oldfield and Lieutenant Belcher were killed and Captain Fitzgerald wounded. Two sections narrowly escaped capture. In Lord Roberts' telegram of 10th July 1900, referring to the taking of Bethlehem, he said, "Paget reports that but for the accurate practice by the 38th Battery RFA and the City Imperial Volunteer Battery under Major M'Micking the casualties would have been many more". The 38th went with Paget to the Transvaal, and a portion of the battery did good work at the taking of Erasmus' camp, September 1900, also at Rhenoster Kop, 29th November (see 1st West Riding Regiment), and elsewhere (Lord Roberts' dispatches of 10th October and 10th November 1900). Early in 1901 the battery was with Babington in the Western Transvaal, and afterwards a section was with the Kimberley column, and one section with Rawlinson in the South-West Transvaal. One section was in Cape Colony; and at Quaggafontein, near Aliwal North, when Kritzinger attacked the camp of the Lovat Scouts on 20th September 1901, the battery lost 7 killed and 5 wounded. Two guns of the battery were with Lord Methuen when he met his final disaster on 7th March 1902. After referring to the disgraceful stampede of the mounted men, Lord Kitchener said in his dispatch of 8th April: "The section of the 38th Battery was left unprotected, but the detachment gallantly continued to serve the guns until every man except Lieutenant Nesham was killed or wounded. This young officer, so Lord Methuen is informed, was then summoned to surrender, and on refusing to do so was also shot down". No unit has any greater cause for pride than this reference. Two men were mentioned by Lord Kitchener for removing the sights and breechblocks after the lieutenant had been shot. The skirmish of Leeuwkop and Bakenkop Following British Major-General, Paget's, success in the Free State, Boer General, Christiaan de Wet retired to Leeuwkop, a rocky hill about ten kilometers to the south-east of Lindley where he established a new defensive position along a ridge line running north-east, which had Bakenkop[a] as its most prominent feature. On 3 July Paget moved his infantry and two guns into the intervening valley towards Leeuwkop, while sending 800 of his mounted troops with six guns against Bakenkop on the left. The commander of the latter detachment, Colonel A.M. Brookfield, took his men onto a ridge 4 000 meters from his objective and returned fire on the five Boer guns which had begun to engage him. During the ensuing conflict, an artillery officer managed to mount a horse and gallop to the rear. He came upon a detachment of South Australians, under captain A.E.M. Norton, who had been ordered to retire. These he led back to the ridge line just in time to prevent the Boers from carrying away the captured guns. When confronted with the Australians' fire, the burghers promptly retreated taking some of the captured gunners with them as prisoners. The enemy party attacking the left gun section also broke contact and withdrew. In the meantime Paget had seized Leeuwkop and was now able to direct flanking fire from his guns against the Boer artillery. De Wet soon abandoned Bakenkop and made off towards Bethlehem. The 38th was in action along side the City Imperial Volunteer Battery and there is a bit more info in the section below. The City Imperial Volunteer battery was for a time at Bloemfontein, and got up to Kroonstad on 21st June. On 23rd June it joined a force which was to escort a convoy to Lindley. The convoy was fiercely attacked on the 26th and 27th, but the enemy was driven off (see 1st King's Own, Yorkshire Light Infantry). On 3rd July, Paget's brigade, to which the battery was now attached, was stoutly opposed between Lindley and Bethlehem. One section was with the general on the right, and was praised by him for very good work. One section, with two sections of the 38th Battery RFA, was near the left. A ridge had been occupied, and these six guns placed on it. By an indiscreet order the troops on the right and left of these guns were retired behind the ridge. The enemy crept up unobserved, and pouring in a deadly rifle-fire they gained possession of three of the guns of the 38th Battery. Captain Budworth, of the CIV Battery, galloped for some Australians who had been retired. They boldly came back and drove off the enemy, and the three guns were recovered. On the 6th and 7th July there was again heavy fighting outside Bethlehem. In his despatch of 10th October 1900, para 8, Lord Roberts, dealing with the capture of Bethlehem, said, "The good service of the 38th Battery RFA and the City Imperial Volunteers' Battery has also been brought to notice by Major General Paget". Paget's force was ordered north after the surrender of Prinsloo, and did much excellent work north-west and north-east of Pretoria. The battery was with Paget when he made a forced night-march and captured the camp of Erasmus (see 1st West Riding Regiment). The battery sailed for home in October 1900. In Lord Roberts' despatch of 4th September 1901 6 officers and 6 non-commissioned officers and men were mentioned. And finally Sir Arthur Conan Doyle's account from The Great Boer War. On getting into touch with Clements, Paget sallied out from Lindley, leaving the Buffs behind to garrison the town. He had with him Brookfield's mounted brigade one thousand strong, eight guns, and two fine battalions of infantry, the Munster Fusiliers and the Yorkshire Light Infantry. On July 3rd he found near Leeuw Kop a considerable force of Boers with three guns opposed to him, Clements being at that time too far off upon the flank to assist him. Four guns of the 38th R.F.A. (Major Oldfield) and two belonging to the City Volunteers came into action. The Royal Artillery guns appear to have been exposed to a very severe fire, and the losses were so heavy that for a time they could not be served. The escort was inadequate, insufficiently advanced, and badly handled, for the Boer riflemen were able, by creeping up a donga, to get right into the 38th battery, and the gallant major, with Lieutenant Belcher, was killed in the defense of the guns. Captain FitzGerald, the only other officer present, was wounded in two places, and twenty men were struck down, with nearly all the horses of one section. Captain Marks, who was brigade-major of Colonel Brookfield's Yeomanry, with the help of Lieut. Keevil Davis and the 15th I.Y. came to the rescue of the disorganized and almost annihilated section. At the same time the C.I.V. guns were in imminent danger, but were energetically covered by Captain Budworth, adjutant of the battery. Soon, however, the infantry, Munster Fusiliers, and Yorkshire Light Infantry, which had been carrying out a turning movement, came into action, and the position was taken. The force moved onwards, and on July 6th they were in front of Bethlehem. Edited May 20, 2021 by azyeoman Link to comment Share on other sites More sharing options...
POWCollector Posted May 21, 2021 Share Posted May 21, 2021 Some more excellent new additions! The Syrian campaign group is a great find! I wonder how many (if any) managed to escape over the border to Turkey? Turkey differed from Switzerland in its neutrality as escaped pows would not be interned, but were sent across to Egypt and could get back into the fight quickly! One of my more recently groups was to a man who escaped from Crete and made his way to Turkey later being killed in action in NW Europe. 1 Link to comment Share on other sites More sharing options...
azyeoman Posted May 28, 2021 Author Share Posted May 28, 2021 (edited) King’s South Africa Medal with clasps, SA 1901, SA 1902 officially named to: 184 Tpr T. W. Martin, Natal Volunteer Composite Regiment, who was taken as a prisoner of war at Vant’s Drift on 10th January 1902. A scarce colonial K.S.A. to the NVCR, officially impressed: “184 Tpr: T. W. Martin. Natal V.C.R.” Martin had attested previously in the Natal Carbineers on 29/09/1899 and served with them until he was transferred on 01/10/1900 to the NCVR in which he served until they were disbanded on 31/07/1902. Martin received a QSA with clasps DoL, OFS, Tvl & LNek (off the NC roll). Please contact if you know the location as I would like to reunite the pair. The action at Vant’s Drift, near Dundee, from WO108/327, South African Surrenders: “Lieutenant Wilson and 25 men of the Natal Volunteer Composite Regiment left Vant’s Drift for Nqutu with 2 Wagons. He put out 8 men about 1000 yards in front, but no flankers or rear-guard. The party was attacked on the left by about 70 Boers and was eventually compelled to abandon the wagons and retire to Rorke’s Drift. One man was wounded in the incident and subsequently died, while 4 men were captured without firing a shot.” The court of Enquiry exonerated the officer in command: Court considers some attempt to keep off enemy by firing should have been made and that Lieutenant Wilson’s dispositions were faulty. General Officer Commanding concurs and considers attempt at self-defense made by those captured was singularly feeble.” Martin T W 184 Trooper Also served NC Source: Nominal roll in WO127 Martin T W 184 Private Prisoner. Vants Drift, 10 January 1902 Released Source: South African Field Force Casualty Roll Page 1 of 1 Upon the final expulsion of the Boer forces from Natal and the general settling down of the northern districts, which had been occupied by the enemy for about nine months in 1899 and 1900, the Natal Volunteer Brigade was demobilized at the request of the Natal Government, which had borne the cost of keeping- its forces in the field for a year and was feeling the financial strain. The Commander-in-Chief of the British forces. Lord Roberts, agreed, provided one mounted regiment was left in the field till the end of the war. This unit was formed from volunteers from all the Natal regiments, and was called the Natal Volunteer Composite Regiment. It came into being in October, 1900, the units furnishing the volunteer personnel being the Natal Carbineers, Natal Mounted Rifles, Umvoti Mounted Rifles, Border Mounted Rifles, Durban Light Infantry, Natal Royal Rifles and Natal Field Artillery, with necessary detachments from the Natal Volunteer Staff, Medical, Veterinary, Transport and Supply Departments. The strength was 505, in four squadrons. Lieut-Colonel Robert Winter Evans, of the Natal Mounted Rifles, was appointed to the command, and the new regiment at once settled down to its work, forming a unit of the Dundee-Ladysmith-Newcastle sub-district Imperial Command. Upon the death in action of Lieut-Colonel Evans, in February, 1902, Major Bede Crompton took command with the rank of Lieut-Colonel. During its 21 months of existence, the unit, or portions of it, at various times formed part of many different field commands in the southern and eastern Transvaal, Orange River Colony and Zululand, as well as in northern Natal, and took part in much fighting. Other activities were patrolling the Natal borders, holding isolated key points, escorting convoys, patrolling block-house lines, cleaning up the districts of rebels, chasing raiding parties and the like. The work of the regiment was never monotonous, and at times was exciting. The unit gained an enviable reputation for its work and many were the encomiums received from high Imperial Army commanders, under whom the regiment or detachments served. Scouting was highly developed, and soon the Natal Volunteer Composite Regiment was famed for this type of work. Amongst its personnel were many men hailing from the districts in which it operated, and consequently they possessed valuable local knowledge and many were linguists in Dutch and Zulu, Men and horses were hardened by a year of previous service and training. Every member owned his own horse, saddlery, equipment and uniforms, and quite soon after formation the regiment or detachments were eagerly sought after by commanders of Imperial independent field units tor the qualities mentioned above, chiefly as scouts, guides, interpreters, intelligence duties and transport experts. The Compiler once heard General French, the famous cavalry leader of the Anglo-Boer War, say that the N.V.C.R. were the finest scouts be had ever known. The uniform was the then universal khaki, with turned-up brim smasher hat. The badge of the regiment was a scroll bearing the motto, "Ad Finem," surrounding the letters, N.V.C.R., worn on the hat. The letters N.V.C.R. were also worn on the shoulder straps, together with the initial letters of the corps from which the member came. The unit was armed with the service magazine rifle and service revolver, officers and some other ranks carrying revolvers only. A picked detachment of 100 all ranks was specially sent to Maritzburg to represent the regiment at the official reception ceremonies attending the visit of H.R.H., the Duke and Duchess of York—later Their Majesties King George V. and Queen Mary. These officers and men had come straight from the scene of severe fighting in the Eastern Transvaal a week before, and the detachment was honored by being appointed the mounted escort of the Royal party during their stay in Martizburg, the Duke being greatly interested in their work-manlike (though somewhat ragged from recent hard field service) appearance and bearing, and he specially congratulated Lieut-Colonel Evans on commanding such a fine and useful regiment, and the good work it had accomplished. Lord Kitchener, then Commander-in-Chief in South Africa, did the same. The N.V.C.R. was disbanded on 31st July, 1902, two months after peace was signed, having been employed during the two months from 31st May in repatriation work and military policing duties pending the taking over of these activities by the Natal Police Field Force. The members thereafter returned to their own original units, after 21 months of field service well done. Honors conferred upon individuals were one DSO, two DCMs, and seven Mentions-in-Dispatches. Casualties sustained were one officer—Lieut-Colonel R. W. Evans—and eleven other ranks killed, and twelve of all ranks wounded, besides five deaths from disease. Edited May 28, 2021 by azyeoman Link to comment Share on other sites More sharing options...
azyeoman Posted June 24, 2021 Author Share Posted June 24, 2021 QUEENS SOUTH AFRICA MEDAL TO ALDER-SOUTH AFRICAN CONSTABULARY-TAKEN AS A PRISONER OF WAR Queens South Africa Medal (3rd type reverse) clasps: CAPE COLONY/ORANGE FREE STATE/TRANSVAAL/SOUTH AFRICA 1901/SOUTH AFRICA 1902. Officially named to: 864 3rd CL TPR T.A. ALDER S.A.C. Taken as a prisoner of war at Meyerton on 31/05/1901 and released. (T.J. Alder on casualty roll, and for SA1901/1902 clasps, and on the roll for the state clasps as T.A.Alder) Served "A" Division, S.A.C. Alder T J 864 Trooper Prisoner. Meyerton, 31 May 1901 A Division. Released Source: South African Field Force Casualty Roll In September 1900 Lord Roberts instructed Major General R S Baden-Powell, CB, to draw up a scheme for a Constabulary Force for the Transvaal (including Swaziland and Orange River Colonies) to be ready for work by June 1901, under the orders of Lord Milner as High Commissioner At that time it was thought that the country was about to settle down to a peace, and it was considered that for normal peace times a force of 6 000 Officers, Non-Commissioned Officers and men might suffice. In view of the probable early restoration of peace and withdrawal of part of the Military Forces, the Commander-in-Chief agreed to hand over the new Force proportion of Officers, Non-Commissioned Officers and Men to 20 per cent of each Corps to form it with Horses, Saddlery, Arms, Transport, etc., as required, and to furnish it with medical treatment through the Army Hospitals. On the 22nd of October 1900, Lord Roberts issued a Proclamation, known as Proclamation 24, under which the South African Constabulary was raised and has worked ever since. The Force was first organized in four Divisions, each commanded by a Colonel, assisted by a Staff. There were three divisions in the Transvaal, and one division in the Orange River Colony. Each division was sub-divided into Troops of 100 men, each under the command of a Captain and Lieutenant. As hostilities showed no signs of ceasing, it was gradually found that the Army were unable to carry out the agreement proposed by the Commander-in Chief, and consequently the Inspector-General (Major-General Baden-Powell) was obliged to establish Recruiting Offices in Cape Colony and Natal, and to arrange for recruits from overseas, both from England and Canada. In addition, arrangements had to be made for obtaining remounts in South Africa, Australia, North America etc. Arrangements also had to be made for obtaining Transport, Equipment, Saddlery, etc., and finally, the Army being unable to meet the Force’s medical, vetenary, and building requirements. Medical, Vetenary and Works Departments had to be organized. In December 1900, it was decided that the establishment should be further increased to 10 000 men. In 1901, in addition to the other Division, a Reserve Division was raised. From the time the Force was raised until the end of the War it was not able to undertake Police duties, but was employed as a Military Force under the Commander-in Chief, and was constantly engaged in field operations and on Blockhouse lines 9 Officers and 85 men were killed in action or died from wounds, and 213 Officers and Men were wounded, whilst 274 Officers and Men died from sickness. In November 1902, peace was so far secured and promised for the future, that it was considered advisable to reduce the Force to its normal peace establishment of 6,000 men. Meyerton: Displaced and captured civilians were forced into 'refugee camps', a total misnomer, because more often they did not seek refuge in the camps, but were rounded up by the British forces and forced into the camps, which soon became known as 'concentration camps. Field-Marshal Lord Roberts had an ulterior motive in putting Blacks into camps, namely to make them work, either to grow crops for the troops or to dig trenches, be wagon drivers or work as miners once the gold mines became partly operational again. They did not receive rations, hardly any medical support or shelter and were expected to grow their own crops. The able-bodied who could work, could exchange labor for food or buy mealie meal at a cheaper price. The British along racial lines separated the White and Black camps. The inmates of the Black camps, situated along railway lines and on the border, became the eyes and ears of the British army. They formed an early warning system against Boer attacks on the British military's primary logistic artery - the railway lines and acted as scouts for British forces. This strategy alienated Whites and Blacks from each other by furthering distrust between the two population groups and was detrimental to racial harmony in South Africa after the war. Concentration Camps for Blacks. Transvaal Colony: Balmoral; Belfast; Heidelberg; Irene; Klerksdorp; Krugersdorp; Middelburg; Standerton; Vereeniging; Volksrust; Bantjes; Bezuidenhout's Valley; Boksburg; Brakpan; Bronkhorstspruit; Brugspruit; Elandshoek; Elandsrivier; Frederikstad; Greylingstad; Groot Olifants River; Koekemoer; Klipriviersberg; Klip River; Meyerton; Natalspruit; Nelspruit; Nigel; Olifantsfontein; Paardekop; Platrand; Rietfontein West; Springs; Van der Merwe Station; Witkop; Wilgerivier. Free State: Allemans Siding; America Siding; Boschrand; Eensgevonden; Geneva; Harrismith; Heilbron; Holfontein; Honingspruit; Houtenbek; Koppies; Rooiwal; Rietspruit; Smaldeel; Serfontein; Thaba 'Nchu; Taaibosch; Vet River; Virginia; Ventersburg Road; Vredefort Road; Welgelegen; Winburg; Wolwehoek. Cape Colony and British Bechuanaland. (Administered by the O.R.C): Kimberley; Orange River; Taungs; Dryharts. Photo below is of the Meyerton Blockhouse that still stands. Link to comment Share on other sites More sharing options...
azyeoman Posted July 10, 2021 Author Share Posted July 10, 2021 Here's another Queens South Africa to a PoW for Lindley, but a different company, the 46th from Belfast; it saw hard fighting on the western part of the battlefield. QSA 1899-1902, clasps, Cape Colony, Orange Free State, Transvaal, South Africa 1901 claps officially named to: 9451 Pte. E. Doak, 46th Coy 13th Imp: Yeo: The last clasp loose as issued. Edwin Doak was born in the Parish of Lurgan, County Armagh, and enlisted into the Imperial Yeomanry in Belfast on 10 January 1900. He served in the 46th (Belfast) Company, 13th Battalion, in South Africa and was taken prisoner at Lindley on 31 May 1900, and was released at Nooitgedacht on 5 September 1900. He returned home in May 1901 and was discharged on 5 July 1901. Link to comment Share on other sites More sharing options...
azyeoman Posted July 13, 2021 Author Share Posted July 13, 2021 (edited) Here's a QSA to a desirable unit, The Rough Riders for a sharp little action in 1901. 5 clasps CC, OFS, Tvl, SA’01, SA’02 - 28260 Pte F.H. Williams, 85th Coy Imp: Yeo: 27 JULY 1901 DOORN RIVER Lace is a historic diamond mine, some 30 km NW of Kroonstad. It was discovered in 1896 and the first mining operations were started in 1901. On 27 July 1901 Lieutenant G Fraser with 20 Imperial Yeomanry men and 14 native guards were ordered to patrol as far as the Mine. On arrival he learnt that Boers had recently been seen in the neighborhood. Rashly searching for them, his party had to retire to a hut near Doorn River (Doringspruit on current maps) on encountering a large Boer force. After fighting for one and a half hours Fraser surrendered: their horses were all killed, and bullets were penetrating the walls. According to WO 108/372 (SA Surrenders) the natives were shot one by one as they left the hut, and a Yeoman was shot whilst lying wounded on the ground. Frank Williams was one of the Yeomen taken prisoner. He was not entitled to the SA’02 clasp, but nevertheless had one soldered to the SA’01 clasp. The 22nd (Rough Riders) Battalion, IY, had been raised in London on 27 March 1901 for the Second Contingent of the IY, consisting of 84th, 85th, 86th and 87th (Rough Riders) Companies. The 2nd Rough Riders sailed from Southampton aboard the German on 31 March under the command of Lt-Col Stewart, with Maj Viscount Dungarvan (lieutenant-colonel of the North Somerset Yeomanry) as his second-in-command. On arrival in South Africa the battalion was joined by 76th and 78th Companies from the First Contingent. The battalion was disbanded at the end of the war in 1902. Edited July 13, 2021 by azyeoman Link to comment Share on other sites More sharing options...
azyeoman Posted August 6, 2021 Author Share Posted August 6, 2021 (edited) Another QSA to a Corporal and later lieutenant who was captured at Lindley on 31 May 1900. Queen’s South Africa 1899-1902: Cape Colony, Orange Free State, Transvaal officially named to: 14156 Cpl. E. J. Hodgson, 47th Coy 13th Imp Yeo: Ernest John Hodgson was from London, is 1878 he enlisted in 1900 and served with the 47th (Duke of Cambridge’s Own) Company, 13th Battalion, Imperial Yeomanry, as a Corporal and was taken prisoner to Lindley on 31 May 1900, and was released at Barberton on 13 September 1900. He was later commissioned Lieutenant in the 18th Battalion Imperial Yeomanry but relinquished his commission on 1 December 1901, having been invalided to England. Hodgson's service papers show that he was born in 1878/79 and lived at St. Onslow's Square in London, MIddlesex and that was an underwriter. He lived at 31 Nevern Square, London. He enlisted on 25 January 1900 when 21 and a half years old in the DCO Special Imperial Yeomanry. He was 6 '1.5" tall and weighed 154 lbs. He had a ruddy complexion with blue eyes and light brown hair. He was C of E. He was in the UK from the 25th of January until the 28th of February when the regiment left for S. Africa. He was in S. Africa from the 11th of March until the 23rd of October, 1900. He served a total of 271 days, and was discharged from the 47th Coy. at his own request and was discharged a Lance Sergeant on the 23rd of October His QSA and three clasps are verified. It appears that he served further with the 22nd Bt. IY as a Lance Sergeant and the later with the Base Depot Imperial Yeomanry as a Lieutenant. (WO100/130). Cpl. Hodgson was one of the "special prisoners", those who could pay extra for their food, and was sent to the officer's PoW camp at Barberton. The camp was liberated by French. He also appears on the IY Base Depot roll as Lieut. E. J. Hodgson with the script annotation " Lce Sgt. DCO Sqd IY (old yeoman) Lieut 28th Battn IY" This is not shown in his FMP service papers which show him discharged in South Africa on 23/10/00 and I can find no other reference to his service in South Africa although he seems to have returned as an invalid on board the Canada on October 24th 1901. Edited August 6, 2021 by azyeoman Link to comment Share on other sites More sharing options...
POWCollector Posted August 7, 2021 Share Posted August 7, 2021 Great new additions! Thanks for sharing and please keep them coming; I enjoy learning more about the Boer War and the various campaigns/battles through your thread as it is not my area of expertise. 1 Link to comment Share on other sites More sharing options...
azyeoman Posted August 7, 2021 Author Share Posted August 7, 2021 2 hours ago, POWCollector said: Great new additions! Thanks for sharing and please keep them coming; I enjoy learning more about the Boer War and the various campaigns/battles through your thread as it is not my area of expertise. Thanks Rob, I appreciate that. What's particularly nice about this last addition is now there are three in the collection to the "special prisoners" captured at the Lindley disaster: Hodgson, Walker and Garrett. I'm hoping to find more info on Hodgson as the unit was made up of prominent and wealthy men, some of whom were aristocracy too; thus, there ability to pay extra for food to make their time as PoWs better. There is more info on the battle in the other posts on Walker and Garrett. Thanks again! Cheers! Link to comment Share on other sites More sharing options...
azyeoman Posted September 12, 2021 Author Share Posted September 12, 2021 Something a bit different, but essential for a Boer War PoW collector. Claspless QSAs were issued to guards at the British PoW Camps. There were also men who were guards who had clasps, but they were men who had served in the campaign in S. Africa before going to St. Helena. South Africa Boer War Prisoner of War Guard on Saint Helena and Great War Group awarded To Private W. Allchin, 3rd Militia Battalion, East Kent Regiment - The Buffs, Later A Driver With The Army Service Corps. Group of 3: Queen’s South Africa Medal 1899-1902, no clasp; (6056 PTE. W. ALLCHIN. E. KENT REGT.); British War Medal and Victory Medal; (T-19613 DVR. W. ALLCHIN. A.S.C.) William Allchin saw service as a Private (No.6056) with the 3rd Militia Battalion, East Kent Regiment - the Buffs, and was present during the Boer War on service in Saint Helena guarding the Boer prisoners of war, as a result of which he qualified for the medal without clasp. Allchin then transferred to the Army Service Corps on 1st September 1902, and later service with this unit during the Great War as a Driver (No.T-19613), initially with the 19th Infantry Brigade Train out on the Western Front from 3rd September 1914, as part of the Supply and Commissariat Staff, but then went on to see service with a Horse Transport Company. Link to comment Share on other sites More sharing options...
peter monahan Posted September 13, 2021 Share Posted September 13, 2021 (edited) I am taking the liberty, and employing my God-like powers as an moderator, to post this intersting story, sent me by a gent in Australia who is in the process of getting GMIC membership. Enjoy! https://www.abc.net.au/news/2021-07-11/the-anzacs-who-beat-the-odds-and-escaped-from-greece/100284226 Edited September 13, 2021 by peter monahan 1 Link to comment Share on other sites More sharing options...
azyeoman Posted October 14, 2021 Author Share Posted October 14, 2021 (edited) It's been a while since I added to the WWI section of the collection and today I was fortunate to find the following. WW1 1914-15 TRIO WITH RETURNED PRISONER OF WAR MEDAL, 8th QUEEN'S REGIMENT, PRISONER OF WAR AT LOOS 1915 1914-15 Trio: G-2035 Pte. F. C. Gatton, The Queen’s R. with regimental medal for returned prisoners of war Frederick Charles Gatton first left England on 31/8/1915. He was wounded and taken prisoner of war by the Germans on the second day of the battle of Loos (26-9-1915). His wife lived at 26 Junction Place, Croydon. He was discharged to the class Z army reserve 18/4/19. The 8th Bn. Queen's West Surrey Regiment was raised around the Guildford area during the push for regiments for the "new army" of Kitchner Battalions. Thus, the "G" in his service number. In training, "The 8th Queen's trained in machine gunnery, musketry, field maneuvers and "bomb throwing" at Herly for most of September of 1915. They frequently found that their instructors knew little more than themselves. Major H. J. C. Peirs wrote in reference to machine gun training that "the whole thing was a farce.” The battalion arrived in Bologne Sur-Mer, France on Friday 1 September, 1915. The 8th Queen's left their barracks at Herly on 24 September and arrived in Vermelles on Saturday, 25 September. The battle of Loos had begun that morning. Six divisions of British soldiers attacked and made gains along the line despite strong German defense and the clumsy use of chlorine gas by their own forces. The 8th Queen's experienced the trenches of the Western Front for the first time the night of 25 September. Sergeant Walter Hitchcock, of B Company wrote, "we marched into the line, and a lot of people had never seen a dead man. There was got soldiers [sic] were hanging on the wire, you know, where they had been killed the day before and hadn't been taken off. Well, we got into the trenches and we were told to make ourselves comfortable" The battalion was in the trenches west of La Rutoire Farm, where they were under shellfire for the first time. They arrived at the jump-off position at 2:00 AM and endured shelling for the rest of the morning. It intensified at 8:00 AM. Their attack was meant to capitalize on gains made the day before.the battalion moved into the line the night of the Saturday the 25 September, and was a part of the 72nd Brigade, 24th Division, 3rd New Army. They would attack with the 3rd Brigade, 1st Division on their left, and the 21st Division on their right. The 72nd brigade was tasked with taking Hill 70 South of Hulluch. The Battalion received verbal orders to attack and went over the top at 11:00 AM. It was "a beautiful sunny day" and the men walked forward "As though we were going partridge shooting." Years later, Major Peirs admitted to "considerable mental disturbance" in response to being exposed to enemy fire for the first time. The 8th Queen's advanced in support of the 8th West Kents, deployed in lines of platoons in extended order. The W. Kents and E. Surreys attacked in the first line and we and the Buffs were in support and consequently were not under the same intense fire. All but one officer of the West Kents would be killed, wounded or captured in the attack. But, Colonel Fairtlough was killed almost immediately and command of the Battalion was passed on to Major Peirs. Private Lintott of the 8th Queen's wrote, "Our Major was magnificent" and "He led us with a cigarette in his mouth, his walking [stick] in one hand and his revolver in the other. He is a jolly good fellow and brave too." Artillery fire was severe during the initial part of the advance, but abated after about 800 yards. German machine gun batteries opened on the 72nd Brigades flanks they crossed Lens-Le Bassee Road. The disciplined Battalions were raked by enfilading fire, which inflicted heavy casualties. Barbed wire entanglements that were four feet high and twenty feet deep halted the advance. British Artillery was supposed to have destroyed the wire. None of the Battalions had been provided with wire cutters. The 8th Queen's hunkered down in a wheat field south of Hulluch for two hours, unable to pass the barbed wire. The men were told "We don't go back. We'll wait here. We'll see what happens." German machine gun batteries took advantage of the Brigade's exposed position and deployed on their flank. The redeployed German machine gun batteries forced the men from their precarious position, and they retreated towards the Lone Tree, many describing it as a "stroll." The Battalion Diary notes, "There appeared to be no panic; the men walked back still under machine gun and shrapnel fire." All organization was lost as the Brigade retreated to its starting point. The men of the 8th Queen's, scattered across the battlefield, passed the night in misery. One man wrote that it was, "the worst night I've ever had in my life. It was cold, we had nowhere to lie down - I got under a GS wagon and tried to get some sleep." The 8th Queen's eventually regrouped at their starting point along with the rest of the Brigade. Reinforcements took their place in the line and they marched back through Vermelles. In total, the 8th Queens lost 12 officers and 409 other ranks killed, wounded, missing or captured. The Battle of Loos shifted the Western Front by a few miles, with gains made by both the British and French Armies. However, the most important shift occurred in the rear and in the ranks. General Haig replaced General French as the commander of the British Expeditionary Force, and the British New Armies, which the 8th Queens was a part of, had seen their first action. General Milford praised the men of the 72nd Brigade, writing, "You were an example of determination to carry out your task not only to the New Armies but to seasoned troops who could not have done better that you did." So, in short, Pte. Frederick Charles Gatton trained and saw one battle in which he was wounded and captured. His soldiering days were spent more as a PoW, but he survived his wounds, the flue pandemic and being in a PoW camp to join his wife, and eventually live in Croydon. In January 1919, he attended the Welcome Home Dinner at Stoughton Barracks in Guilford and presented the Welcome home medal/fob. The welcome-home medal to the Queen’s Royal West Surrey Regiment is very scarce. There was a reception in January 1919 in Guildford for 270 repatriated PoW other ranks from the Queen’s Royal West Surrey. (See the invitation below). These men were awarded this small commemorative medal (fob) that could be worn on a watch-chain A list of those attending in the Surrey Advertiser shows most of the men came from places within the regimental recruitment district or from within Surrey. In total there were about 1,200 other ranks of the Queen’s who were PoWs. Gatton is listed on the left side of page 60 of the PoW list (or page 29 of the online list) as follows: Gatton FC Frederick Charles Pte 8th 2035 Croydon Surrey 60 Right QRWS/1/5/1 On the 1939 register he is still living in Croydon and was a 55-year-old “jobbing gardener” living at 5 Junction Road, Croydon This is a nice group that goes along with one of the above WWI pairs and Welcome-Home Fob. For more information on the Surrey PoW War Relief Fund see: https://www.surreycc.gov.uk/culture-and-leisure/history-centre/marvels/queens-prisoner-of-war-relief-fund Edited October 16, 2021 by azyeoman Link to comment Share on other sites More sharing options...


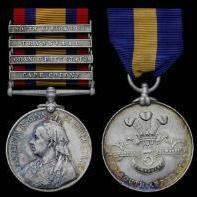

Recommended Posts
Create an account or sign in to comment
You need to be a member in order to leave a comment
Create an account
Sign up for a new account in our community. It's easy!
Register a new accountSign in
Already have an account? Sign in here.
Sign In Now