.jpg.c1d9bcec183c96b9ddb1eb6551289cc3.jpg)
archie777
-
Posts
1,593 -
Joined
-
Last visited
-
Days Won
14
Content Type
Profiles
Forums
Blogs
Gallery
Events
Store
Everything posted by archie777
-
.thumb.jpg.8f11964f4d04824d881c313e10a95c32.jpg) During July 1901 Cmdts Scheepers and Schalk Pypers had made their base in the most rugged part of the Camdeboo Mountains. One camp was on the farm Langfontein and the other on Middelplaas. (It was known from an intercepted letter that Scheepers at this stage had 240 men with him, of whom 40 were Free Staters, the rest being Cape rebels.) Frequent raids were being made from these two camps by small Boer patrols on the neighbouring farmers whom they compelled to bring wagonloads of grain and lucerne to the laagers. Then, on 12 July Gen French came to Graaff-Reinet and mobilised four columns under Sir Charles P Crewe, G Wyndham, Col Beauchamp Doran and Scobell as well as the Cape Mounted Riflemen to try to trap Scheepers. They surprised a body of Boers at Onbedacht in the Camdeboo (50 km west of Graaff-Reinet), but Scheepers and Pypers, who were at Middelplaas with the Rebel Commando, managed to elude French’s net and escaped via Morgenzon, fleeing southwards. 29 of Scheepers’ men were captured and were brought into Graaff-Reinet. Six were OFS men and were sent to PoW camps. The remaining captured rebels were tried, found guilty of High Treason under arms and other war crimes and sentenced to death. Twelve of them were executed while the sentences of the rest were subsequently commuted to life imprisonment on Bermuda. (T & D Shearing: “Commandant Gideon Scheepers and the Search for his Grave”)
During July 1901 Cmdts Scheepers and Schalk Pypers had made their base in the most rugged part of the Camdeboo Mountains. One camp was on the farm Langfontein and the other on Middelplaas. (It was known from an intercepted letter that Scheepers at this stage had 240 men with him, of whom 40 were Free Staters, the rest being Cape rebels.) Frequent raids were being made from these two camps by small Boer patrols on the neighbouring farmers whom they compelled to bring wagonloads of grain and lucerne to the laagers. Then, on 12 July Gen French came to Graaff-Reinet and mobilised four columns under Sir Charles P Crewe, G Wyndham, Col Beauchamp Doran and Scobell as well as the Cape Mounted Riflemen to try to trap Scheepers. They surprised a body of Boers at Onbedacht in the Camdeboo (50 km west of Graaff-Reinet), but Scheepers and Pypers, who were at Middelplaas with the Rebel Commando, managed to elude French’s net and escaped via Morgenzon, fleeing southwards. 29 of Scheepers’ men were captured and were brought into Graaff-Reinet. Six were OFS men and were sent to PoW camps. The remaining captured rebels were tried, found guilty of High Treason under arms and other war crimes and sentenced to death. Twelve of them were executed while the sentences of the rest were subsequently commuted to life imprisonment on Bermuda. (T & D Shearing: “Commandant Gideon Scheepers and the Search for his Grave”)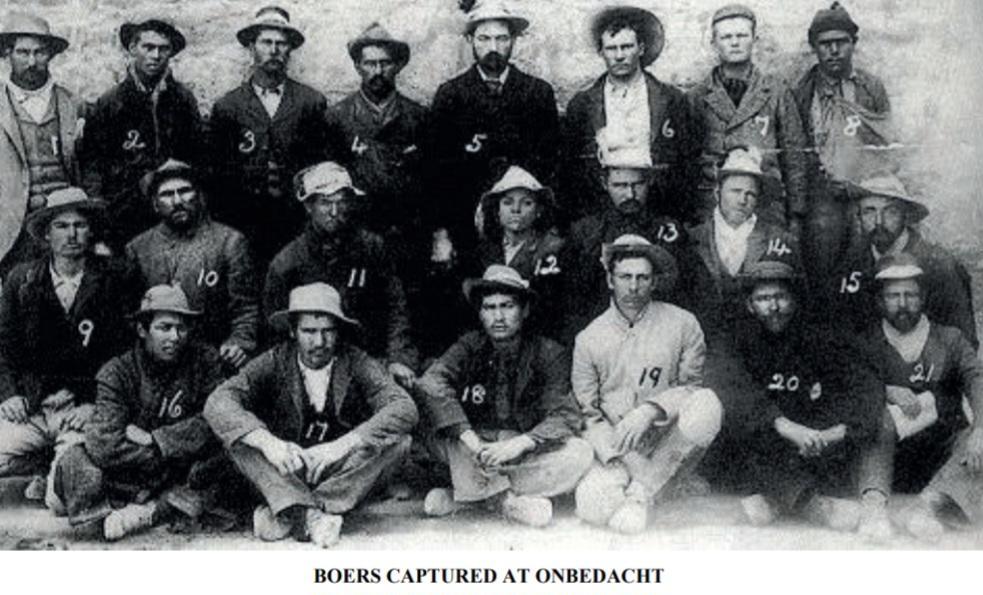
-
The 107 Down train left Naboomspruit for Pietersburg at 3:15pm on 4 July, carrying an escort of 29 (of which 22 were Gordon Highlanders under Lt A A D Best), in an open truck. On reaching Kilo 176½ it was derailed by an explosion of a Boer dynamite mine which destroyed 10 inches of rail. The train immediately came under heavy fire from the 150 Boers manning the ambush. Lt Best and 13 of his men as well as the guard of the train were killed and 8 of the Gordons were wounded after putting up a valiant fight. On 10 August Lord Kitchener cabled His Majesty, the King: As Colonel-in-Chief of the Gordon Highlanders Your Majesty may be pleased to know that Commandant de Villiers who was present and who has just surrendered, informs me that at the attack on the train on 4th July at Naboomspruit the guard of Gordon Highlanders under Lt Best behaved with the utmost gallantry. After the train had been captured by 150 Boers the last four men, although completely surrounded and with no cover, continued to fire till three were killed and the fourth wounded. On Boers asking the survivor the reason they had not surrendered, he replied: “Why, man, we are the Gordon Highlanders”.
-
On 2 July 1901 Colonel Benson received information at Machadodorp that detachments of the Lydenburg and Middelburg Commandos were in laager on the farm Vlakfontein, some 11km north west of the town. His column left Machadodorp in the early hours of 3 July, but the track followed turned out to be longer and more difficult than anticipated and he only arrived at about 8:00, too late for a surprise attack. The Boers were seen moving northwards towards Elandskloof and for the next 7 hours pursuit and search operations were carried out. At about 15:00 two detachments of F Squadron, Scottish Horse were sent ahead to search two adjoining valleys. One detachment of 26 men under Major Murray was suddenly attacked by some 60 Boers but held their own for some 45 minutes until relieved by E Squadron, Scottish Horse. In this sharp and very close fight British losses were 3 men killed and 9 wounded. On the Boer side 4 men were definitely killed with another 3 men as possible. Lt English won the Victoria Cross for running between his men’s positions under heavy fire at point blank range, supplying them with more ammunition.
-
At 9pm on 26 June Gen Ben Viljoen’s commando attempted to cross the railway line near Brugspruit by simultaneously attacking the blockhouses at Kilo 370½ and Kilo 372. The attack on the Kilo 370½ blockhouse, which was defended by 14 men of “The Buffs”, was repulsed after a hotly contested half-hour engagement. However, the Kilo 372 blockhouse, garrisoned by 7 men of “The Buffs”, was taken by the Boers. Viljoen, in his memoirs, states that his Field Cornet Myburgh was killed by a shot that went off as the surrendering soldiers threw out their rifles. Viljoen proceeded to pass across his main body, guns and convoy under a heavy fire. The operation was barely half completed when an armoured train appeared on the scene.Turning on its searchlights, it wreaked havoc among the Boers with shrapnel and Maxim bullets, thereby ending the crossing attempt. Eventually Viljoen, with half of the commando, ended up north of the line and his 2 Commandants south of the line with the other half of the commando.
-
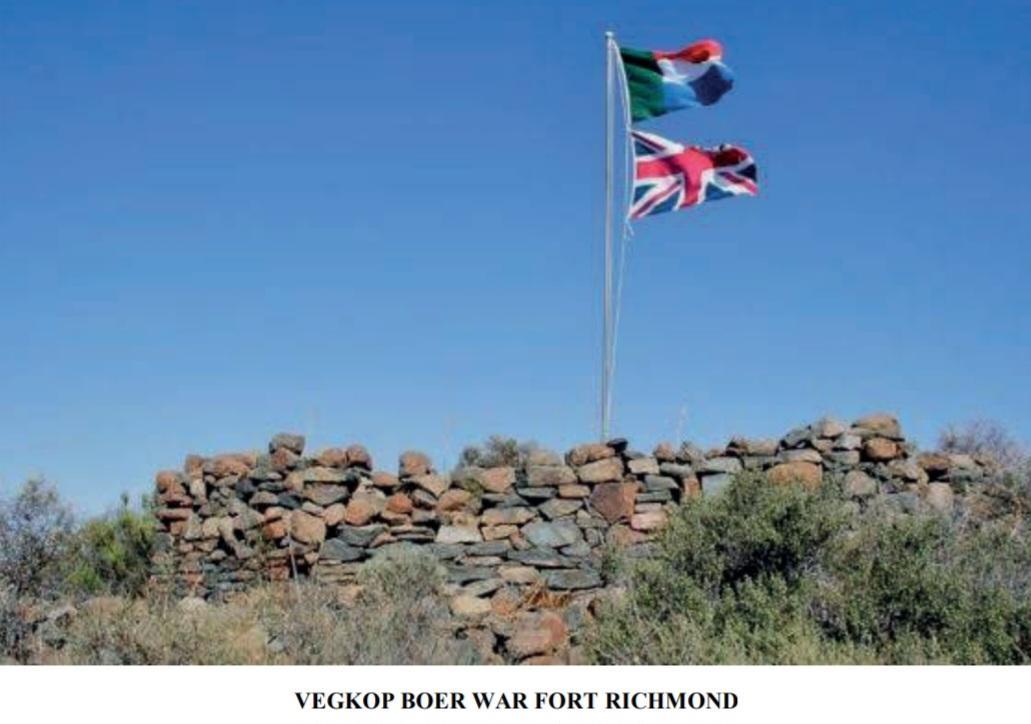
On 25 June 1901, the small town of Richmond, defended by a detachment of the 4th Battalion North Staffordshire Regt and the Richmond Town Guard, was attacked by a superior Boer force under Gen Wynand Malan and Commandant Smith. A number of small forts on kopjes overlooking the town were overrun. The Boer tactics were to keep a continuous fire on the loopholes of a fort while a number of them stormed the fort and were safe below the loopholes that were too highly positioned. They then threatened to toss in dynamite, leading to the surrender of the defenders. Eventually only the heavily fortified jail and the so-called “Flag Hill Fort” remained unconquered. At dusk word reached Malan that a strong British force was nearing Richmond and in the evening the Boers withdrew. British losses were 6 killed and 8 wounded, while on the Boer side there were only a number of wounded burghers.

-
On this date the left wing of the 5th Victorian Mounted Rifles (Squadrons E, F, G, and H) encamped at Wilmansrust farm, between Middelburg and Ermelo. This location was noted later as being dominated by three nearby koppies (hills) and not easy to defend. The security of the encampment was entrusted to four widely spaced outposts.This was “in accordance with Indian Cavalry practice” as the camp C/O, Major Morris of the RFA had recently arrived in South Africa from India. No standing patrols were ordered between outposts and there was no inner picket line. Trouble hit at 7.45pm when Gen Muller and some 150 men, guided by the farm owner, sneaked past the sentries without being challenged. Inexcusably, the VMR men did not have their rifles at hand, confusion reigned supreme and panic quickly spread. The whole camp was over-run in minutes. The price was reportedly 22 KiA (including a Boer “hensopper” summarily executed), 42 WiA and the remainder either briefly captured or escaped the scene. The 5th VMR captives were abandoned as the Burghers made off with the very considerable spoils, including food, ammunition and the two pom-poms. Unfortunately, the defeat at Wilmansrust caused Gen Beatson to describe the 5th VMR; the “Fateful Fifth”, in terms which included “wasters… In my opinion they are a lot of white-livered curs”. This resulted in rebellious conduct by several rank-and-file: subsequent Court Martial sentenced 4 men to be shot, later reduced to 10 years hard labour and finally quashed by Kitchener. The inevitable Court of Enquiry on the action itself found the camp commander, Maj. Morris, responsible for the defeat. Gen. Beatson was later transferred back to India after only serving six months of his secondment.
-
“The Inspector General wishes to place on record the very commendable piece of work performed by sections of A, B and D Troops of the Reserve Depot under the orders of Captain Scriven on the 10th, 11th and 12th Inst. This force had been detailed to sieze and occupy Leeuwkop and neighbouring koppies (8 miles NW of the Dynamite Factory) during the night and then to demonstrate against the enemy northward to cover Capt Adye’s troop during its work of entrenching itself on Leeuwkop. These duties were most ably carried out. On each of the three days Capt Scriven’s parties, working over a wide area, but in perfect combination, were engaged with the enemy, always with success. They captured wagons and cattle… The enemy were in superior numbers, at about 2 to 1. In this work the following Officers, NCO’s and men especially distinguished themselves: Lieutenants MacNaughton and Bourne No 198 Reserve Depot Trooper H Lord (wounded)…” SA Constabulary Circular Memo No 44.
-
On the evening of 5 June Colonel Elliott was informed that a Boer convoy was about 15 miles away from his own convoy and he detached Major Sladen, the Commander of the 6th Mounted Infantry with a force of 200 and some Australians to intercept it. The convoy of 120 wagons and carts was duly captured at dawn on 6 June, but the majority of prisoners were women and children with only about 100 armed Boers as guards. What should have been a routine, albeit large, capture was rapidly altered by a thundering counterattack by De Wet and De la Rey who had been informed about it over breakfast. Fighting raged amongst the captured wagons and Sladen’s advance line was driven back to a cluster of native huts in a kraal. THE CAPTURE OF DE WET’S CONVOY The fight lasted for four hours and ascendancy swung backwards and forwards between British and Boer. Sladen held off the counterattack until relieved by De Lisle in the afternoon but casualties had been heavy on both sides: 26 British and 17 Boers killed, 25 British and 20 Boers wounded. The brutal hand-to-hand fighting at Graspan gave rise to accusations of atrocities on both sides. The Boers claimed that the British had fired on unarmed women and children in the wagons and the British accused the Boers of murdering prisoners.

-
On 6 June 1901 the Commandant van Reenen and his Cape Rebel Commando decided to spend the night on the farm Ruigtevlei, south of Steynsburg. It was bitterly cold and apparently guards were not posted. Shortly after midnight they were totally surprised by an attack of the 17th Lancers (the “Death and Glory Boys”) under Lt-Col W P Wyndham. The leading squadrons, led by Captain D’A Legard, rushed the farm buildings which l sheltered the bulk of the commando and captured 23 prisoners (although the official Boer PoW Register lists only 16 names and a Boer source puts the total at 18 and states their names). A number of the Rebels, who chose to sleep in a nearby poplar-grove, managed to escape. In the action one Boer Rebel, Jan Kruger, was killed with a bullet through the heart. Capt Legard was seriously wounded (and subsequently MiD for good service at Ruigtevlei) and two Lancers (Lanham & Turner) were mortally wounded. The captured rebels had to walk to Steynsburg, where they were put in gaol. During the following week the Rebels were tried by a Military Court: all of them were found guilty of High Treason under arms, while a number of them were also found guilty on a 2nd charge: the murder of Pte Lanham. One of these men, P W Klopper, was shortly afterwards moved to Burgersdorp gaol where his death sentence was ratified on 19 July 1901 and he was hanged on 20 July 1901. On the same day the Steynsburg prisoners were marched to the Market Square where they were informed that all remaining death sentences had been commuted to penal servitude for life on Bermuda.
-
The “First Occupation of Jamestown” took place on 18 November 1899. On the previous day the 30-strong garrison of Cape Police under Inspector Halse received notice to quit Jamestown and proceed to Dordrecht. There was no Town Guard at the time and the Boers under General Olivier, flushed as they were with their capture of Aliwal North, met with no opposition in taking Jamestown. In due course the Boers withdrew from that part of the Cape Colony, and British rule returned to Jamestown. Then, on 2 June 1901, a Boer Commando under General Kritzinger, “boldly charging the cordon, surprised the small and somnolent garrison of Jamestown.” “History of the War in South Africa” by Grant, Vol IV, p79. By this time there was a Jamestown Town Guard, 40 strong, and they manned the trenches on the perimeter of the town. A koppie about 1000 yards from the town was defended by 16 men of the Dordrecht District Volunteer Guard and 11 more of the DDVG held a trench near the road to Aliwal North. The Boer forces numbered some 500 men and the defenders of the koppie were the first to surrender after 4 of them were killed. The total action lasted some 3 hours. The Boers only had one casualty: a young chap who had donned the greatcoat of one of the British casualties and was mistakenly shot by his own people.
-
Due to the reported southward advance of Gen Beyers’ Commando from the Waterberg district in May 1901, Lt-Col Grenfell tasked two columns (the one under Lt-Col A E Wilson at Naboomspruit and the other under Maj H McMicking at Nylstroom) with the protection of the railway line to Pretoria. Wilson’s column (540 strong, including 300 Kitchener’s Fighting Scouts) acted on intelligence reports about Boer commandos in the Warm Baths vicinity and moved down to Roodeberg to round them up. On 1 June two of Wilson’s squadrons had a sharp engagement with 500 Boers under Commandants Uys and Pretorius. Both sides suffered significant losses but in retreating the Boers came within reach of the rest of Wilson’s column. “He fell upon them heavily on the 2nd, and after a stubborn combat which continued all day, utterly routed them, killing and wounding many and taking forty prisoners, with loss to his own force of only eleven.” “The History of the War in South Africa”, Vol IV, p441: The incident is not mentioned in the Times History of the War but is fully covered in “After Pretoria: The Guerilla War” Vol II, p608-610, albeit with highly inflated numbers of Boer casualties. The SAFF Casualty Roll has a combined listing over the 2 days’ skirmishing “near Pienaar’s River” of 8 men from KFS as KiA or DoW with a further 23 men wounded.
-
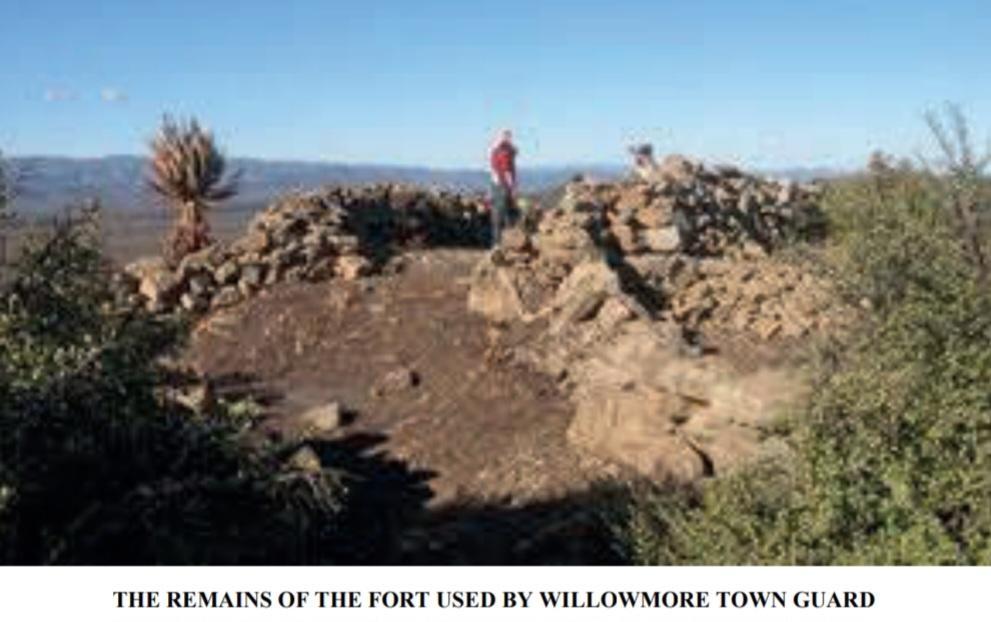
At 4am on 1 June 1901 Commandant Gideon Scheepers with 100 men, mainly Cape Rebels, attacked Willowmore from the east, north and south-west. By 5.45 am at least 7 of the outlying defensive posts, manned by the Willowmore Native Contingent, were overrun with six of the defenders and one rebel killed. However, the defenders in the town itself rallied: Capt Curry with the Willowmore Railway Contingent checked the attack from the east and the Town Guard succeeded in retaking 5 of the posts. At 7.30 am Lt van der Hoven of the Town Guard led a small party of the Native Contingent down the riverbed to a position commanding the other two posts. The Boers started faltering at the determined resistance and by 11 am Scheepers and his men had retreated towards Aberdeen Road. Gideon Scheepers: Shearing
-
During the guerrilla phase of the War, while Lord Methuen pursued General Koos de la Rey in the southern part of the Western Transvaal, General Jan Kemp, based at Tafelkop near the Koster/ Lichtenburg road, was active in the Swartruggens area. This threatened Brigadier General H.G. Dixon who was encamped at Naauwpoort in the Magaliesberg. On 26 May 1901 Dixon set out with a force of some 450 men to clear farms and search for hidden guns and ammunition west of Naauwpoort on the farm Waterval near Vlakfontein, in the vicinity of present-day Derby. Dixon’s force marched in 3 columns led by Major Chance R.A. on the left, Colonel Wylly in the centre and Lt-Colonel Duff on the right. General Jan Kemp, laagered at Waterval northeast of Krugersdorp, initially had 400 burghers, including his scouts, some members of the Staatsartillerie (without their guns) and men from the Krugersdorp, Pretoria and the Rustenburg commandos. They had buried some of their remaining guns to have artillery available when required, but also to provide unhampered mobility to commandos. On 29 May Dixon’s men set out to recover these guns. Their search revealed no guns, but a large cache of ammunition was discovered. In this search the British came under sniper fire on Duff’s Ridge and the heavy fire from Kemp’s burghers. When the British attempted to arrange their defence, Kemp’s men under cover of the smoke from a fire they had started, charged Chance’s rear-guard Yeomanry with (now) 500 burghers. The Yeomanry suffered heavy casualties and the Boers overran the 2 guns of the 28th battery. Dixon ordered Duff to reinforce Chance, who had returned to the scene of action with men of the 1st Derbyshire Regiment. On Chance’s Ridge the Derbys, and what remained of the Yeomanry, charged the Boers with fixed bayonets. The Boers galloped off and the British retrieved their guns. The British suffered heavy casualties (6 officers and 51 other ranks dead) while only 7 burghers died in the battle and 2 later from wounds. Kemp’s new strategy of lightning strikes behind a smoke screen had been effective.
-
In the last week of May 1901, the 9th Lancers were operating in a sweep south-east of Edenburg and they were ambushed on 27 May. “A” and “D” Squadrons were farm clearing, and as “A” would eventually have to get over the neck in the hills overlooking Ospoort, the emergency squadron (“C”) was sent to support them. While the clearing was going on Lieut Stirling was sent with his troop to occupy the neck, covered by the pom-pom. The three advanced points were allowed to go right through the neck and the remainder of the troop to get right underneath the kopjes, some already having dismounted, when there was a shout of “Hands up!” followed by heavy firing, as Stirling shouted “Files about!”. The men all took what little cover they could find, while reinforcements were sent up on both flanks. The pom-pom getting to work effectually cleared the kopjes, and Lieut Kincaid-Smith, who had been sent up to the right, saw some 200 Boers going away north, besides a certain number leaving the different parts of the kopjes. The casualties all belonged to “C” Squadron: 1 man was killed, 4 were wounded and subsequently died of wounds and 3 were wounded. “Diary of the 9th Lancers”, p215.
-
Nothing of importance occurred during the rest of May except an attack on a Potchefstroom – Ventersdorp convoy on the 23rd. The attack, which was twice repeated, was of a determined nature, and the convoy was surrounded and all but taken as it came within sight of Ventersdorp. The Boers were kept off, however, by the stubborn defence of the escort, under Major P. Palmes (Royal North Lancashire) and Captain E. C. Purchas (South Wales Borderers), and by a gun which the Commandant at Ventersdorp, Major J. H. du B. Travers (South Wales Borderers), took out from the village with what men he had some twenty in all - and the convoy barely escaped with the loss of six killed and thirty-one wounded amongst the escort. “History of the War in South Africa 1899-1902” Vol IV, p183.
-
“Yesterday at Naroegas 2½ hours north this Patrol of 60 Border Scouts were attacked at 9am by 94 Rebels. Engagement lasted until 3pm when enemy retired and ceased firing… Rebel losses 15 dead counted. 5 known to be wounded. Commandant Jan Nel severely (wounded and) left behind. One Jacobs rebel from Kakamas brought in. Others left behind. Jooste of Kakamas also prisoner. Many rebel horses killed. 1 saddle, 2 horses, arms and ammunition (explosive) brought in. Explosive ammunition freely used by rebels. Our losses one man wounded. By accident 7 horses killed. Officers and men of Border Scouts fought with great bravery.” Telegram: Acting Resident Magistrate, Kenhardt, to Lex (Law Department) Cape Town, 24/05/1901. “Shortly after he (Conroy) took command, he decided to attack Kenhardt. While he was making ready for this with about 170 men al Dwaalgees, 12 miles north-west of Kenhardt, he learnt that an English patrol was waiting for him at Naroegas on the Keimoes road. P. Gresse and Christiaan Emmenis went to investigate and observed about six saddled horses on the farm. Without further scouting of the terrain, Conroy sent 28 horsemen to catch the ‘kakies’. While they were riding unsuspiciously in the ‘sandloop’ (sandy riverbed) to the farm they were unexpectedly put under a murderous crossfire from the ridges by the Basters of Captain Ramsbottom and Lieutenant McCloud. Those who could sought shelter behind meagre rocks and bushes outside the ‘sandloop’, where they had to endure the accurate fire of the Border Scouts for the whole day in the scorching heat. Only when it became dark could Henry Wickens risk taking a report to Conroy at Dwaalgees. Reinforcements were hastily sent to the scene of the disaster, but the coloureds had already left the ridges and were on their way to Kenhardt. Almost all the horses fell in the battle. A number of burghers (Emmenis and Willem Walton) were dead. Jacobus Bonthuys and Kootjie Knouwds were seriously wounded but escaped with the help of friends and could join the commando later. H L Jacobs who was wounded in the foot and A.C. Jooste who surrendered to the enemy were taken as prisoners to Kenhardt. The claim that wounded Boers were killed with stones after the battle cannot be substantiated.” Translated extract from History of Kenhardt compiled by W A Burger in 1952.
-
“To continue the survey of the operations in the Cape, the first point scored was by the invaders, for Malan’s commando succeeded upon May 13th in overwhelming a strong patrol of the Midland Mounted Rifles, the local colonial corps, to the south of Maraisburg. Six killed, eleven wounded, and forty-one prisoners were the fruits of his little victory, which furnished him also with a fresh supply of rifles and ammunition”. Arthur Conan.Doyle’s “The Great Boer War” 1902 edition. This skirmish took place on the farm Doornhoek. In the SAFF Casualty Roll the men taken prisoner are not recorded, and 3 names of wounded are listed under Komgha Mounted Volunteers. Robert Marshall was severely wounded in the skirmish at Doornhoek. Although this was recorded under Komgha Mounted Volunteers, his QSA was issued off the roll of the Midlands Mounted Rifles. During WWI he enlisted in the 2nd SA Infantry at East London on 10 August 1915 with an entry “2 bullet wounds 1901” on his Medical History Form. After the Senussi Campaign in Egypt (Jan – March 1916) his unit disembarked at Marseilles on 20 April 1916. Three months later, on 18 July 1916, Marshall was killed at Delville Wood. On that day an estimated 600 German guns blasted the Wood and its occupants for eight hours with high-explosive shells: at times the rate of shelling reached seven per second and it is estimated that more than 200 000 shells fell in an area of less than a square mile. Like so many of his comrades Marshall has no known grave, but his name is recorded on the Thiepval Memorial.
-
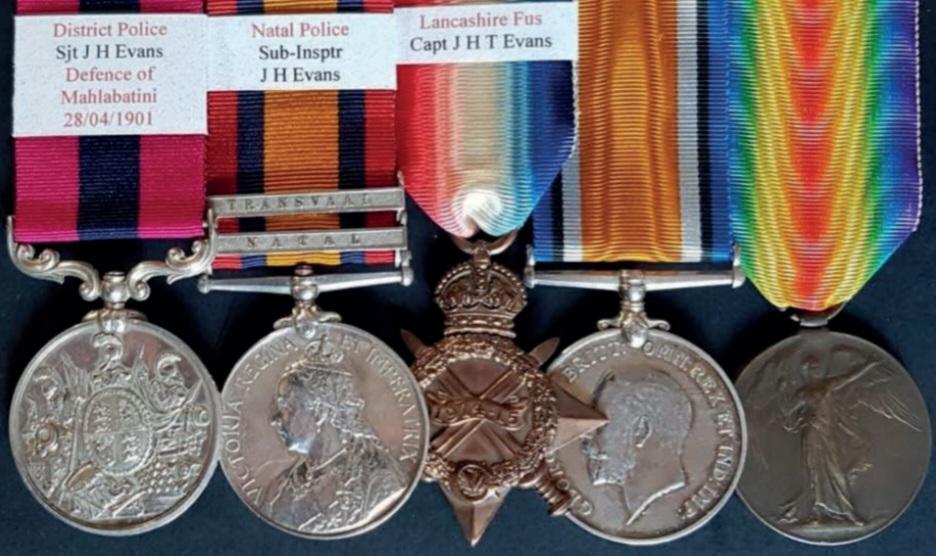
DCM (VR): Sjt. J.H. Evans Dist. Police; QSA, 2 clasps Natal, Tvl: Sub.-Insptr. J.H. Evans. Natal Police; 1914-15 Star: Capt. J.H.T. Evans. Lan. Fus.; BWM & AVM: Capt. J.H.T. Evans. Sergeant James Herbert Thomas Evans was promoted to Sub-Inspector and was granted a DCM (LG 26 July 1901, p4950) for the part he played in the defence of the Magistracy. He was not mentioned in a despatch and, in addition, the Submission to the King incorrectly referred to his unit as “District Police”. Judging from entries in the NP Headquarter’s Order Book, Evans continued to serve in Zululand until at least the end of the war. He was awarded the QSA with the clasps ‘Natal’ and ‘Transvaal’, the latter indicating his service in those parts of the Vryheid district that bordered on Zululand. Evans is one of many Natal Policemen who should have been awarded the KSA. Hevretired from the NP in 1904 and evidently returned to Britain. When World War I broke out he attested as a Private in the 12th Battalion, Royal Fusiliers and the next day he was commissioned as Lieutenant, 13th Battalion Lancashire Fusiliers. He served at Gallipoli till early August 1915, when he was wounded by a shell fragment (broken fibula) and returned home. After recovery he served in France, where he developed Neurasthenia: this resulted in two periods of hospitalisation in England, although he recovered sufficiently to serve in the trenches for the duration of the war. On completing his service, he stayed with his sister in Sussex where he eventually died after a long and painful illness.
-
“The convoy got safely across, and we camped at a pan of water in the flats. About an hour after camping, some of the officers, among whom was the captain of the New Zealand squadron, said they were anxious to see Cronje’s last stand, and whether, if permission was granted by Major Paris, I would go with them. I agreed, and shortly after saw Major Paris, l who said he would allow them to go, providing I went in command. I agreed, and we started about 2pm. One captain of the 4th Scottish Rifles, staff officer to Major Paris, also accompanied us. We reached the memorable camp of General Cronje about an hour later, and after placing a couple of lookouts on points of vantage, I allowed the party to scatter and look for curios. We were about sixty five all told, chiefly New Zealanders, scouts, and some Royal Welsh Fusiliers, who were attached to me under Lieutenant Holroyd. After spending about half an hour, I gave orders to return- the column had meanwhile gone on—and after some little difficulty got the party collected, and we started back through the river, when I at once extended the men and sent out the necessary scouts. When almost opposite Kitchener’s Kop (so called, being the position held by Lord Kitchener during the shelling of Cronje’s camp and trenches along the river banks), firing was reported on our left, and shortly after I noticed two of four men, New Zealanders, I had sent forward on our left point coming on at a gallop…” ‘A Fight to a Finish” by Major C G Dennison. “Were with a patrol of about 60 men. Hearing that the left flank was being attacked, Captain Dennison rode out to it. About 60 of the enemy cut them off, and they eventually surrendered.” “SA Surrenders” (WO108-372). According to the SAFF Casualty Roll one man was killed and Captain Dennison and 4 men (one of them severely wounded) were taken prisoner. One of the prisoners, a New Zealander, 2634 Tpr Frank Perham covered the incident and his early release by the Boers in a book “The Kimberley Flying Column”
-
One of the most serious conflicts in which the Natal Police took part in was the defence of the magistracy at Mahlabatini on 28 April 1901. About a score of the police under Sgt Locke were brigaded at Dundee and received orders to entrain for Zululand. From the Tugela they rode up to Melmoth, where a standing camp was pitched for some weeks until further orders were received for them to go on a four days’ patrol to Mahlabatini. A camp was established outside the courthouse and every morning before dawn a four-man patrol was sent along the road towards Emtonjeneni. This patrol went out as usual on the day of the attack. As the men were riding past a mealie patch, about two miles from the camp, a shot was fired, and one of the patrol galloped back to camp reporting the incident. The whole force quickly moved out under Sergeant Locke, with Mr. Wheelwright, the magistrate, and Colonel Bottomley. They rode quickly down the road, made a thorough search of the mealie patch. Finding nothing they went along the veldt towards the Emtonjeneni store, about three miles away, until they came to where the road divides with the main track passing to the left, and a path going straight on through some wattle trees. The magistrate, with four men, went to the left, galloping to the top of a ridge, where they came under a hail of bullets. The sun was just rising, showing the troopers up very clearly on the skyline, and providing an excellent target for the Boers, who were concealed in the trees. On hearing shots, the advance party of the men who had gone along the path got into skirmishing order, and entered the trees, where they were ambushed. They were shot down to a man, every one of them receiving two or more wounds. The remainder of the troop hastily opened out, and arrived on the scene at a gallop, just as a Boer named Van Niekerk, more courageous than the others, came out of the trees to demand the surrender of the whole troop. This was refused, so he instantly fired, hitting one of the horses; but he in return received a bullet fired by Trooper J. Smith. The police dismounted and took cover, spreading well out and firing at the slightest movement of the enemy. After some hours the Boers were driven off and the dead and wounded troopers were placed in a police wagon. Sergeant Locke had been very badly injured within an hour of the opening of hostilities. He was found lying on the ground with his head on his saddle, and Van Niekerk, also badly wounded, being near him. Sergeant Locke was with difficulty lifted on to the wagon, which went slowly towards the camp, but as the jolting was so bad a stretcher was improvised. No natives had been seen about all day, but fortunately at this moment a party of thirty of them in full war paint appeared. They were told to carry the stretcher in which Sergeant Locke was lying, but they were in a violent frame of mind. Killed: Sergeant Collett (seven wounds in one leg), Troopers Cameron, Salmond and Nelson. Mortally wounded: Sergeant Locke and Trooper Aldwinkle. Wounded: Trooper Smith. Sergeant Locke died the same evening and Trooper Aldwinkle about a month later. Trooper Smith recovered and became a warder at the central gaol at Pietermaritzburg. The defence had been maintained by 3 non-commissioned officers and 19 troopers of the Natal Police. It was afterwards discovered that the enemy had numbered about 150 (some reports suggest 400), and the little British force killed nine of them. The rest went back, and, thinking they had been opposed by a regiment, shot their native spies, who had told them that there were only a few men of the police there. When they discovered how many troopers there really were at Mahlabatini they sent along a disconcerting message to the effect that they would pay a visit to the camp on the first moonlight night and wipe out every man there. In “The Nongqai” – the official police magazine – a photograph of the survivors appeared along with a brief account of the action which read as follows: “The Magistracy, Mahlabatini, Zululand, was attacked by a large force of Boers at 5am yesterday. The defence was maintained by a detachment of the Natal Police Field Force, comprising 3 N.C.O’s, 19 men and 2 civil servants. The fighting lasted 6 hours, and resulted in the defeat and repulse of the Boers, who numbered 400 strong (according to computation of prisoners captured).
-
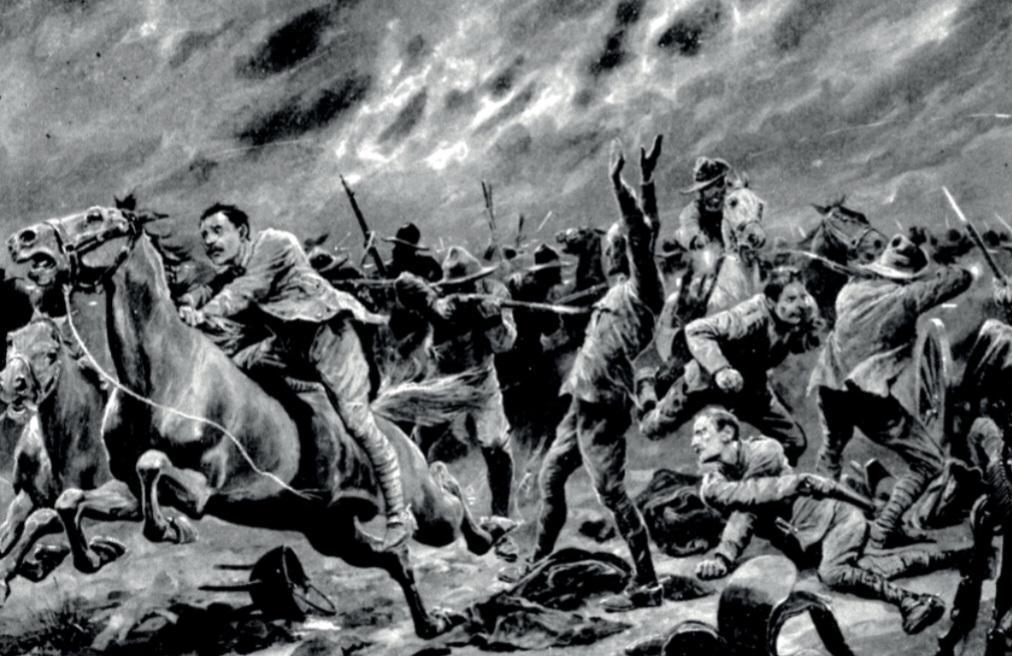
On 22 April 22 two hundred men of the 8th M.I. were escorting a supply convoy from Cyferkuil to Klerksdorp when it was attacked on Reebokfontein Farm by 700 of De la Rey’s burghers. During the fight Lieutenant Percy Goodwyn, who was in command of the left flank guard, saw sixty Boers making for a kopje which commanded the position from which the British guns were firing. Gathering ten of his men, he raced the enemy for the top of the hill. As the East Lancashires galloped for the kopje, Corporal Connery received five wounds, and his horse was hit twice, but still he rode on. Both sides arrived simultaneously, and, although overwhelmed by numbers, Goodwyn and his men maintained their position long enough for the guns to withdraw. The Boers massed 180 men against the little band, who were eventually rushed with the loss of two killed, three wounded and the remainder taken prisoners, but not before Private Burrows had collected rifle bolts from the casualties and thrown them away to prevent the enemy getting them. For gallantry on this occasion, Lieutenant Goodwyn was awarded the DSO and Corporal Connery and Private Burrows were Mentioned in Despatches and received Special Promotion from Lord Kitchener for Distinguished Conduct in the Field. Red Roses on the Veldt, p277.
-
On 21 April 1901 Commandant Manie Maritz with 10 mounted men surprised a 15-man patrol of the Western Province Mounted Rifles who were on their way to the farm Nelskop, some 40 km south of Brandvlei in the direction of Calvinia. After a short skirmish the majority of the WPMR men remounted and made for a nearby hill, Swartkop. Maritz and five men charged in parallel and ascended Swartkop on the opposite side as the British. As Maritz dismounted near the summit, he received a flesh wound in the arm. One of his men helped him to get up and as he started a charge up-hill he received two further light wounds in the arm and back. He again got up and stormed the WPMR men. At this stage he was joined by the rest of his party and after a short exchange of fire the WPMR party surrendered. The British losses were two men killed, Lt Tidmarsh and 2 men wounded, and 9 men taken prisoner. The Boers gained 13 horses and 13 rifles with ammunition. Maritz was the only casualty on the Boer side, and he was nursed on a nearby farm T’Boop by the owner’s wife, Mrs Hessie Nel. Later in the war the farm was to become a hospital for wounded Boer rebels. Translated from Memoirs of Commandant Manie Maritz.
-
After the successful Rietspruit action Lt-Col Monro set out again 2 nights later towards Ventershoek. In the Ruigtespruit vicinity the party became entangled in difficult country, and owed its escape with but seven casualties largely to its being mistaken for friends by the Boers, who were met with in considerable strength. Official History, Vol IV, p163.
-
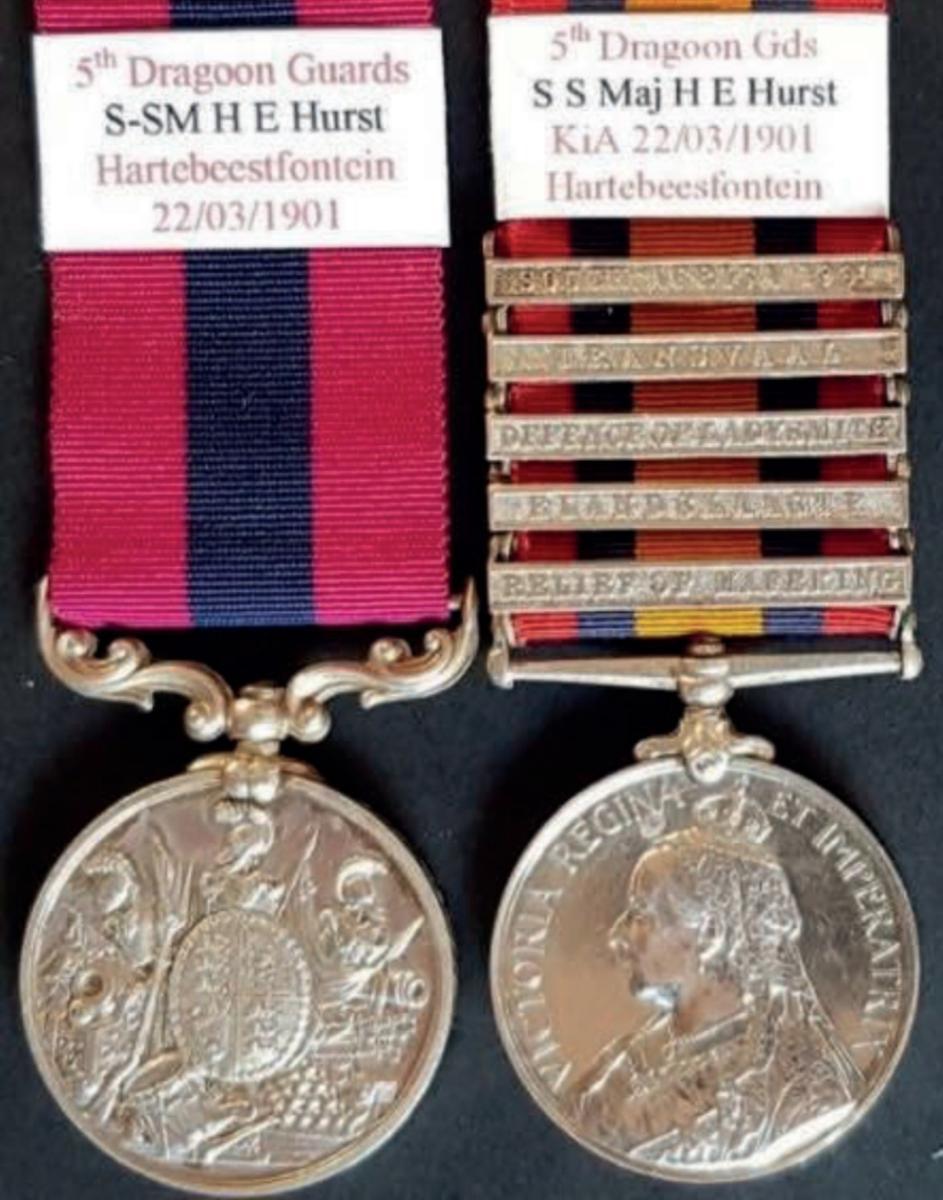
DCM (Vic): 2828 Sqdn. Sgt. Major A.E. Hurst 5/Drgn. Gds.; QSA 5 clasps RoM, Elandsl, DoL, Tvl, SA’01: 2828 Sq: S. Major A. Hurst, 5th Dragoon Guards Arthur Hurst was in South Africa with his parent unit when the war broke out and saw action at Elandslaagte and during the Defence of Ladysmith. He was one of 3 Sergeants “imported” from the 5th Dragoon Guards by Major B R M Glossop when Adjutant of the 1st Imperial Light Horse and he earned his Relief of Mafeking, Transvaal and SA1901 clasps with his adopted unit. In “The Story of the Imperial Light Horse” by Lt G F Gibson it is related that during the action at Cyferfontein on 5 Jan 1901, when Colonel Woolls-Sampson was trying to get his men to retire from heavy fire, RSM Hurst was seen to ride down the whole Imperial Light Horse line, waving the men away and yelling “Retire! Retire!” Miraculously neither Colonel Wools-Sampson, Major Briggs, Captain Normand nor RSM Hurst, although remaining mounted were touched, but their chargers were wounded in many places and their saddlery and clothing were pierced by many bullets. Hurst displayed much coolness under fire that day, but, as the history of the ILH informs us, he reacted a lot more hotly to a visiting member of the Army Service Corps that evening: Hurst was yarning to the members of his mess, including a visiting Sergeant-Major of the A.S.C., about the day’s experiences; he was particularly sore about the damage to his hat, which had received more than its arithmetical quota of attention from the enemy that morning, no less than three bullets having torn through it and shot it to rags. His miraculous escape from death concerned him less, knowing the workings of the supply side, than the prospect of having to replace the hat at his own expense. Sourly regarding his wrecked headgear, he commented fluently upon the parentage, upbringing and morals of the “New Hat Department.” The Sergeant-Major from the A.S.C., his branch of the Service involved, imprudently intervened: “What would happen if every soldier wanting a new hat merely fired three bullets through his old one and then claimed a new one?” At this interjection (and possible innuendo) Hurst warmed to his work in real earnestness. Expurgated of his Rabelaisian ornamentation and the choicer cuts and thrusts of army lingo and shafts of pious wit (this out of consideration for our more gently nurtured readers) his homily on the scale of values, rank and precedence in the army, but nothing about ‘hats’ ran:- “Look here, my lad (glaring maliciously). You are talking to the R.S.M. of the I.L.H., and a S.M. of the 5th Dragoon Guards, two fighting regiments, FIGHTING regiments. My Colonel, who is a just bloke, would choke me off like Hades if he saw me talking with one of your sort. It would break his precious heart if he heard that I had talked with a Creator Condemned Grocer, and as for arguing – if he knew that I, a cavalry soldier, had condescended to argue with one, do you know what he’d do? Of course, you don’t – pity the ignorant! He’d have me on the peg and reduced to the ranks in a brace of shakes. Now, no more ruddy talk from YOU about my hat.” Of true fighting spirit, Arthur Hurst was killed in action at Hartebeestfontein. In the London Gazette of 9 July, 1901 (p4561) RSM Hurst with 2 other men (Pte Langham, 4th NZ Rgt and Cpl Moy, 6th Imp Bushmen) are “Brought to notice by General Babington for their conduct in capture of guns and convoy at Vaal Bank on March 23rd and 24th, 1901”. In the “Remarks Column” is stated “Awarded DC medal”. Langham and Moy were definitely mentioned and rewarded for this particular action, also known as Wildfontein. However, SSM Hurst’s name is out of place when coupled to Vaal Bank as he had been killed on 22 March! As the Hartbeesfontein rear-guard action led to General Babington’s success at Vaal Bank it seems that he commented on the 3 days’ combined operations (22 to 24 March) in his despatch to Kitchener. This is borne out by the particulars and dates in the LG mentions by Babington: 22nd and 23rd March 1901: Sixteen Officers are mentioned under the reference “General Babington’s despatch on capture of Boer guns and convoy at Vaal Bank” 24 March 1901: Fifteen men (including Hurst) are mentioned under the reference “General Babington’s despatch, dated 29th March, on capture of Boer guns and convoy at Vaal Bank.” 22 March 1901: Only three men are mentioned under the reference “General Babington’s despatch on action of Imperial Light Horse.” Based on the above, it is concluded that Hurst’s DCM must have been awarded for the Hartbeesfontein action. It is hoped that Babington’s Despatch(es) will one day be traced to confirm this! Warrant for Municipal or Metropolitan Police Service Ten Year Loyal Service Medal 2008.pdf

-
A detachment of 150 mounted men and a pom-pom under Lt-Col Monro set off on 10 April from Dewetsdorp in pursuit of a Boer commando. After a 3 hour chase the enemy was found, l outspanned near some farm buildings and protected by a large donga in front of them. However, the surrounding kopjes were within rifle range and were speedily occupied by Monro’s men. A hot fight ensued with a large party of Boers in the donga and a smaller number in the farm buildings, but when the British charged the donga from both flanks, 53 burghers surrendered. The Boers in the farm buildings kept up their fire in spite of the capitulation of their comrades before their eyes. Monro, seeing Boers approaching on the horizon, decided to try negotiation to make a speedy end to the skirmish and he sent in Lt Shott of Bethunes Mtd Infy (who had earlier initiated the assault on the donga) unarmed and with only a white handkerchief to the farmhouses. Shott eventually persuaded the defenders to yield and Monro returned to Dewetsdorp with the Boer convoy and 83 prisoners. Official History, Vol IV, p162. (Dates of 9 and 11 April are attributed to the incident in contemporary sources).