Artillery in the First World War: Special Issue – The Royal Artillery at Mons, 23 August 1914

My intention was to publish this entry yesterday on the 100th anniversary of the Battle of Mons. However, as Robert Burns wrote, "The best laid schemes o’ Mice an’ Men, Gang aft agley." That applies to combat operations plans as well. No plan survives enemy contact. This special issue of Artillery in the First World War will also further delay publishing "Artillery in the First World War: Russia – The Tsar’s Cannons." In the meantime, another special issue has already been submitted for publication, "Artillery in the First World War: Special Issue – Belgium’s Artillery and the Battle of Liege, 1914." Hopefully, you will be reading that entry very soon. In the meantime, here is a short piece on Britian's Royal Artillery and the Battle of Mons.
So, much has already been discussed and published regarding the British Army during the First World War, especially the British Expeditionary Force’s first battle at Mons in August 1914, that any short article about the Royal Artillery during the First World War would be profoundly superficial. Nevertheless, a modest purpose of this GMIC article series on Artillery in the First World War is to encourage further reading and discussion on the topic; thus, a short refresher on the Royal Artillery’s role at Mons seems to be in order on this 100th anniversary.
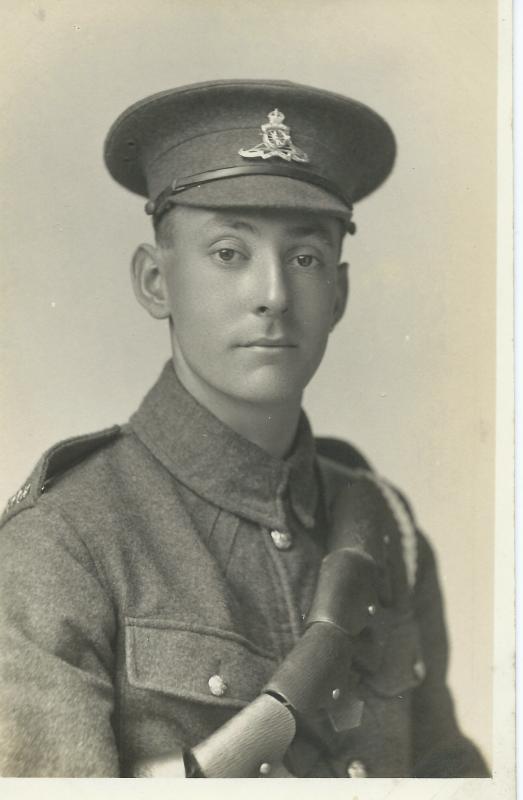
Royal Artillery Gunner
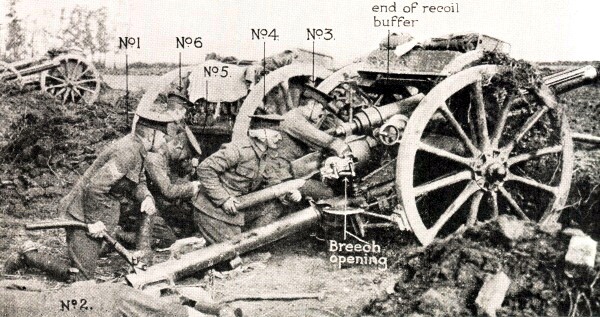
The British Expeditionary Force first landed in France on 9 August 1914 and by the Battle of Mons numbered four infantry divisions and five cavalry brigades. (Two additional divisions would arrive by the end of August.) Each infantry division had three field artillery brigades equipped with 54 18-pounder guns, one field howitzer brigade with 18 4.5 in howitzers, and one heavy artillery battery with 4 60-pounder guns. Each cavalry brigade had one battery of Royal Horse Artillery; each battery being equipped with 6 13-pounder field guns, for a total of 30 13-pounders.
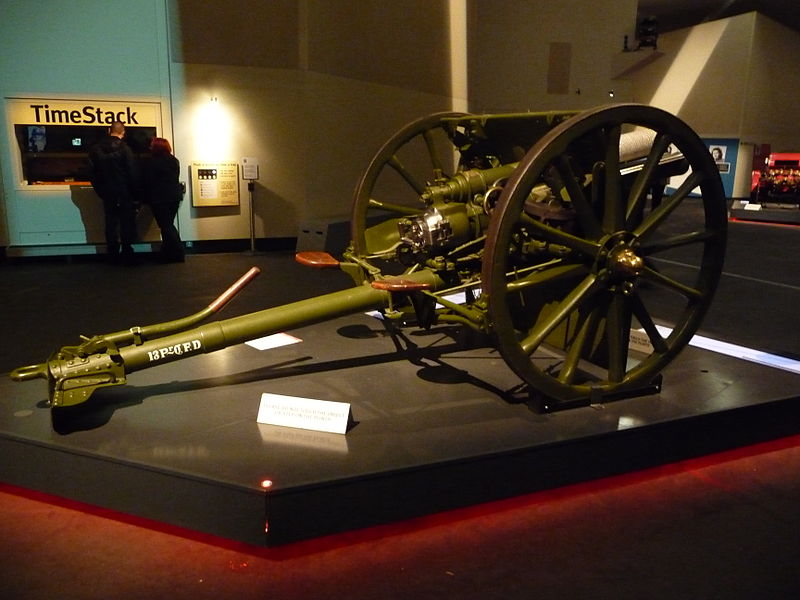
18-pounder QF Field Gun (Wikipedia)
1st Division:
25th Artillery Brigade: 113th Battery, 114th Battery, 115th Battery, RFA
26th Artillery Brigade: 116th Battery, 117th Battery, 118th Battery, RFA
39th Artillery Brigade: 46th Battery, 51st Battery, 54th Battery, RFA
53rd (Howitzer) Artillery Brigade: 30th Battery, 40th Battery, 57th Battery, RFA
2nd Division:
34th Artillery Brigade: 22nd Battery, 50th Battery, 70th Battery, RFA
36th Artillery Brigade: 15th Battery, 48th Battery, 71st Battery, RFA
41st Artillery Brigade: 9th Battery, 16th Battery, 17th Battery, RFA
Howitzer Brigade: 47th Battery, 56th Battery, 60th Battery, RFA
General Support: 35th Battery, RGA
3rd Division:
23rd Artillery Brigade: 107th Battery, 108th Battery, 109th Battery, RFA
40th Artillery Brigade: 6th Battery, 23rd Battery, 49th Battery, RFA
42nd Artillery Brigade: 29th Battery, 41st Battery, 48th Battery, RFA
30th (Howitzer) Artillery Brigade: 128th Battery, 129th Battery, 130th Battery, RFA
General Support: 48th Battery, RGA
5th Division:
15th Artillery Brigade: 11th Battery, 52nd Battery, 80th Battery, RFA
27th Artillery Brigade: 119th Battery, 120th Battery, 121st Battery, RFA
28th Artillery Brigade: 122nd Battery, 123rd Battery, 124th Battery, RFA
8th (Howitzer) Brigade: 37th Battery, 61st Battery, 65th Battery, RFA
General Support:: 108th Battery, RGA
1st Cavalry Division (4 brigades): D Battery, E Battery, I Battery, J Battery, RHA
5th Cavalry Brigade (independent): L Battery, RHA
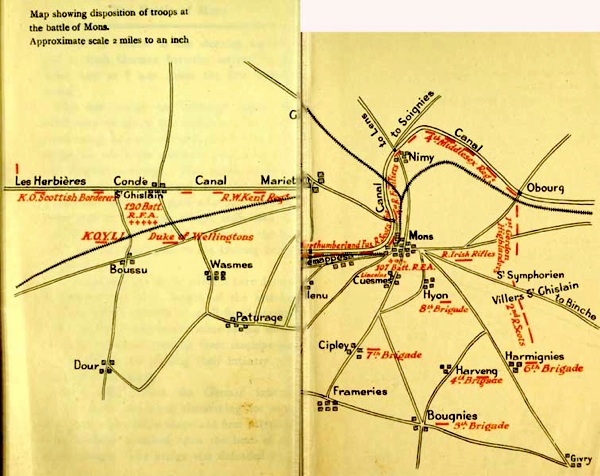
The Battle of Mons was part of a larger campaign later called the Battle of the Frontiers, the result of France implementing its Plan XVII and Britain deploying the BEF in response to Germany’s violation of Belgian neutrality. After conquering the fortresses of Liege and Namur, the German Army continued its advance toward France in accordance with the Schlieffen Plan. Generaloberst Alexander von Kluck’s 1. Armee advanced toward the French border and encountered the BEF near the Belgian town of Mons. The BEF had taken up positions along the Mons–Condé Canal in order to delay the advance of the 1. Armee and protect the left flank of the French Army as it prepared to meet the oncoming German assault. While the canal provided a useful obstacle for defensive positions, some British accounts after the war related that the surrounding terrain was difficult from an artillery perspective. There were some good locations for siting batteries on the high ground south of the canal, but for the most part along the line, artillery officers had difficulty in finding suitable positions for batteries or even for single guns, as well as in finding proper positions for observation posts. At the time, artillery tactics dictated pushing the field batteries or gun sections as close as possible to the infantry positions to provide supporting defensive fire, and to keep the mass of the artillery, including the heavy battery, on the flanks, where the guns could cover all the open ground and prevent a turning movement.
The BEF first engaged the 1. Armee on 22 August in a cavalry skirmish that also included an exchange of artillery fire. The 4th (Royal Irish) Dragoon Guards, along with E Battery, Royal Horse Artillery, exchanged fire with the German Kürassier-Regiment Königin (Pommersches) Nr.2. No. 4 Gun, E Btry, RHA earned the honor of firing the first British artillery round of the First World War in the vicinity of Bray, along the Mons- Charleroi road. Additionally, on 22 August, two RFA batteries of the British I. Corps came under fire from German batteries of the 17. Infantrie Division, causing some of the first British casualties of the war.
Ordnance QF 13-pounder Light Gun; No. 4 Gun, E Btry, RHA – Imperial War Museum (Wikipedia)
On 23 August shortly before 9a.m., German field guns took up positions on the high ground north of the canal and began heavy shelling of the British line. Battery after battery from from 1. Armee moved forward and joined the barrage; the Germans gradually achieved almost a 2:1 advantage in artillery during the battle. Throughout the day, German infantry regiments attacked the British line with direct support from their own field artillery. The British infantry stubbornly resisted the attacks with equally effective close support from its Royal Field Artillery batteries. At one point during the battle, Grenadier-Regiment Prinz Karl von Preußen (2. Brandenburgisches) Nr. 12 from the 5. Infantrie Division, supported by up to five batteries of field artillery, pushed hard against positions of the 1st West Kent and 2nd King’s Own Scottish Borderers Regiments. The 120th Battery, RFA, had significant effect in support; however, the battery was eventually forced to withdraw with the loss of two guns, abandoned in their exposed position on the canal at St. Ghislain. Further along the line, 107th Battery, RFA, provided equally effective fire in support of a company of 4th Royal Fusiliers defending the Nimy Bridge, largely due to the accuracy of artillery observers entrenched with the infantry. Eventually, the BEF was forced to withdraw from its positions; Royal Artillery batteries up and down the line gallantly covered the deliberate withdrawal of their infantry brothers. Supporting the rearguard action of the 2nd South Lancashire and 1st Lincolnshire Regiments near Ciply/Frameries, 109th Battery, RFA provided devastating fire which helped break the assault of three German regiments of the 6. Infantrie Division. Reportedly, 37th Battery, RFA, fired its howitzers “as if they were machine guns.” (Lomas) Despite giving up terrain, Mons can be considered a tactical success for the BEF, especially in terms of artillery support to the infantry. Up and down the British line in the defense, as well as during the withdrawal, the action of the Royal Artillery at Mons provided a text book study of field artillery in close support of infantry.
Works Cited: The vignettes and histories related in these articles have been compiled from various sources found on the internet, as well as many published references. They are meant only to provide a snapshot and encourage further research of artillery in the First World War. Any inaccuracies, misquotes, or dropped citations are unintentional and if brought to my attention, will be corrected immediately.
Chandler, David and Ian Beckett. Ed. The Oxford History of the British Army. Oxford: Oxford University Press, 2003. Web. 23 August 2014.
Doyle, Arthur Conan. The British Campaign in France and Flanders 1914. New York: George H. Doran, Co., 1918. Web (CGSC.edu). 23 August 2014.
Edmonds, James E. The Battle of Mons: Military Operations France and Belgium 1914. New York: Macmillan, 1933. Web. 23 August 2014.
Hamilton, Ernest W. The First Seven Divisions: Being a Detailed Account of the Fighting from Mons to Ypres. Toronto: McClelland, Goodchild & Stewart, 1916. eBook. 24 August 2014.
Lomas, David. Mons 1914: The BEF’s Tactical Triumph. London: Osprey, 2014. Web. 24 August 2014.


2 Comments
Recommended Comments