


Spasm
-
Posts
1,869 -
Joined
-
Last visited
-
Days Won
7
Content Type
Profiles
Forums
Blogs
Gallery
Events
Store
Posts posted by Spasm
-
-
-
-
The Southampton newspaper articles on the court trial
It actually says Woolley Bully - now I know where the song originates
 0
0 -
more elbows
 0
0 -
-
sorry agaion
 0
0 -
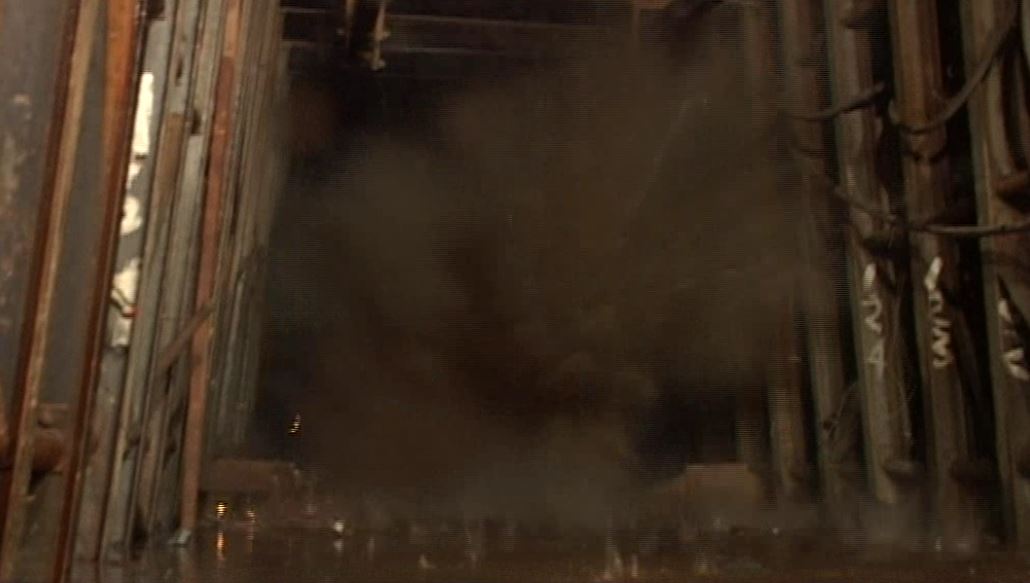
This is what that stuff does.
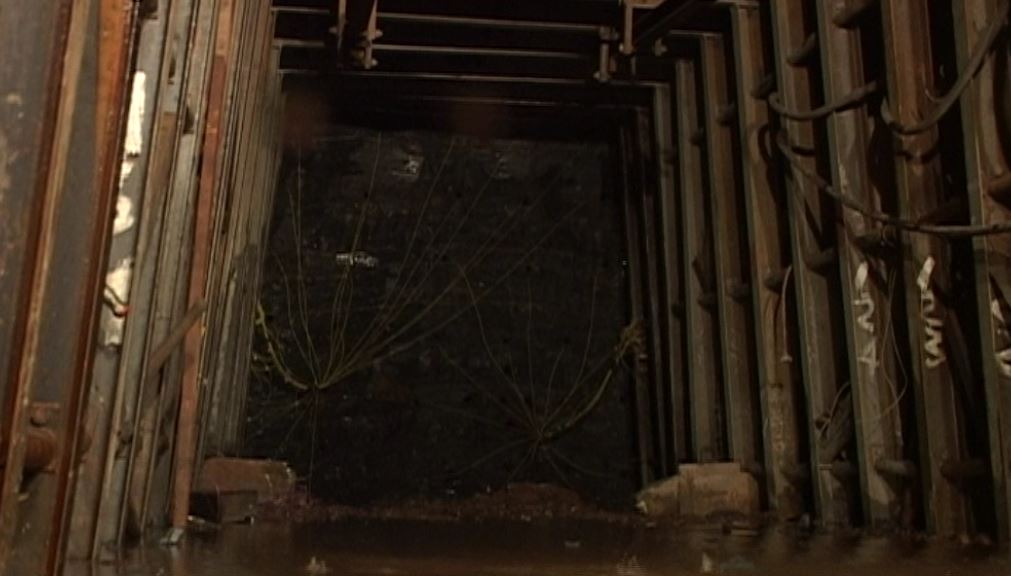
The photos are in series from a very short film that we made on one of my tunnel jobs. I could only get half of the blast on the 25% speed film. You can clearly see the tunnel temporary works while the tunnel progressed. Essentially the same gear was used as in Chris' picture above. Drill a load of holes, stick in some dynamite, set electronic fuses and bang! Go back down, dig out the rock and start all over. 2 years to drill and blast a tunnel about half a mile long 80 metres below Bristol town centre (no damage at all to the historic 17th and 18th century buildings above). Good job.
The last picture shows how the perspex box, the camera was in, broke.
Now I wonder what Chris is gonna do with his. Be careful mate.


 0
0 -
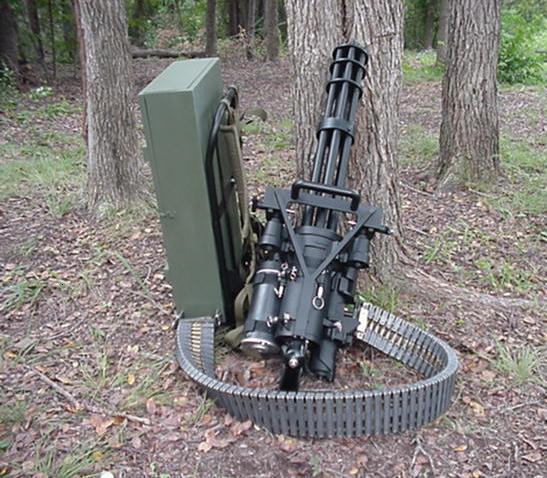
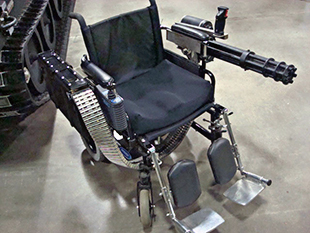
Think Chris got it. The picture is the right way round (the lettering on the M136 is upside down so you can read it knelt on the ground).
Here's one showing the right side feed and Mervyn's new sword stick and door opening gadget.
 0
0 -
He must be carrying a whole heap of barrels (and ammo come to that).
0 -
Blimey, what is that they are firing just out of shot?
There seems to be at least one live round in there too.
 0
0 -
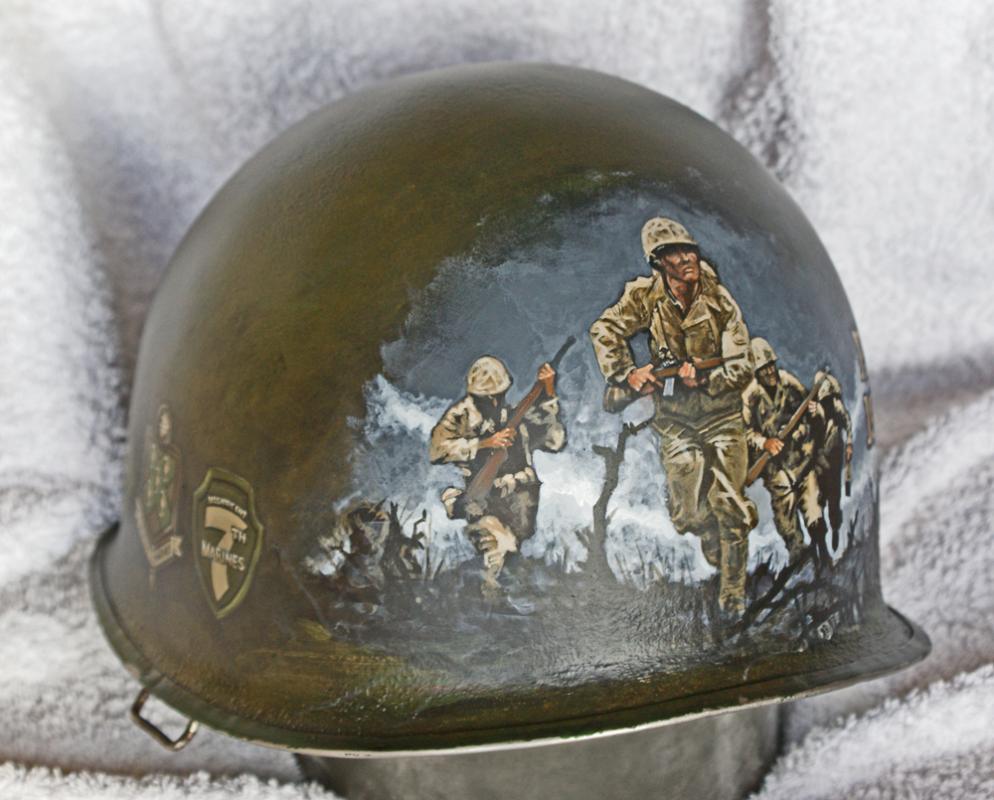
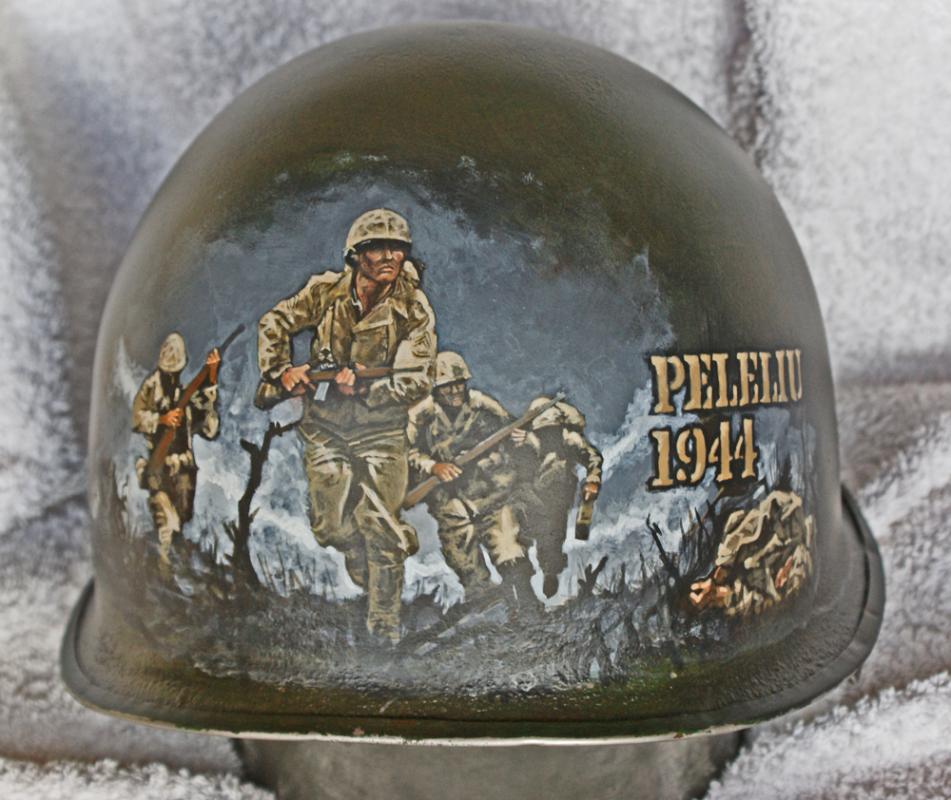
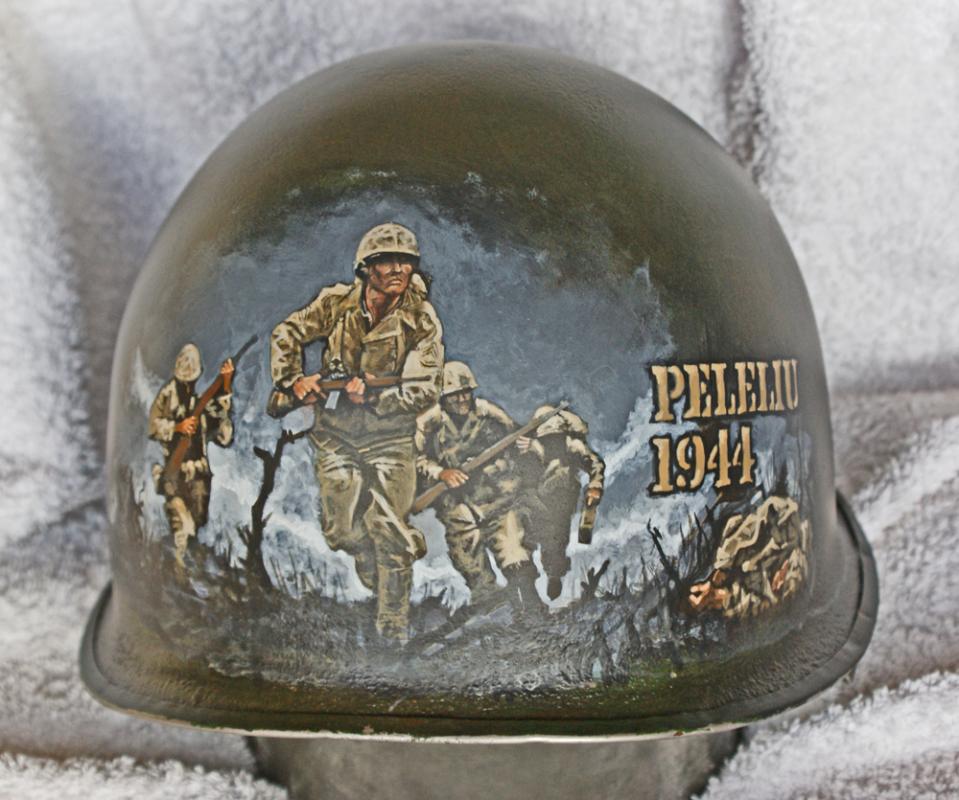
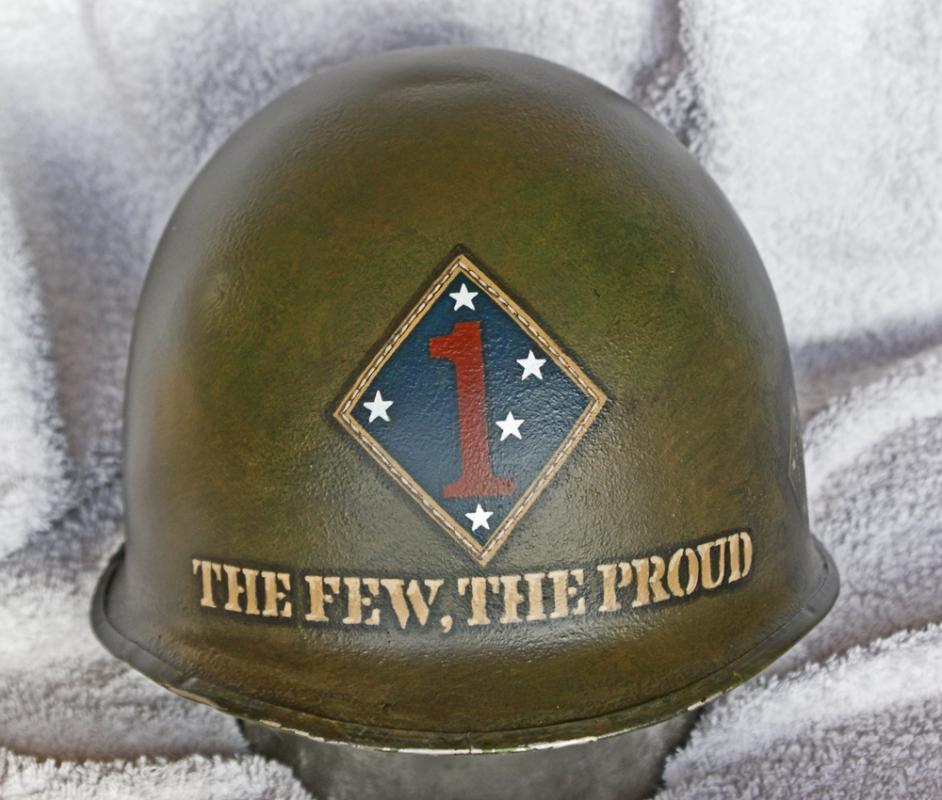
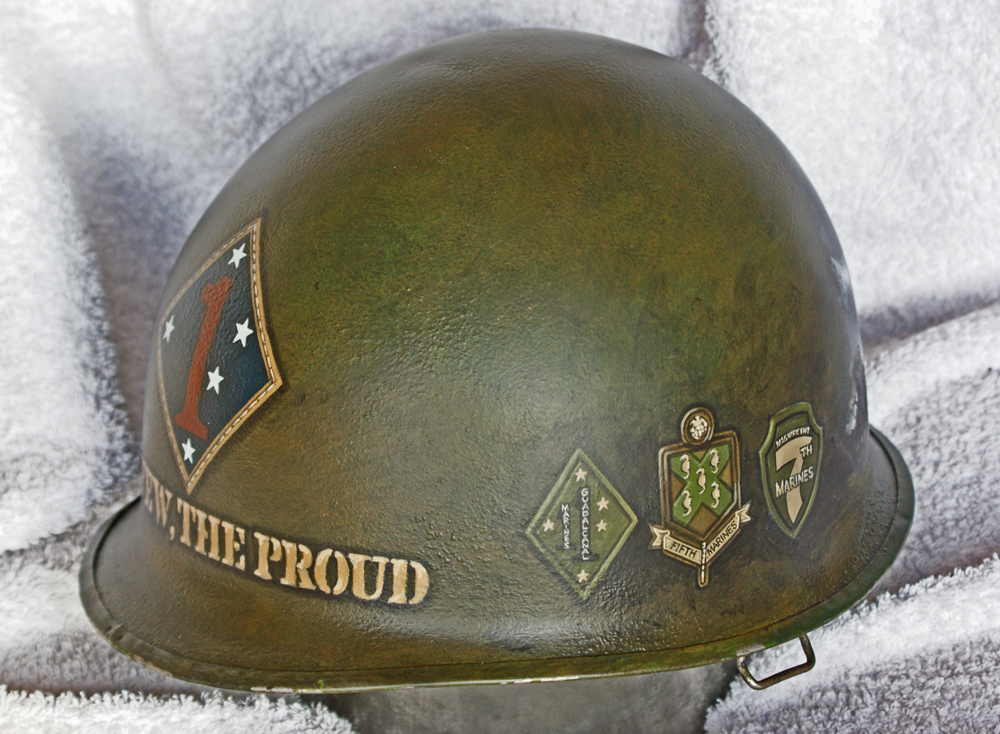
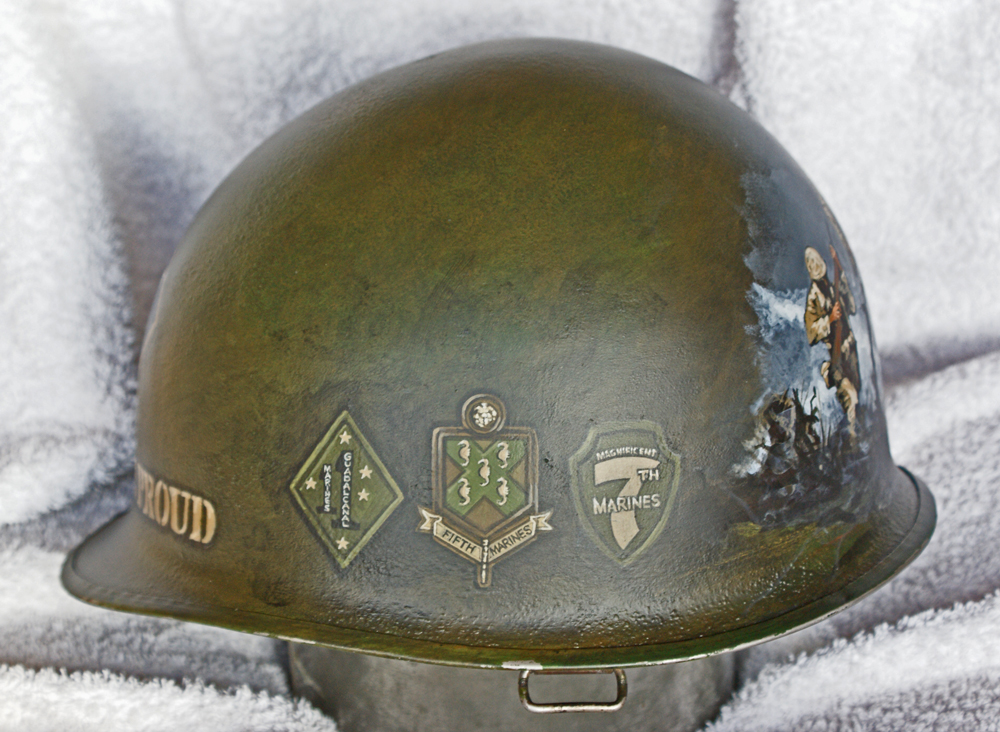
It's the 1st, 5th and 7th Marine Regiments of the 1st Marine Division who landed on the Peleliu beach at 08.30 on 15 September 1944.
73 days later the island was declared secure (although some 35 Japanese held out in caves until 22 April 1947). The 1st Marine Division suffered over 6,500 casualties in their one month stay on Peleliu, over one third of the entire Division and remained out of action until 1 April 1945.
0 -
Didn't realise the size of pictures I load in. When they are opened they are actually larger than the lifesize helmet (maybe thats different depending on your screen size).
It still needs a bit of work now that I look.
 0
0 -
Been working on this one. Received from the other side of the pond a couple of weeks ago. It's an American front seam, swivel bales, stainless rimmed M1 made by Schlueter as it has an impressed S inside the front. The batch number is 303.
Found years and years ago on a Peleliu beach and stored in a garage until bought by a dealer. Was in a bit of a state but cleaned preserved and painted.
 0
0 -
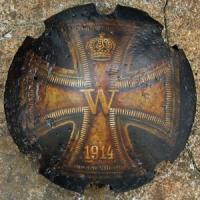
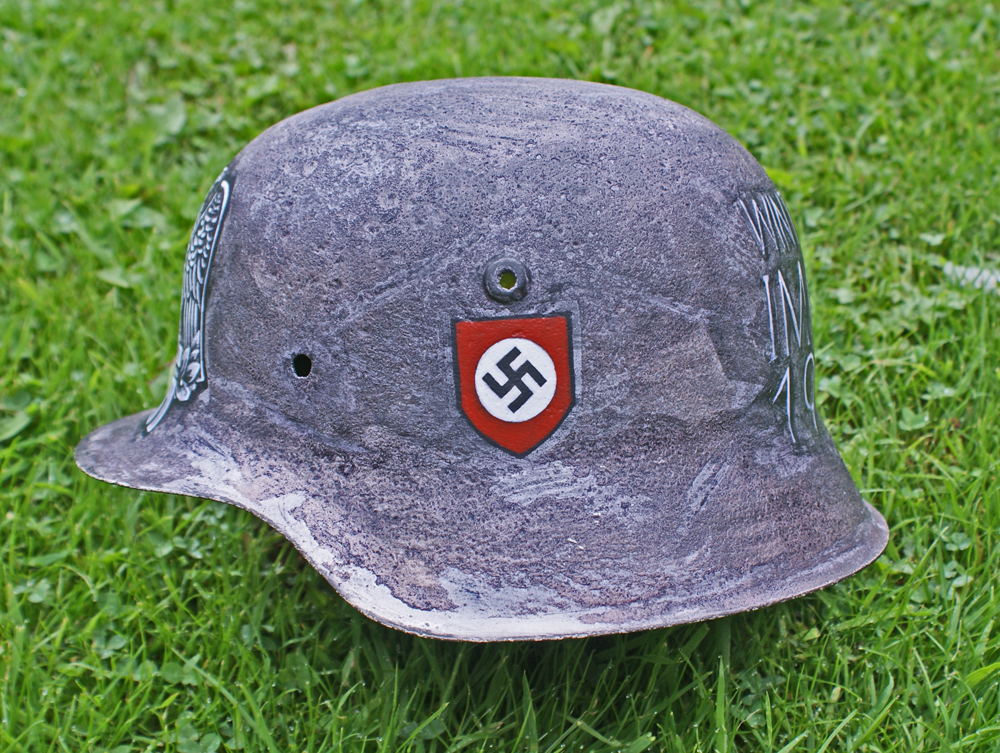
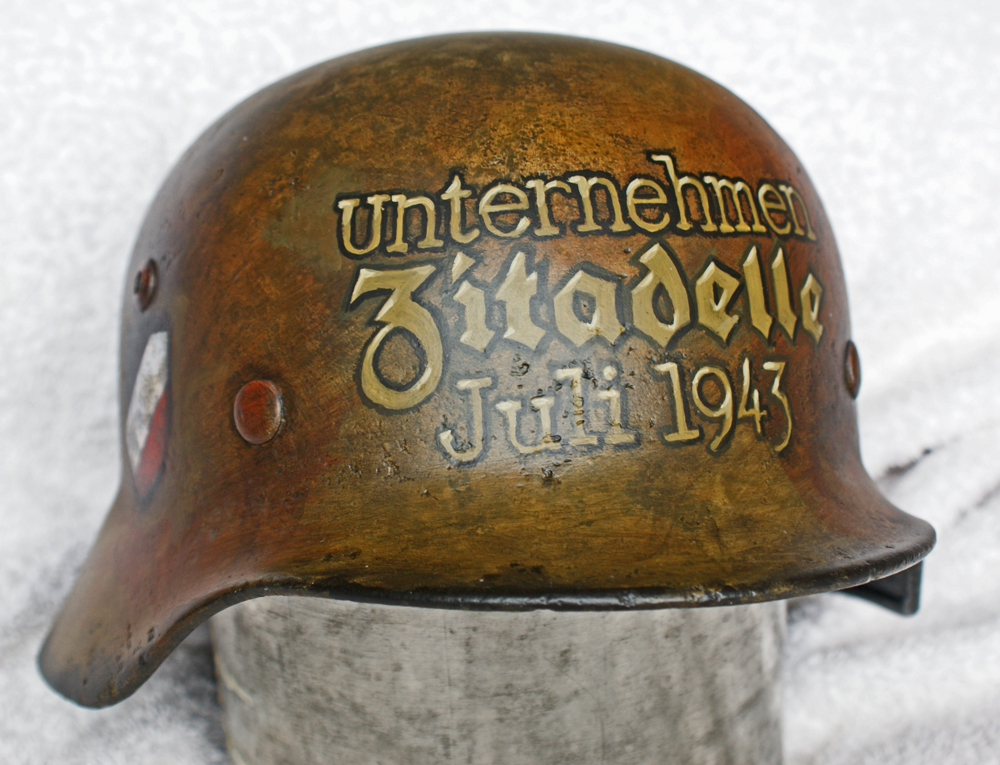
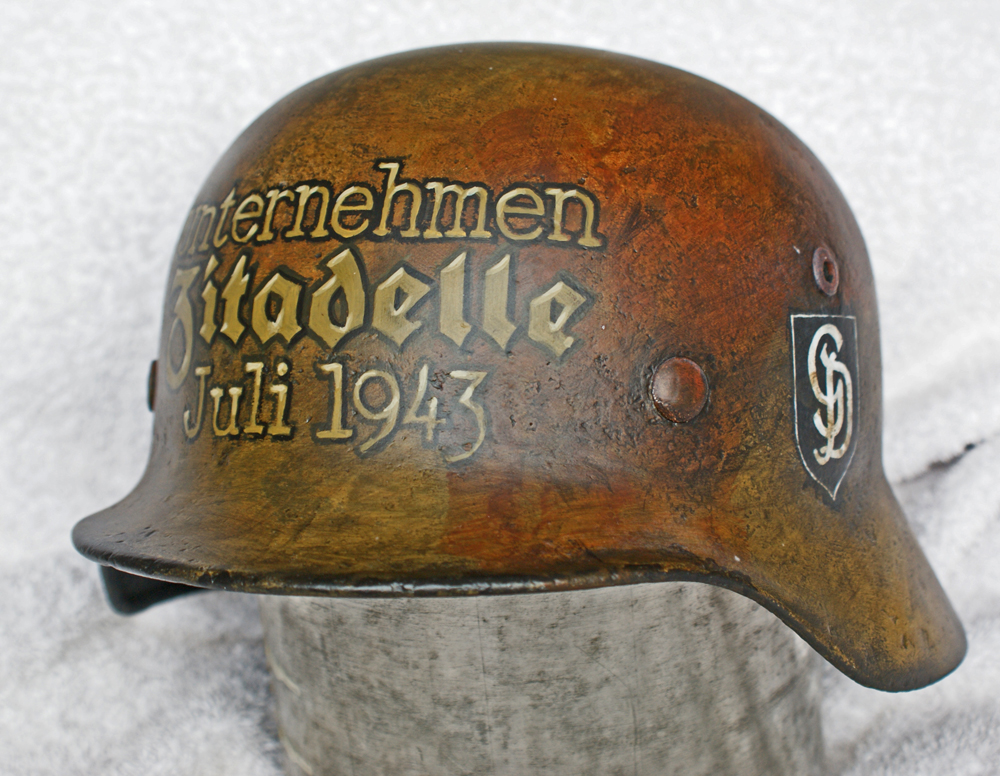
Didn't really like the cufftitle on the Kursk helmet so I've changed it. Much better
 Put a few kill stripes on the barrel as well.
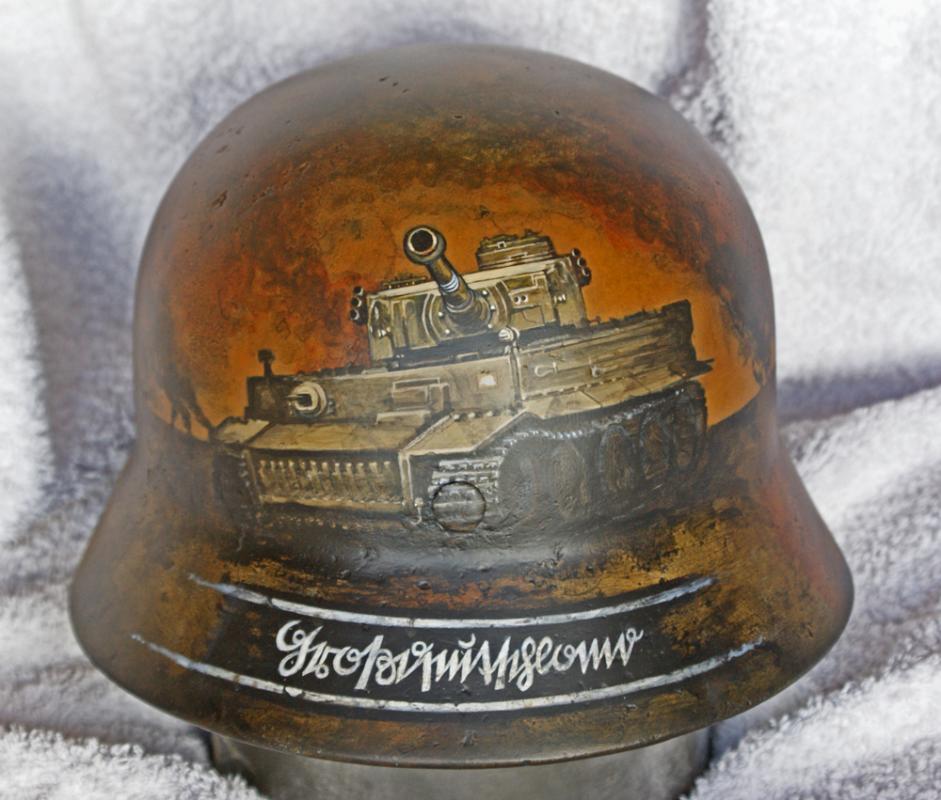 0
0 -
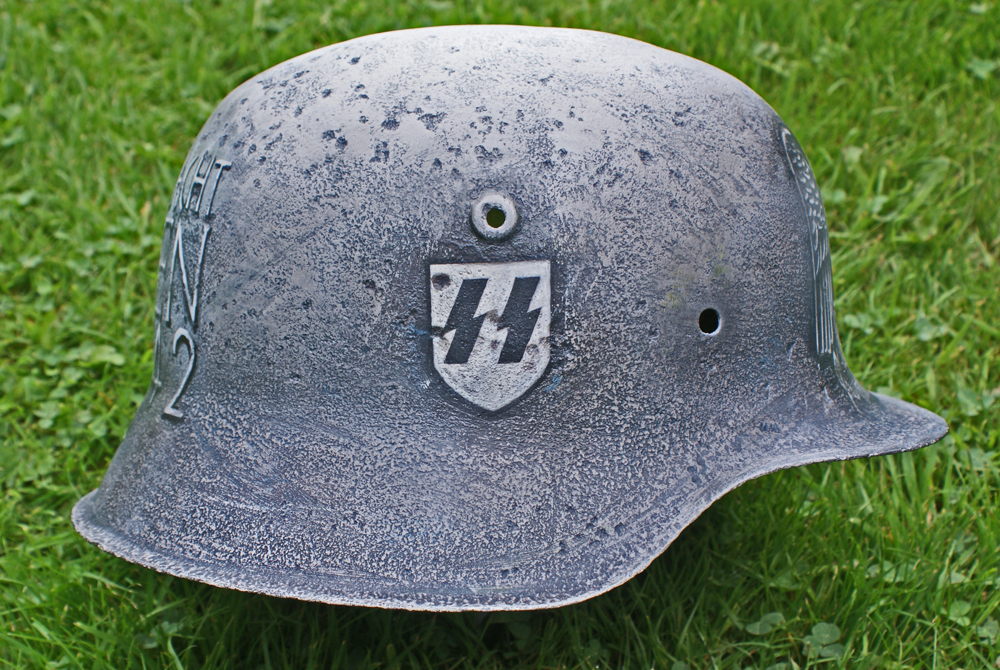
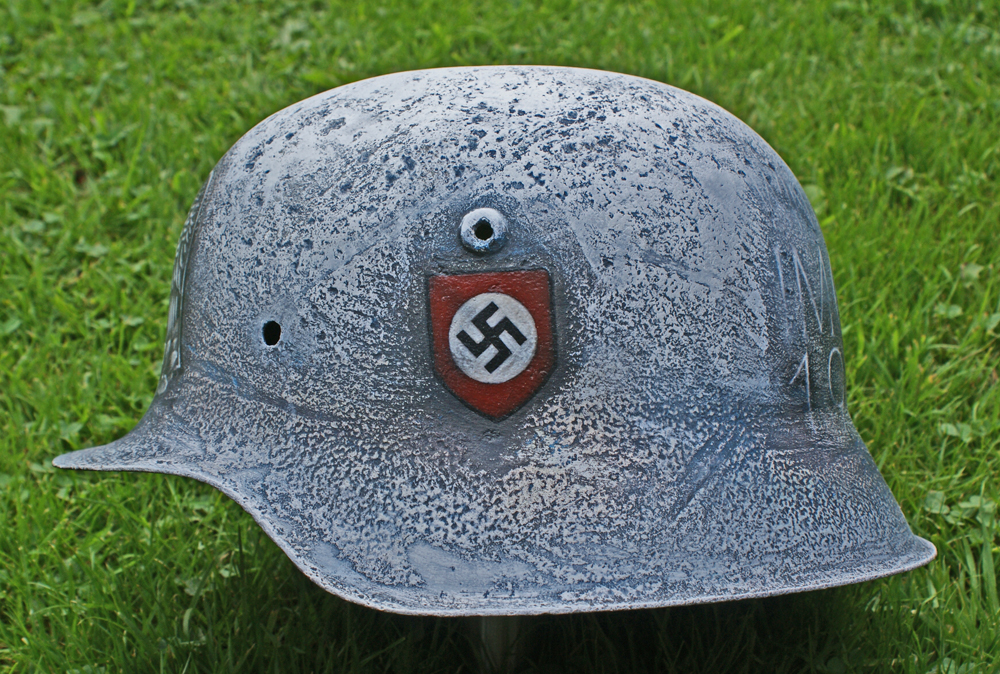
Here's both sides of the finished helmet. It was to commemorate the Ostmedialle (you can just make out the medal details on the front and rear of the helmet) so a build up from dark at the bottom to white at the top so as to appear that the helmet was actually frozen didn't come out too bad. Hopefully the owner likes it.
 0
0 -
Then it's just a matter of painting on the designs and another layer of protection. And trying to get the finished look ok across the whole of the helmet so it all blends in. Lots of airbrushing, blending and use of colour to build up the look while maintaining a strong image on the decals and designs. Takes ages (this one isn't too difficult as it's mostly grey/blue/green/white mixes but some helmets using field greens can take forever to get the look just right).
 0
0 -
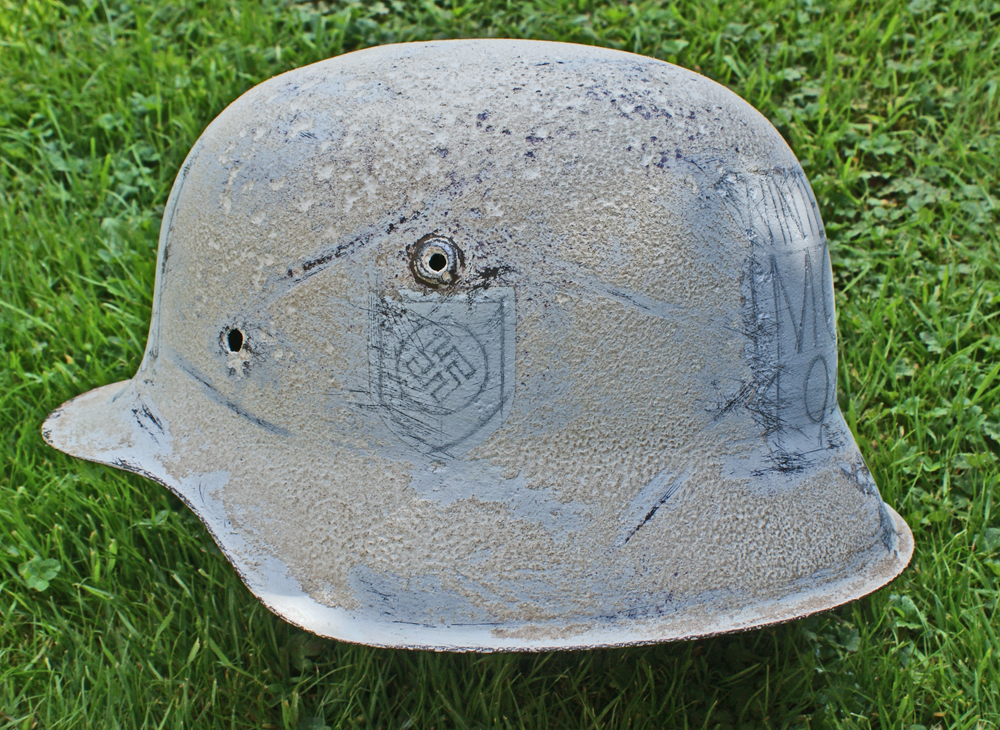
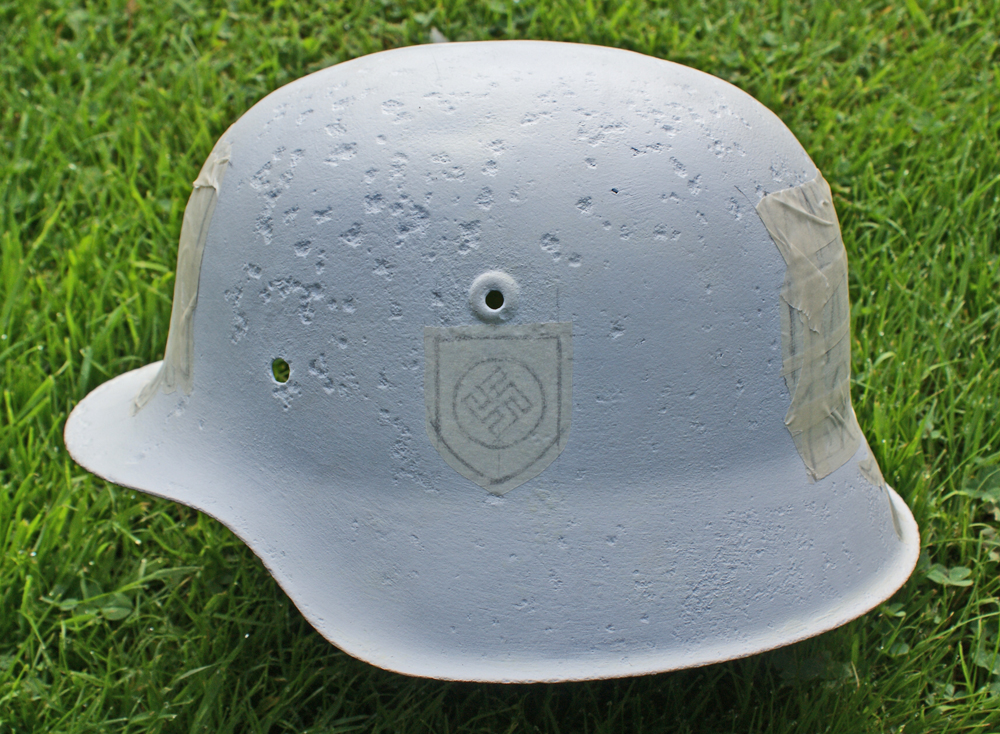
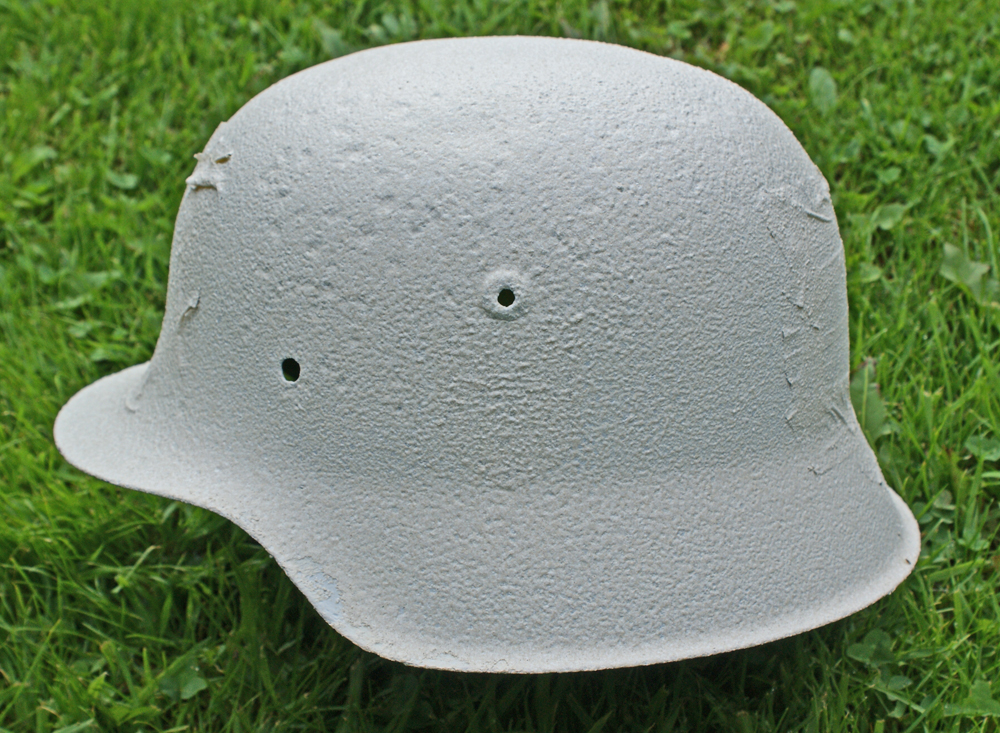
The masking is removed. Edges are sanded down and the overall helmet is sanded, scuffed, rubbed etc to get the finish wanted (I have to hold myself back on this as I have been known to get a bit carried away at this stage and totally overdo it, less is more here).
Then apply a base thin dark coat to flow and stay in the holes, scratches etc that will show through the lighter top coats. This first coat needs to be very dark, no point in playing with feldgrau or greens here.
 0
0 -
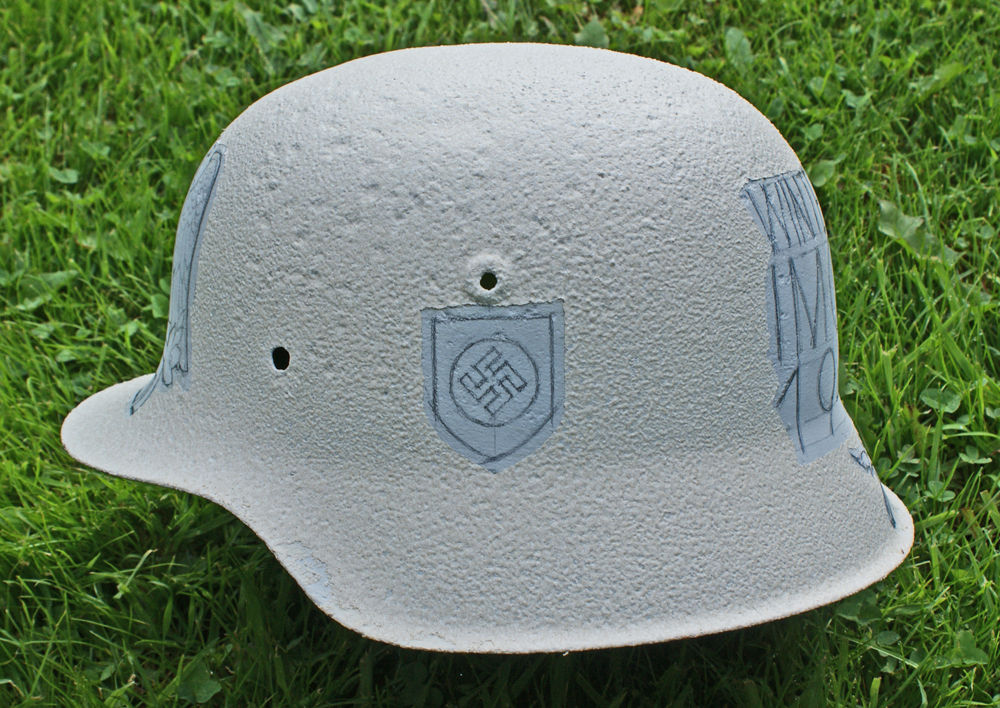
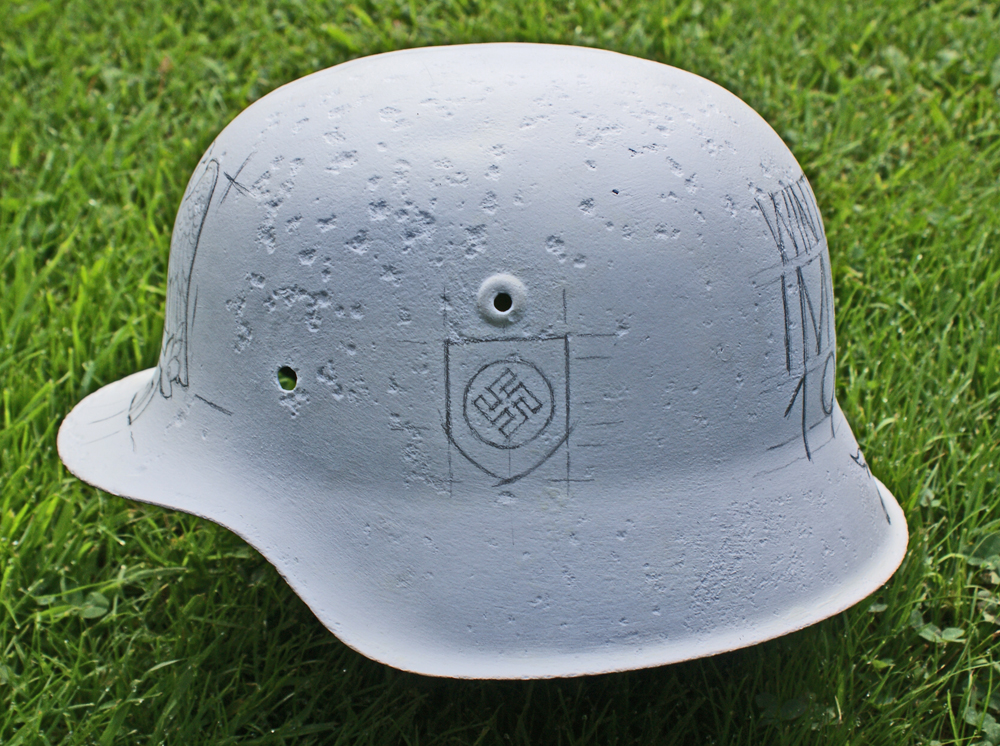
Then, depending on the final design and appearance wanted, I draw on the designs of helmet decals (I don't apply any bought stickers,transfers or decals - all are drawn and painted to the actual sizes of decals) and pictures.
Mask those off and apply a rough finish to the helmet (again depends on the helmet and final look that's required)
 0
0 -
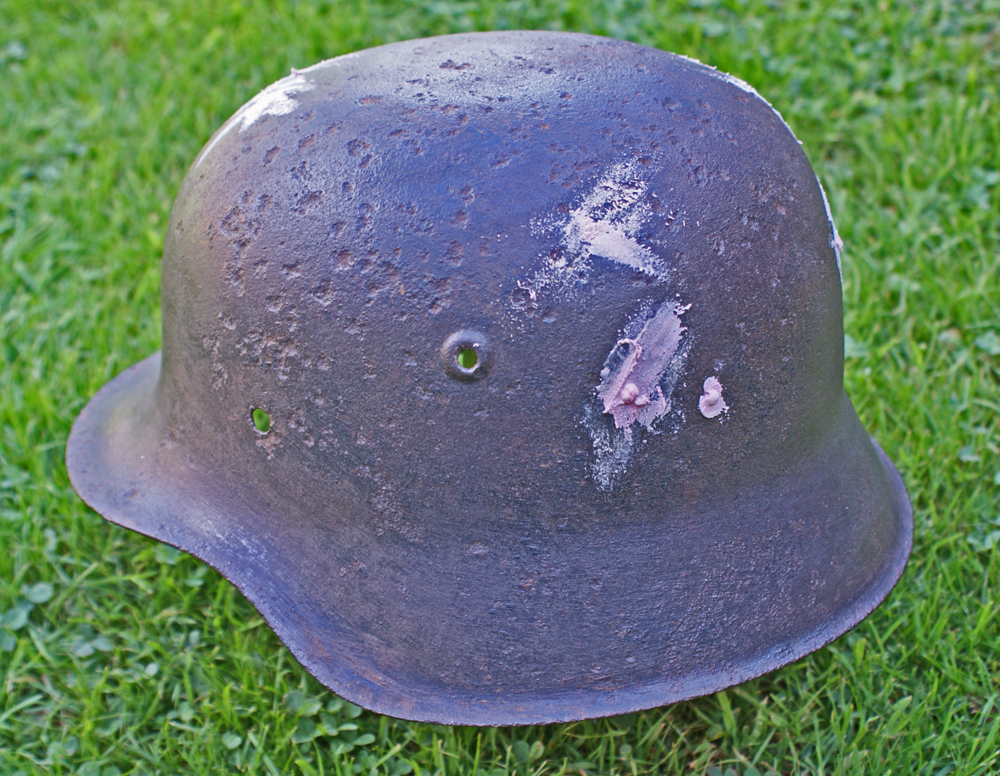
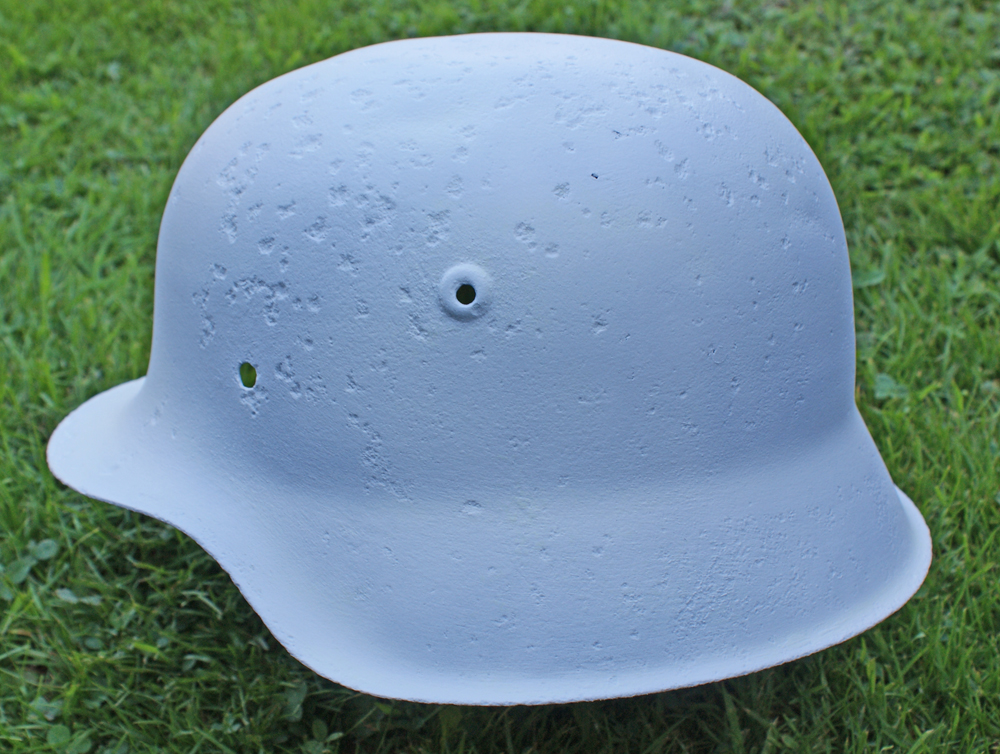
The helmet is then sanded down to metal and any holes filled as in the first picture.
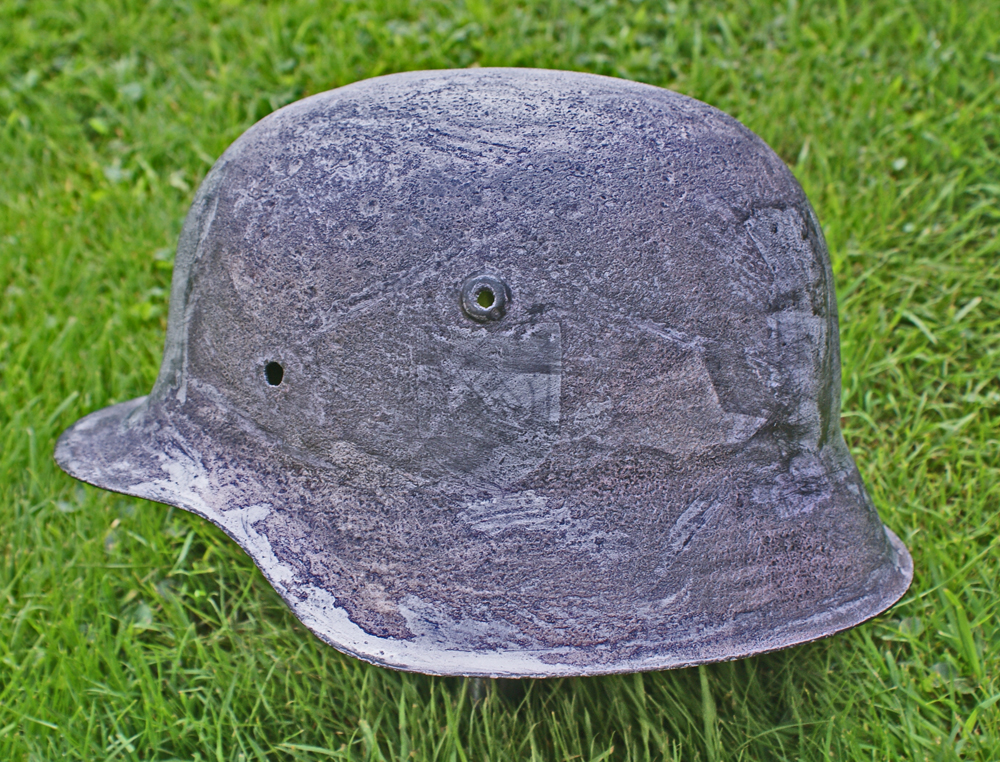
Sanded down again to the finish required, note how I've left most of the rust indents to keep the aged look. Then several coats of rust protection is applied both inside and out.
Then a primer coat is applied, resanded and reprimed where needed.
 0
0 -
Mervyn
Thanks again for that, looking forward to see what you send. No rush, I've a few things lined up to get on with. No worries on the rust or the can of spray, my helmets don't get the rattle can treatment as They need to be protected and look as original as possible so that they can live on a bit. Some buyers have been surprised that I totally redo the whole thing and build/paint in the old used and worn look complete with overpainting, paint chips, rust and a kicked around look (which isn't done by kicking it around - I wish it was). Actually, the overall finish of the helmets take a lot longer than the applied designs.
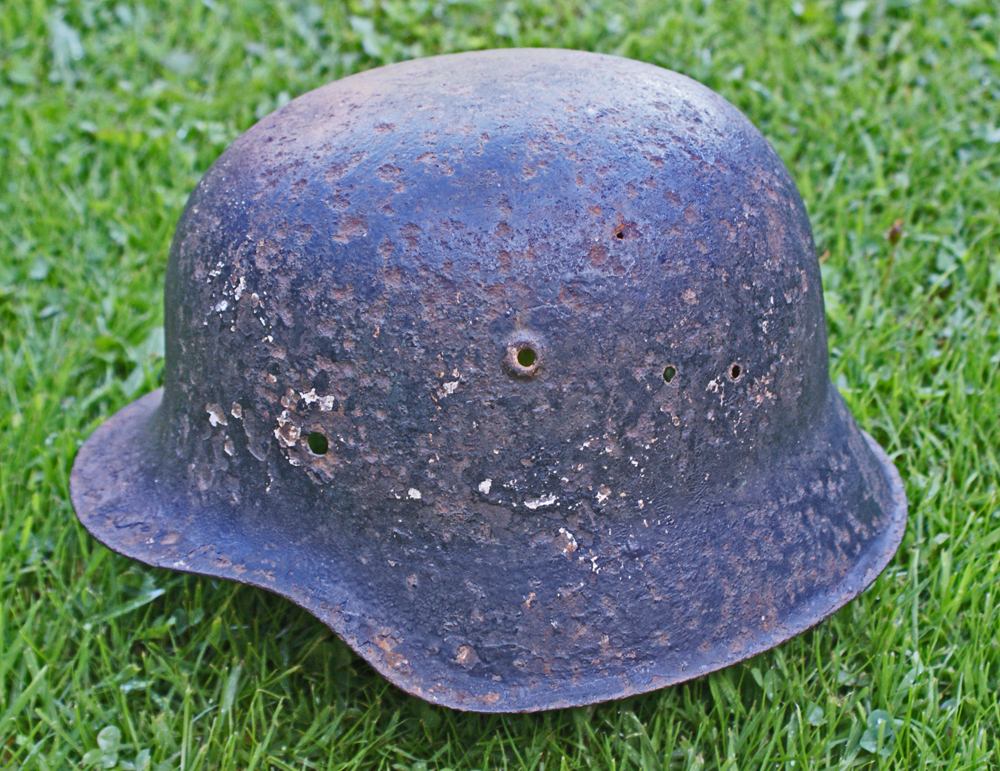
For those that may be interested here's what a helmet goes through once it's been cleaned (that normally takes a large screwdriver to remove an inch of Normandy/Begium/Latvian/Italian/Far Eastern mud and rusted in roots and parts of liners). I carefully check for any remains of decals on the helmets. If there are any (I've only found one so far) they are preserved and kept within the overall design. Then an hour or so of rust removal with a lot of mess to clear up afterwards. Along with varying sizes of plasters to stick on fingers.
I then am happy to end up with something like this:
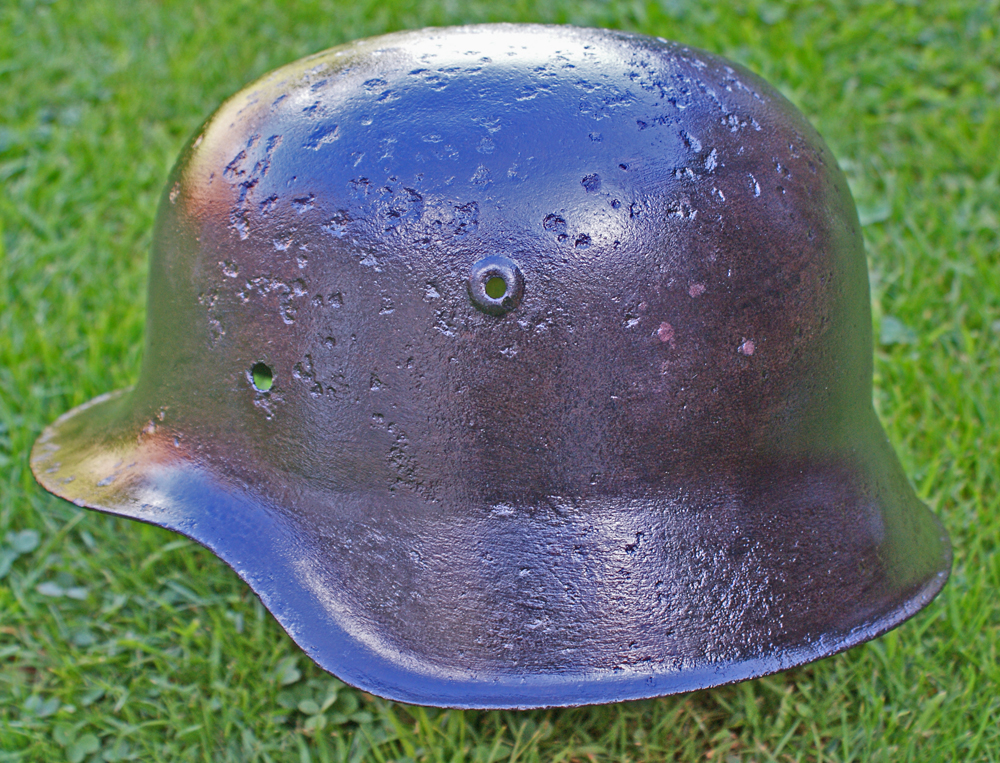
This one is an M42 that came to me covered in some sort of bitumen and had been used as a bucket on a farm. Plenty of chemicals used to get off (paint stripper) and plenty of elbow grease and censored language that had the neighbours commenting. No real large holes though so no need for glass fibre and resin fills that the holey ones have to have. Sometimes I leave the holes to aid the old and used look I'm looking for.
 0
0 -
Rear with burning on horizon and cufftitle.
By the way, Nick, the picture loading is well sorted now. Good job.
 0
0 -
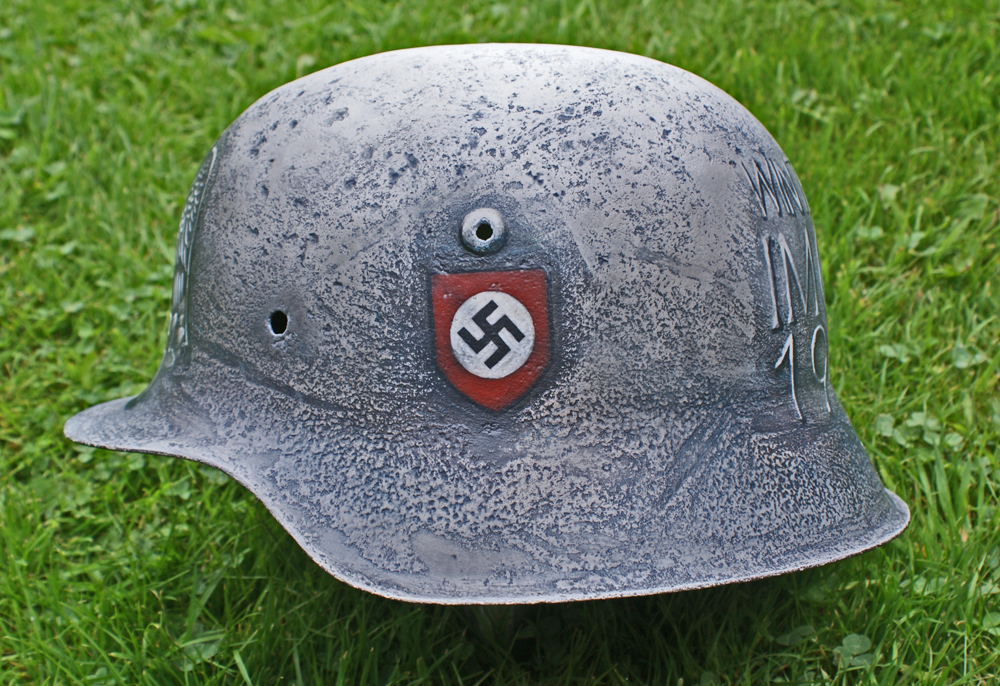
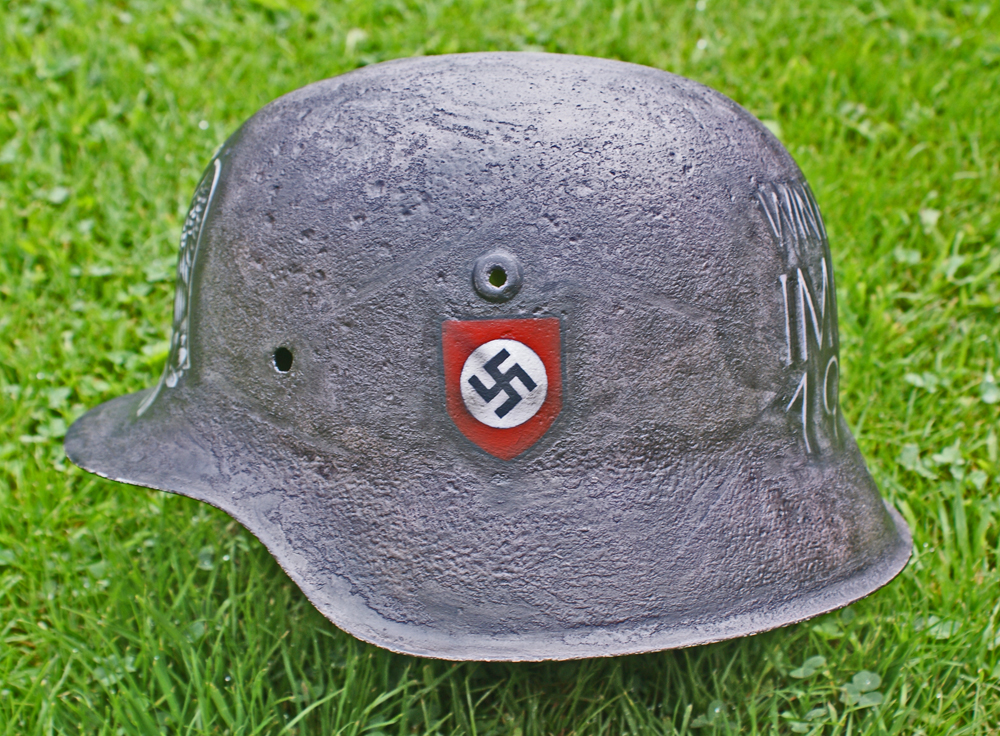
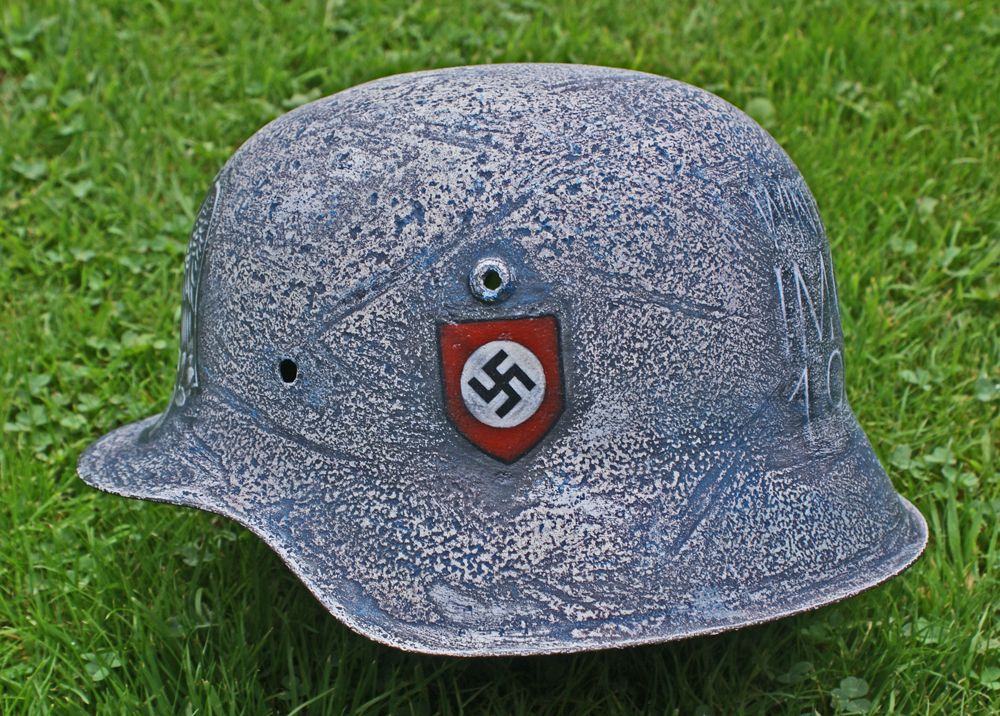
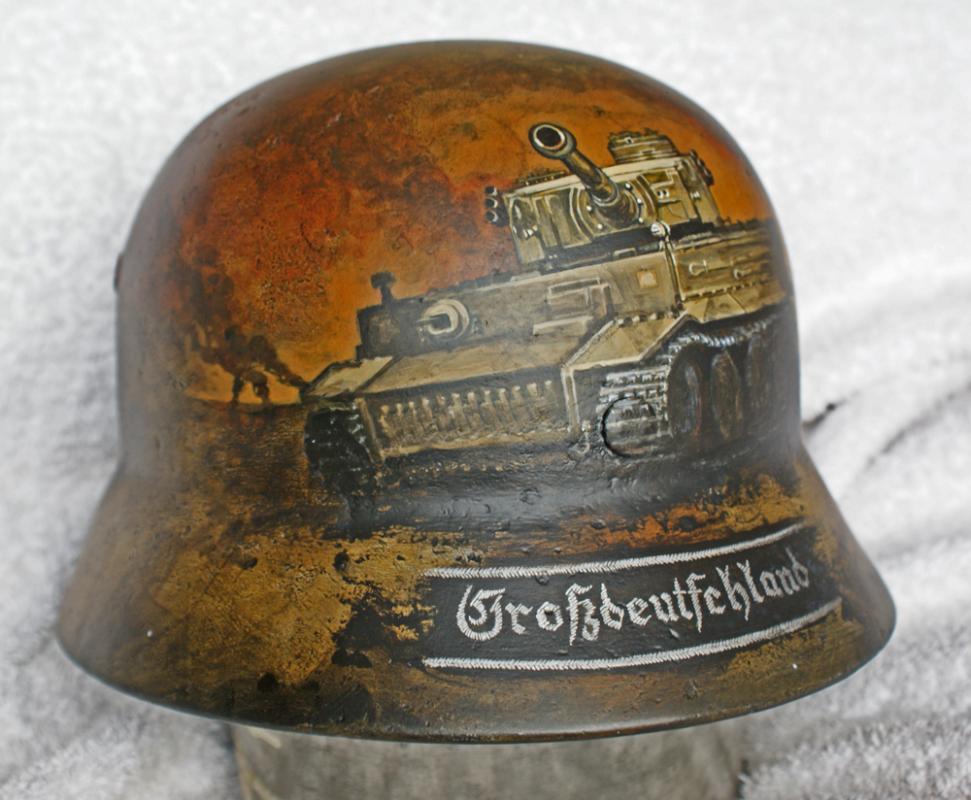
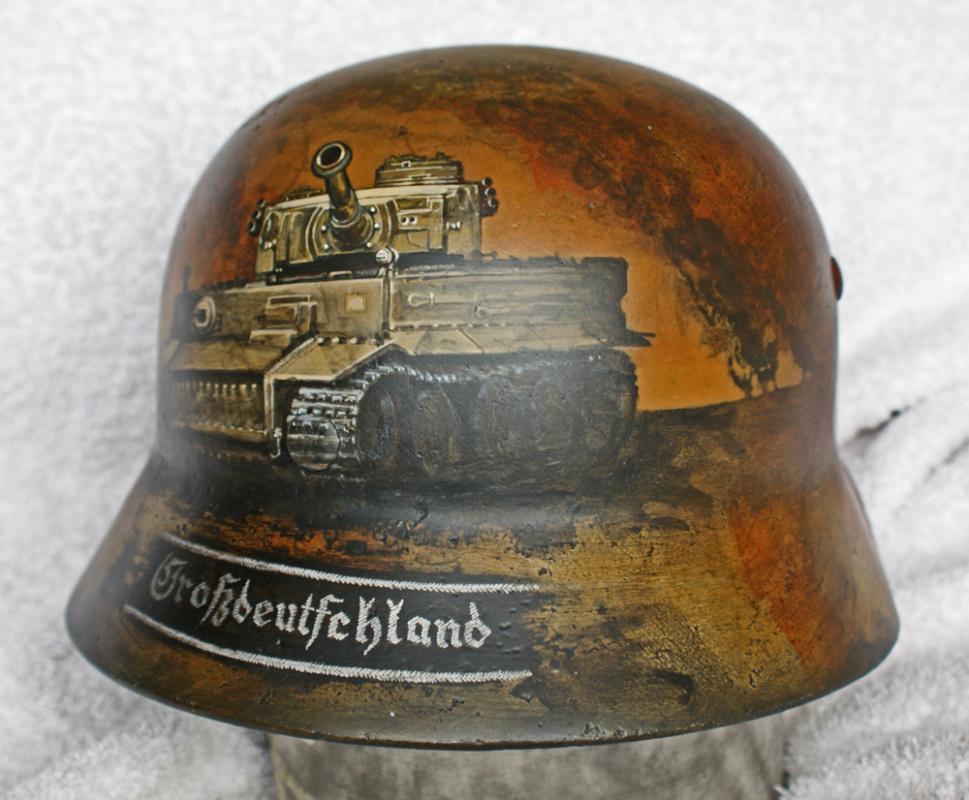
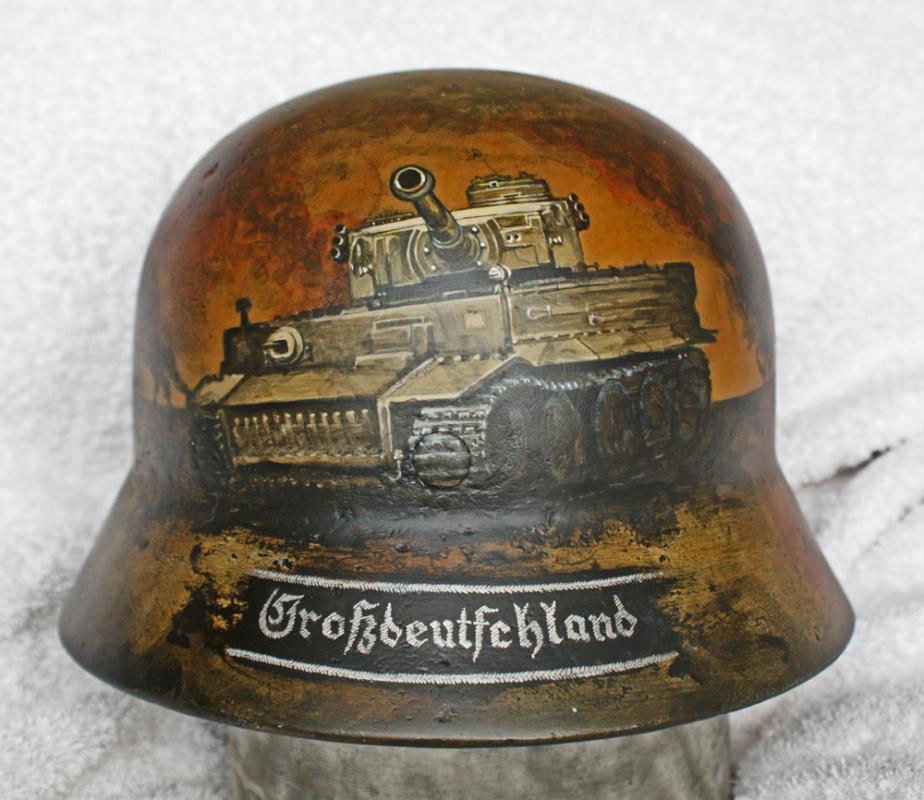
Another one, just finished. Kursk colours with Tiger from Grossdeutchland.

 0
0 -
Paul
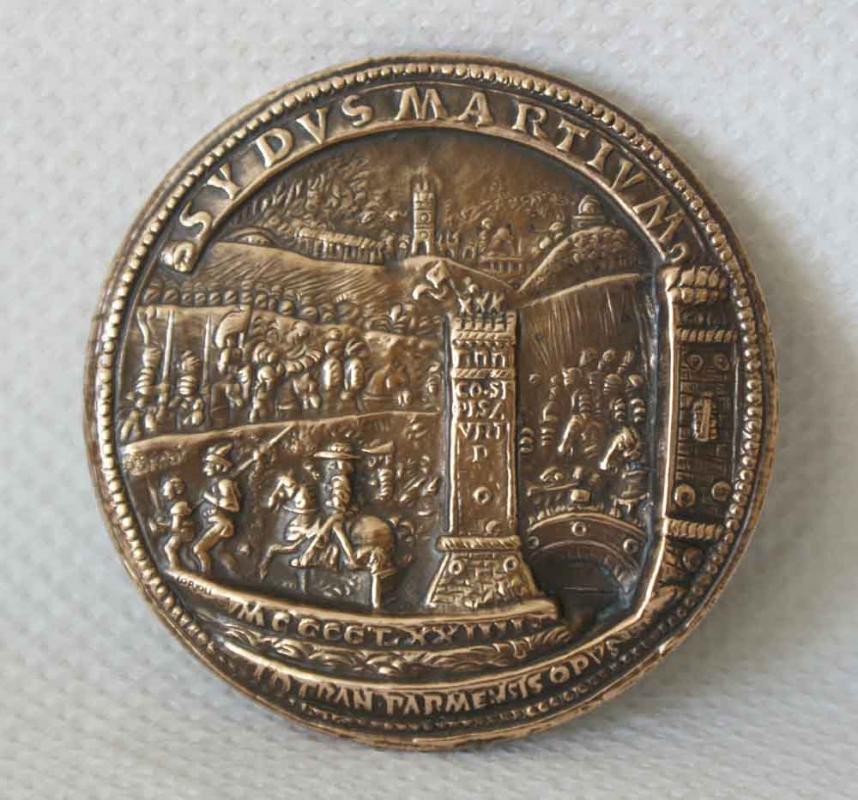
Blimey, and it took me ages to find that out. Yes, a recast by a company called Lorioli (still around today but not doing this sort of stuff I beleive), probably from the 50s or 60s I was told. It's a nice thing though, really thick and heavy. Something else the kids can fight over and then discover it's worth a fiver
Must go off to find the music.No idea on yours though, sorry.
Spaz
0 -
Paul
How fascinating. A copy that isn't even close but must have taken effort and a great amount of time to produce.
Try www.coincommunity.com and put your pictures into the enquiry section. I've done this before and they've been most helpful. I didn't have any clue for this but they were very helpful.
Let us know what you find out

 0
0

Drawings
in Military Art
Posted
Just finished a few more and before they get new wings