


Spasm
-
Posts
1,869 -
Joined
-
Last visited
-
Days Won
7
Content Type
Profiles
Forums
Blogs
Gallery
Events
Store
Posts posted by Spasm
-
-
And on and on..... take it outside to check all looks ok in the daylight. If happy, then get a light spray of lacquer on it to protect as it'll get rubbed and scratched during the rest of the helmet painting.
 0
0 -
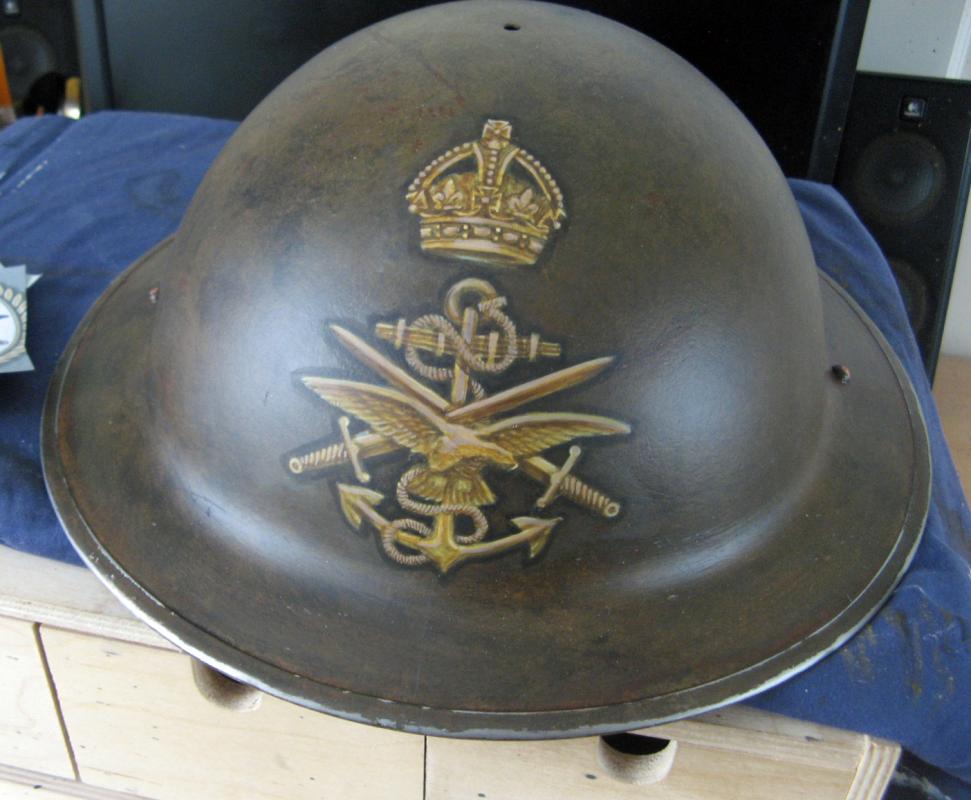
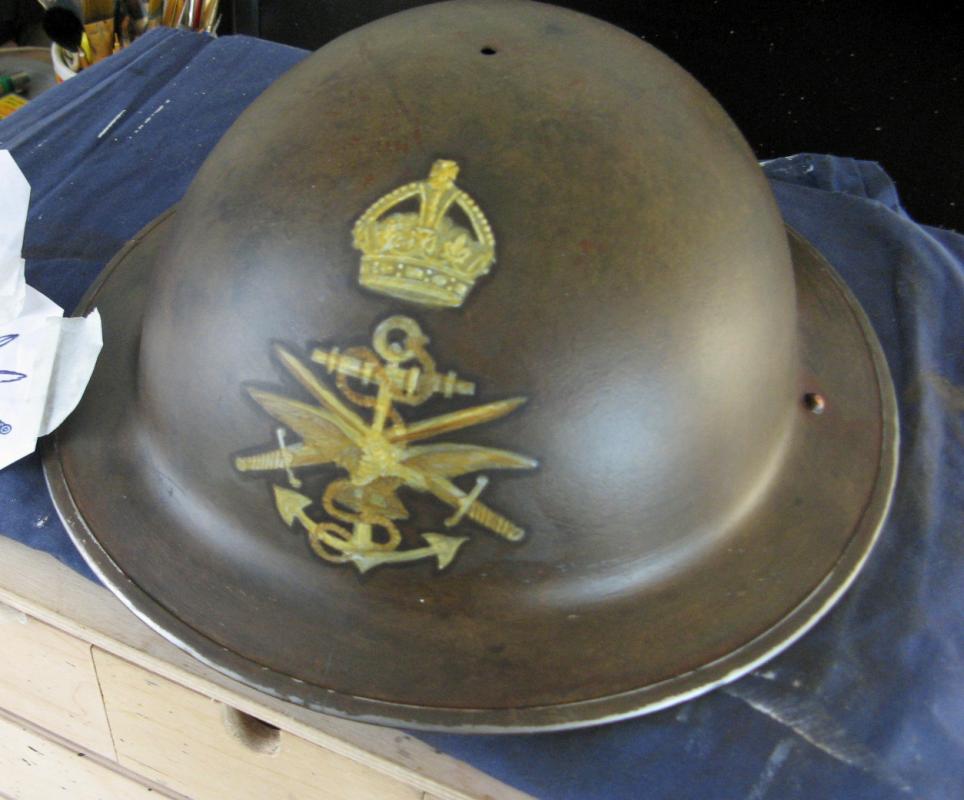
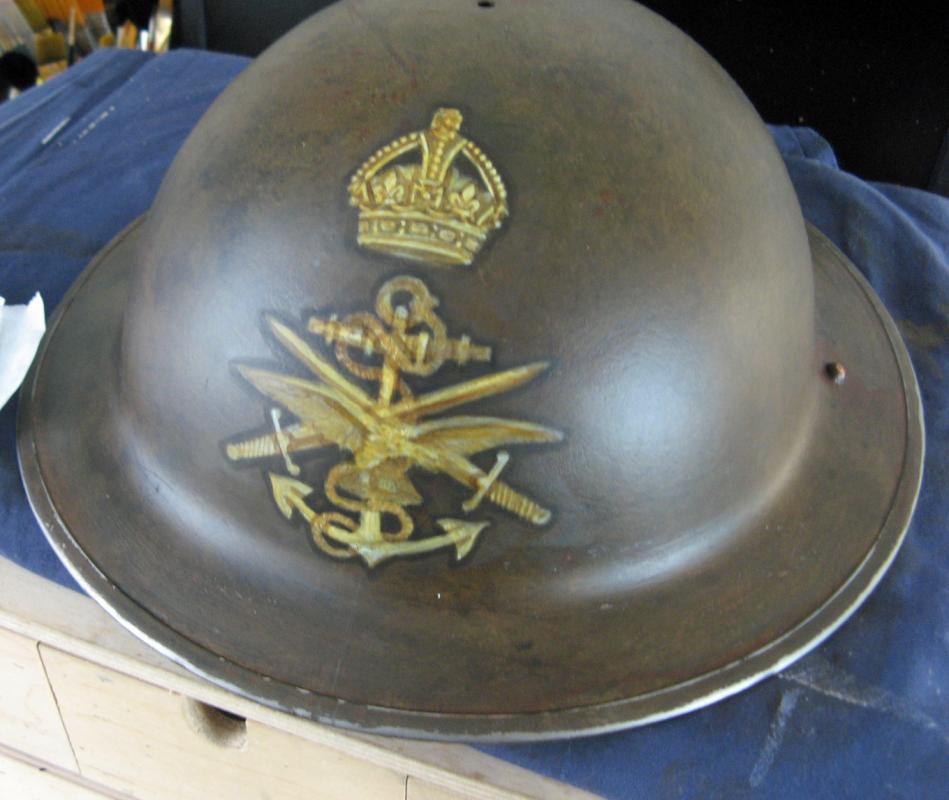
Then I get a base of Yellow Ochre over the white. Then get a shadow around the badge using a wash of black. This won't want to stick to the lacquer so rub gently with your finger through the black being careful not to lift any of the adjacent painting off. It'll go on nicely then.
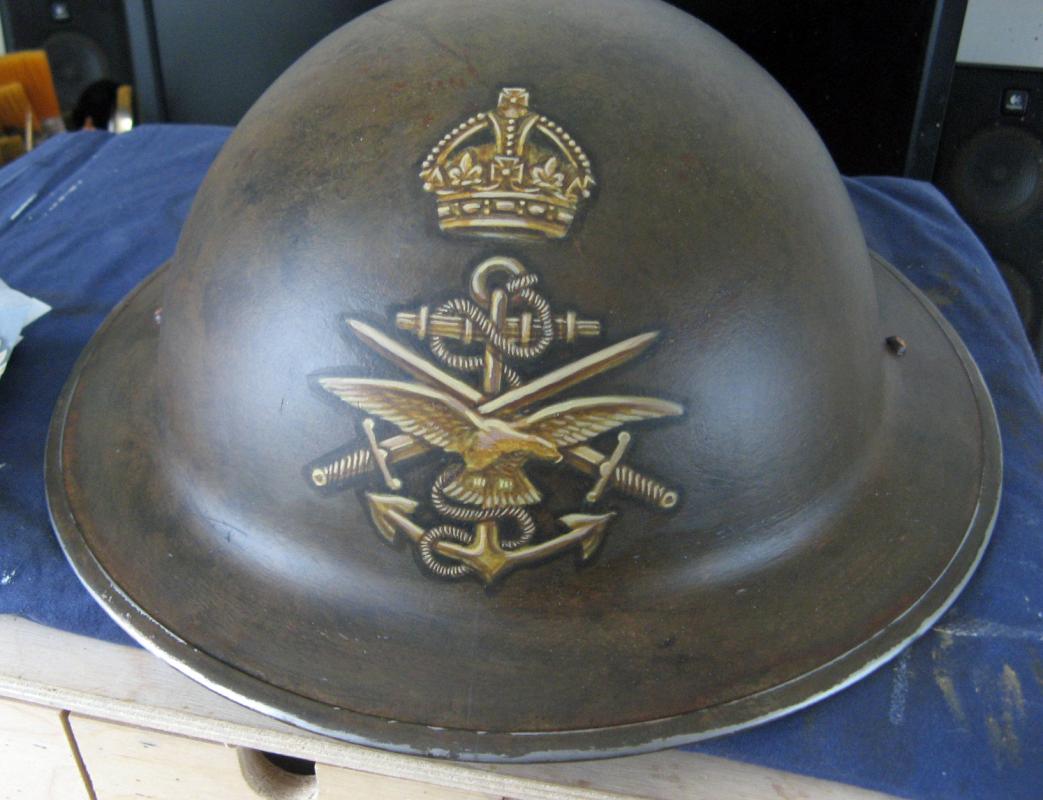
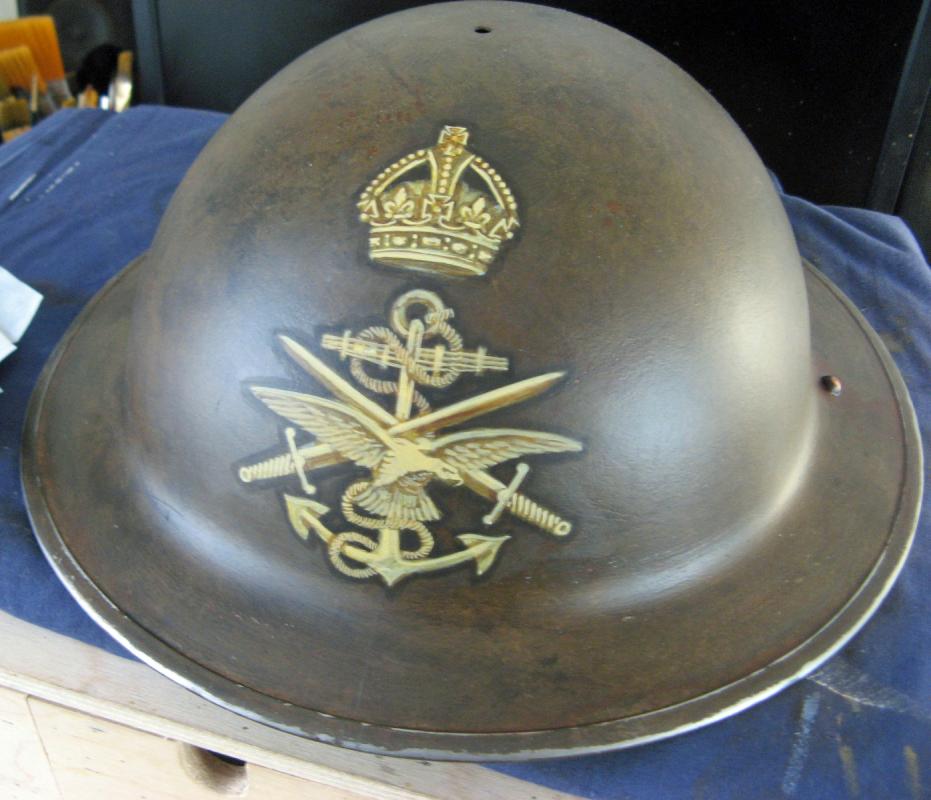
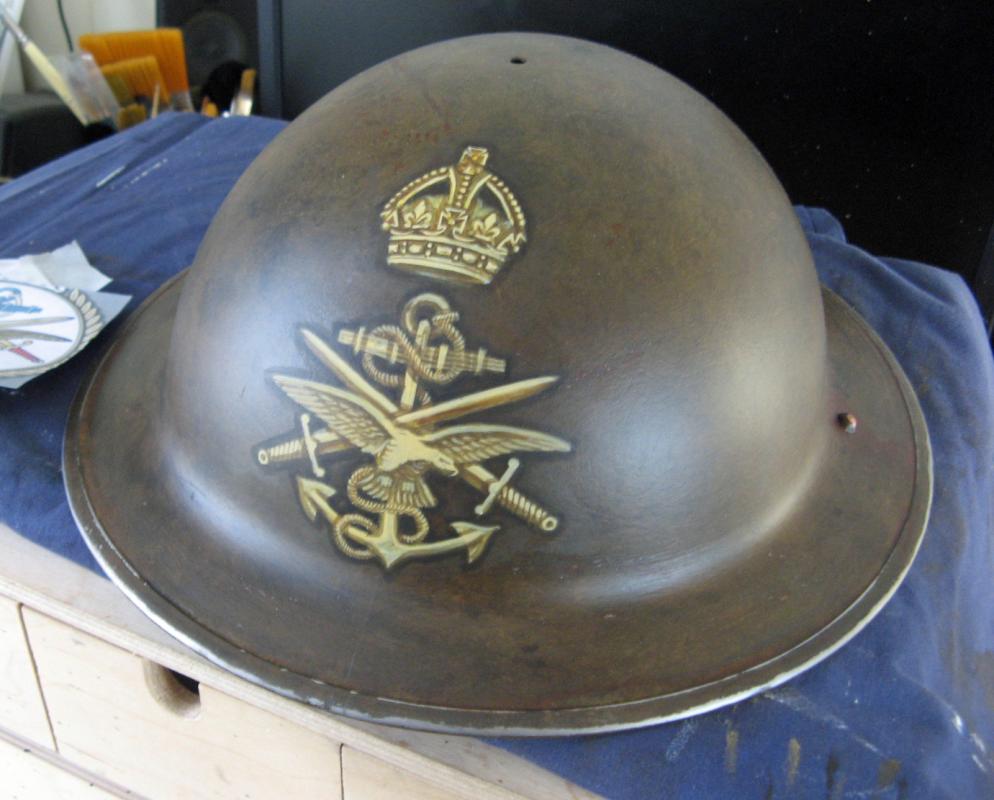
Mix up washes of brown/black/yellow getting darker and darker to outline and bring out the picture. Highlight areas where they need it. This doesn't happen quickly but allows the tones to be built up slowly. Darkening and highlighting over and over until happy. More and more detail can be had but this is a helmet to be seen as a whole so too much detail, and therefore time, can be wasted. Then use white to highlight the bright spots. Make these spots a bit bigger so that they appear to shine. Highlights can be overdone, maybe this badge has a bit too much but it can always be glazed later on to match the helmet.

 0
0 -
Now to get the pictures onto the helmet.
Do some careful measuring and mark the centre line of the helmet. Use a floppy tape measure robbed from the other half's sewing box - it's better at measuring around bends and corners.
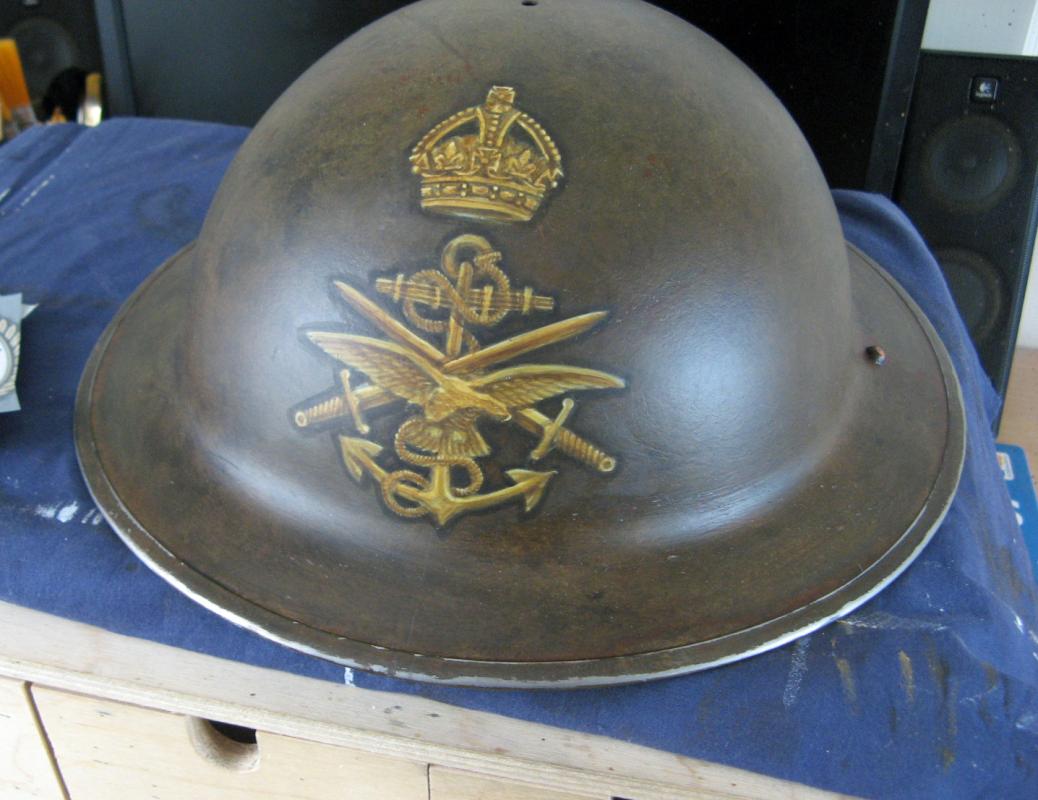
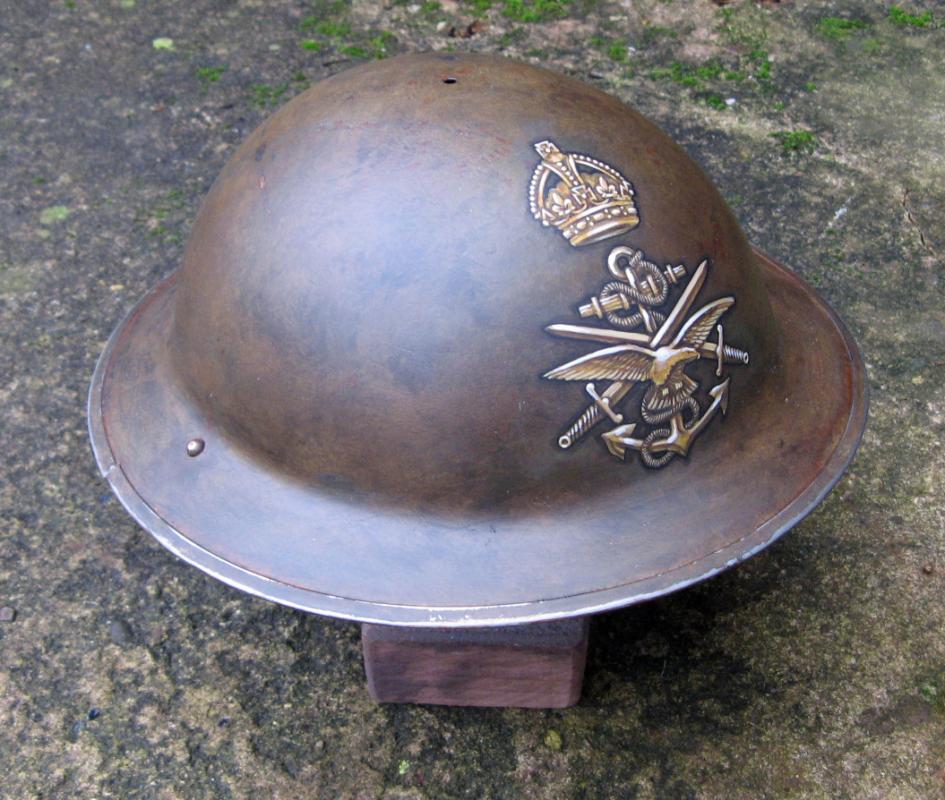
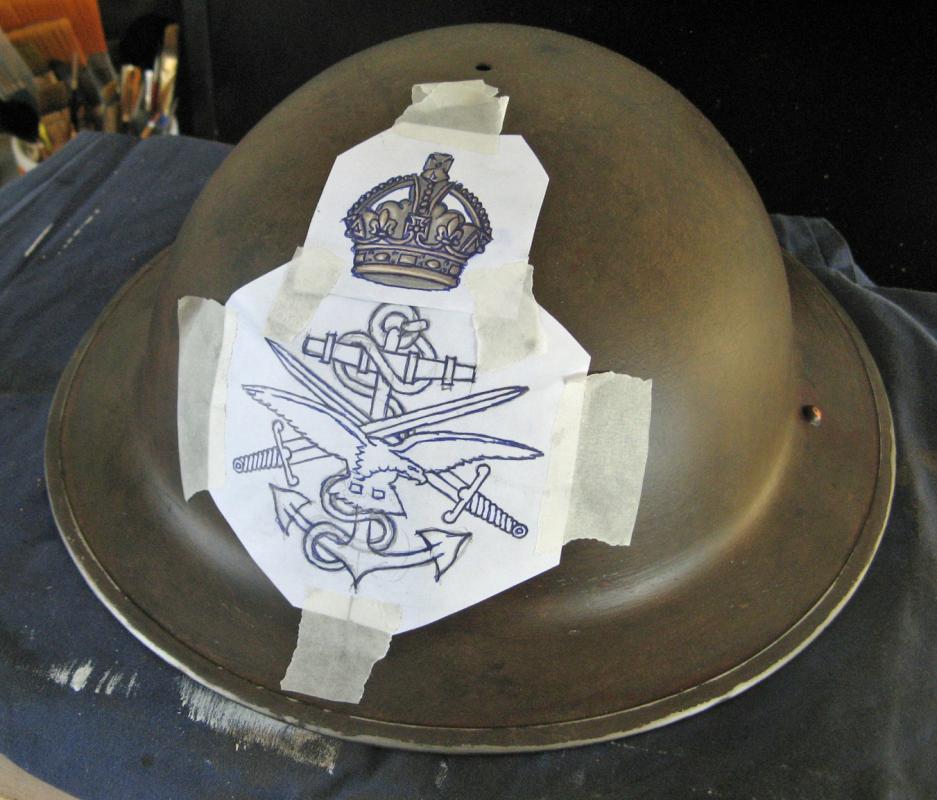
I nearly always start on the crest/badge that I've decided to use on the front. In this case the drawing of the three services with a King's crown above. Instead of colouring the RAF Eagle, Army Swords and Navy Anchor I think they'll be better as a sort of brass colour to match the crown.
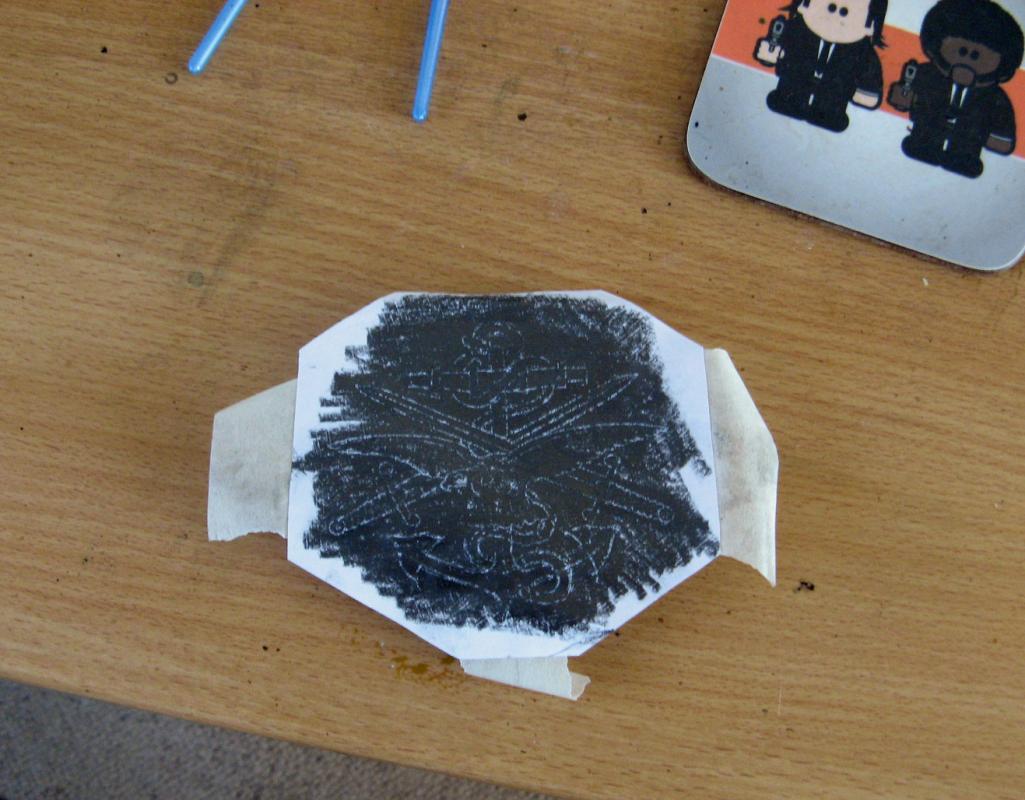
The drawing/print has already been scaled to fit the helmet. Use a big pencil and cover the back of the picture so that it can be traced. I used to draw this stuff straight onto the helmet but it took ages and ended up with the same result. No need to learn how to draw, just trace the drawing with a ball point pen. The pencil then marked onto the helmet is easily removed even by rubbing with your hand so be careful to keep away from the pencil while doing your first bit of painting.
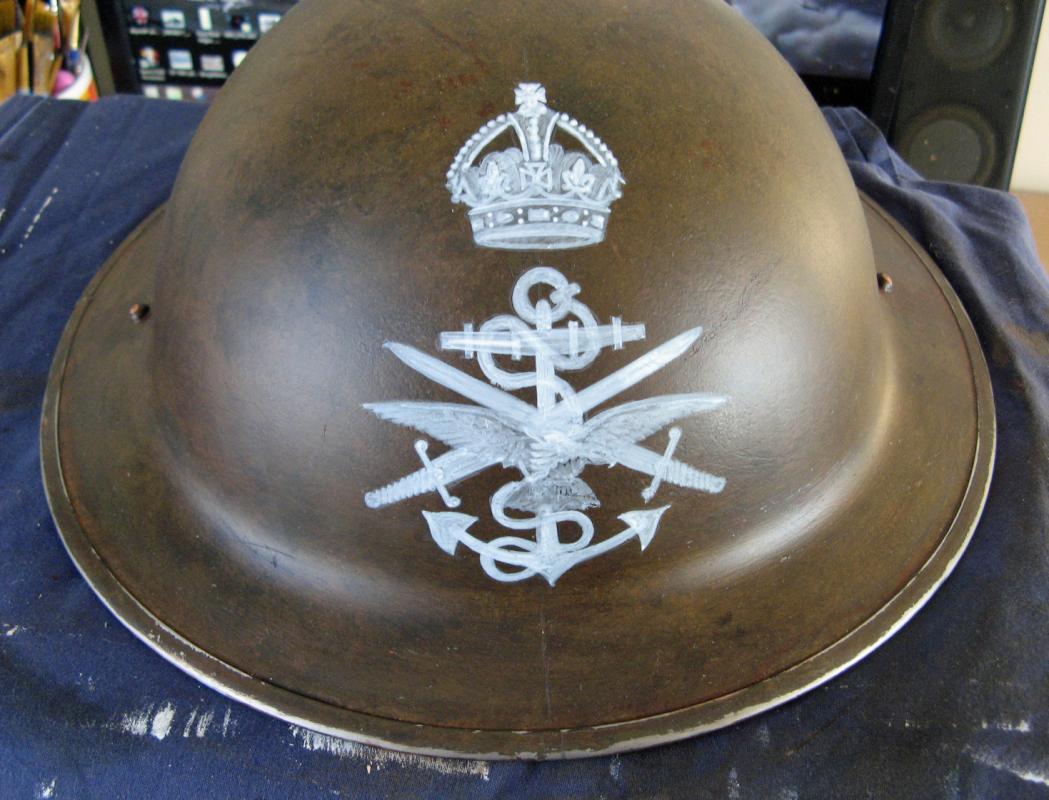
I go over the pencil with white. This may take a few coats and I build up the picture in the same way as doing an underpainting with an airbrush. You can see that the details are lighter where they need to be.
 0
0 -
Well.......thank you very much
 0
0 -
Cool
Not sure about Ricky Geruseless being in the list though
Also check out the Viktoria Modesta video on the same page, now she IS very cool. Remember the Torture Garden?
 0
0 -
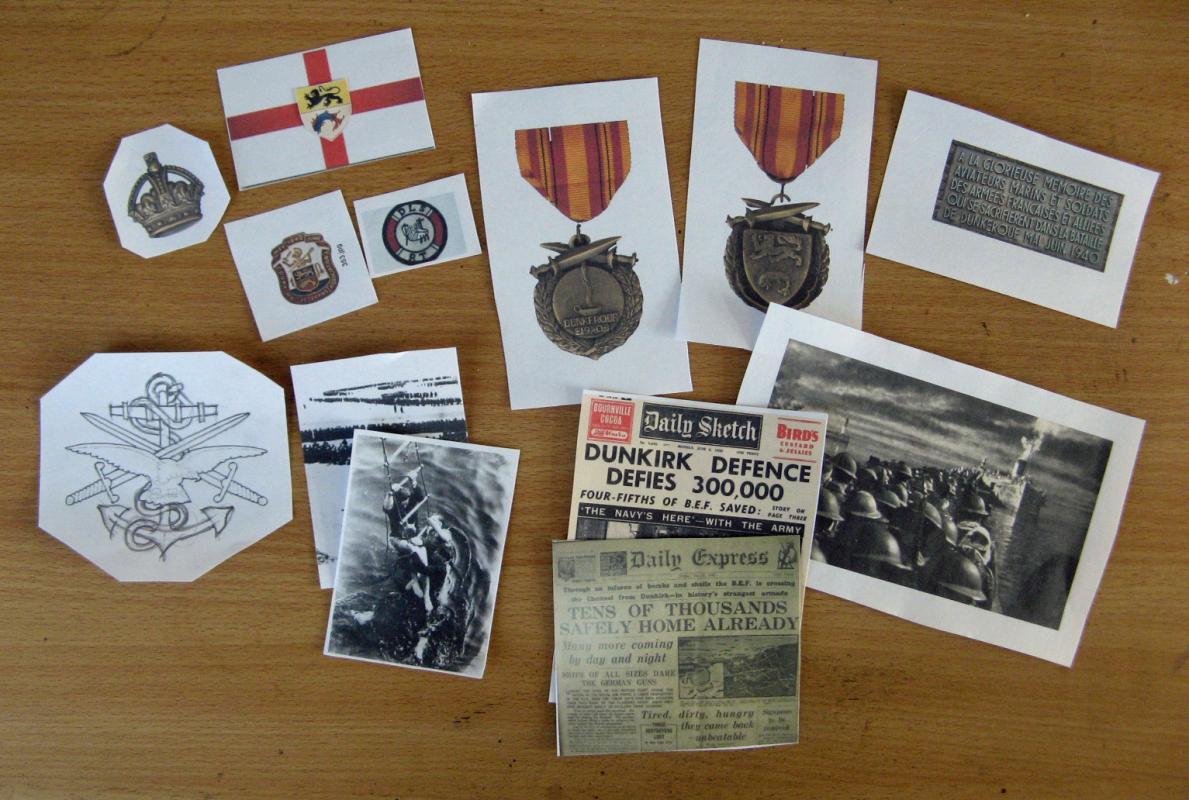
Spent a few hours on t'tinternet doing a bit of research and collecting pictures
These are the few I've whittled it down to
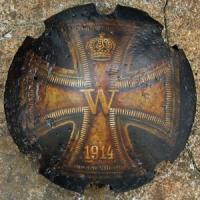
A crest/badge for all 3 services involved in Operation Dynamo. there's not really anything officially WW2 so I've drawn my own based on the MOD crest
Some newspaper headlines
A King's crown
Some photos
A still from the film Dunkirk
The flag that the little boats are allowed to fly and their badge
A Dunkirk veteran's badge
The Dunkirk Medal
The inscription from the Dunkirk memorial
These have all been scaled to a size that fits on the helmet
 0
0 -
Tony
Ah yes, sorry. Not too clear was I.
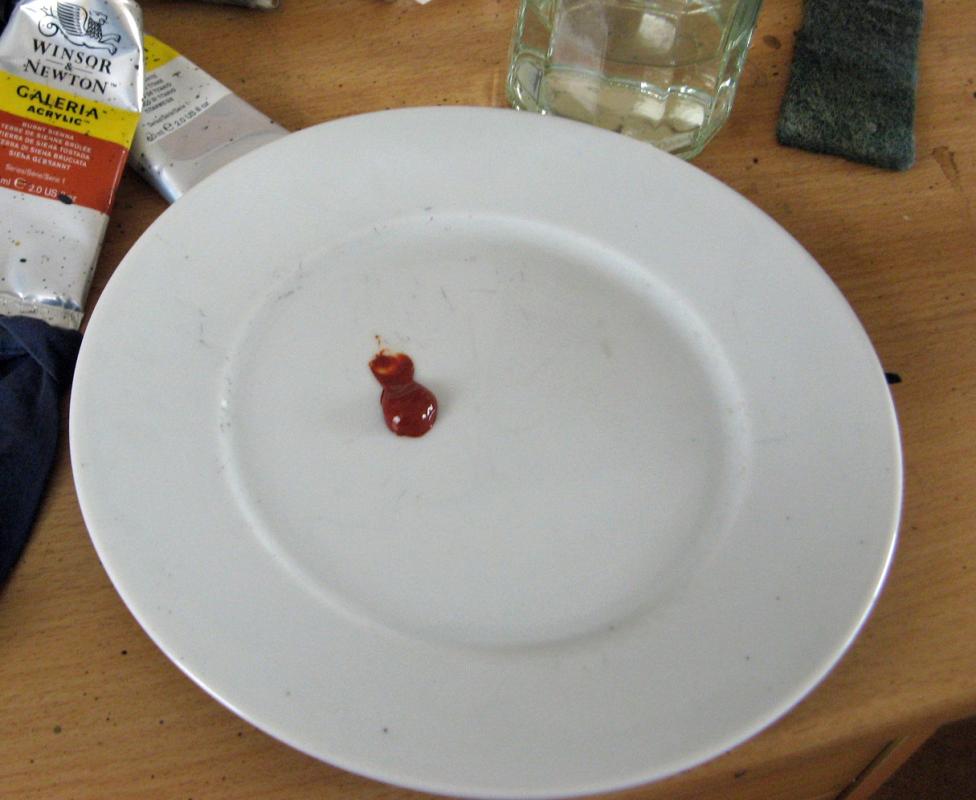
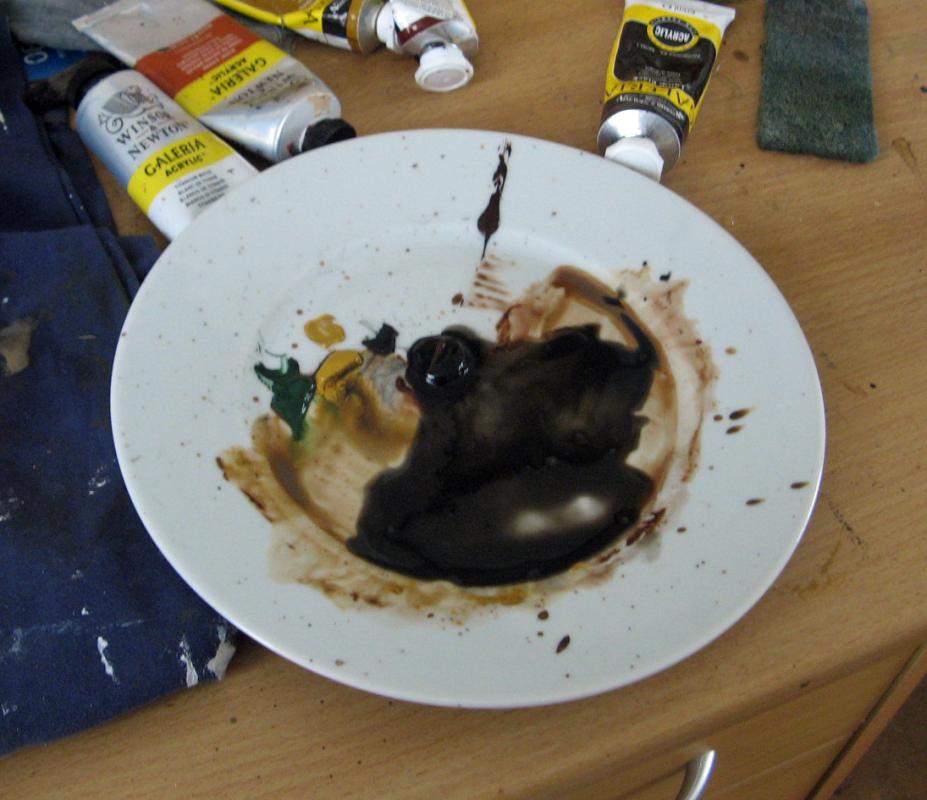
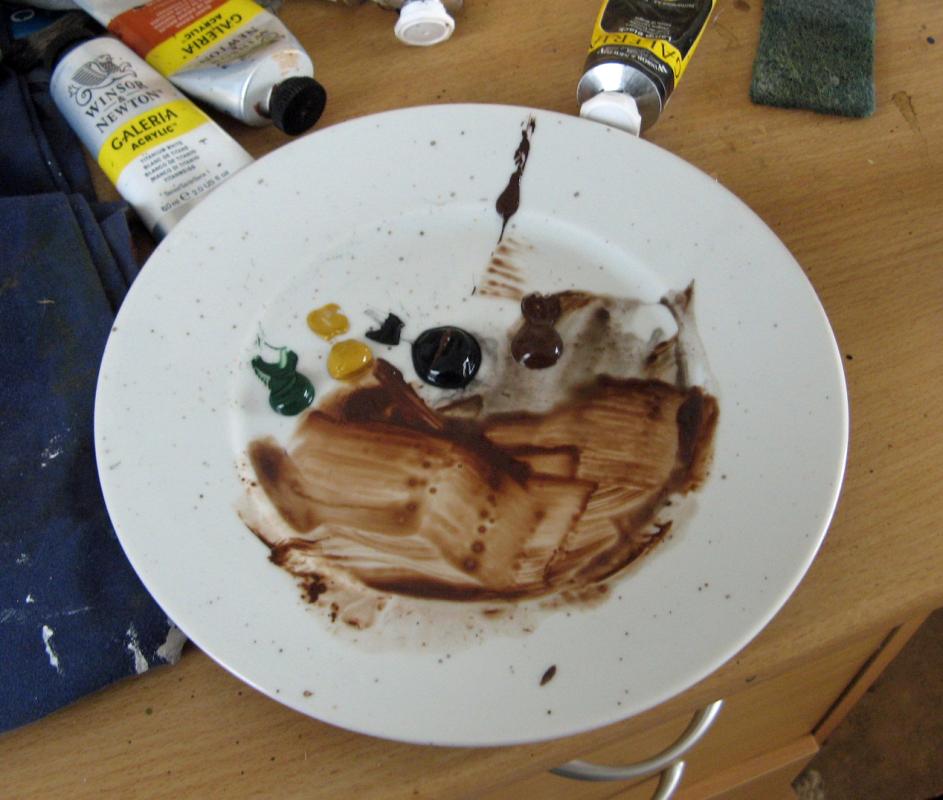
I put a small blob of all of the colours on the plate. Form a puddle of water on the plate and then drag a weenie part of one blob, or some of the blobs into the mix to produce a glaze. Brush that onto the helmet and see if its giving the desired effect. If not, wipe off and/or add another glaze by dragging some more colour in with your brush. You can see if you look at the remaining blobs in post #30 that I've only used weenie parts of the blobs. Mix a glaze with the colour/s you feel the helmet needs, if it's too light add some umber and black, too red add some green, if it's too dark then lighten up etc etc. You can build up each glaze and dry before adding another. It may take quite few glazes until you get what you want. If it's all going wrong you can use some water and wipe off the glazes and start over.
0 -
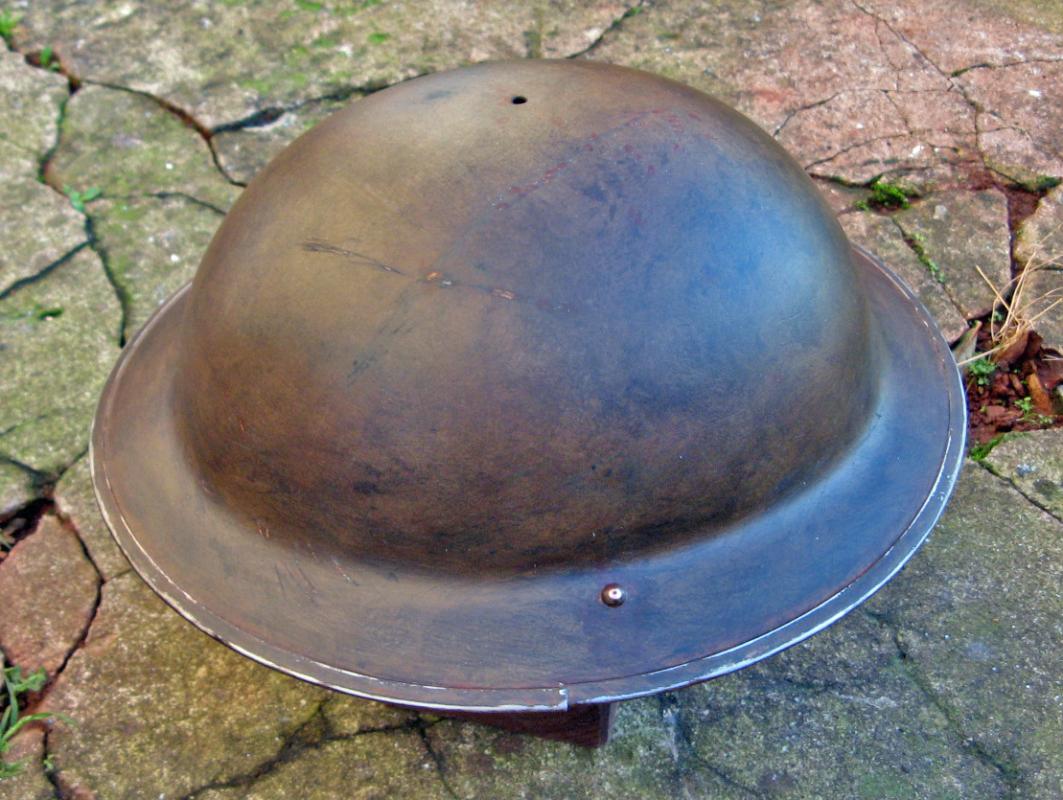
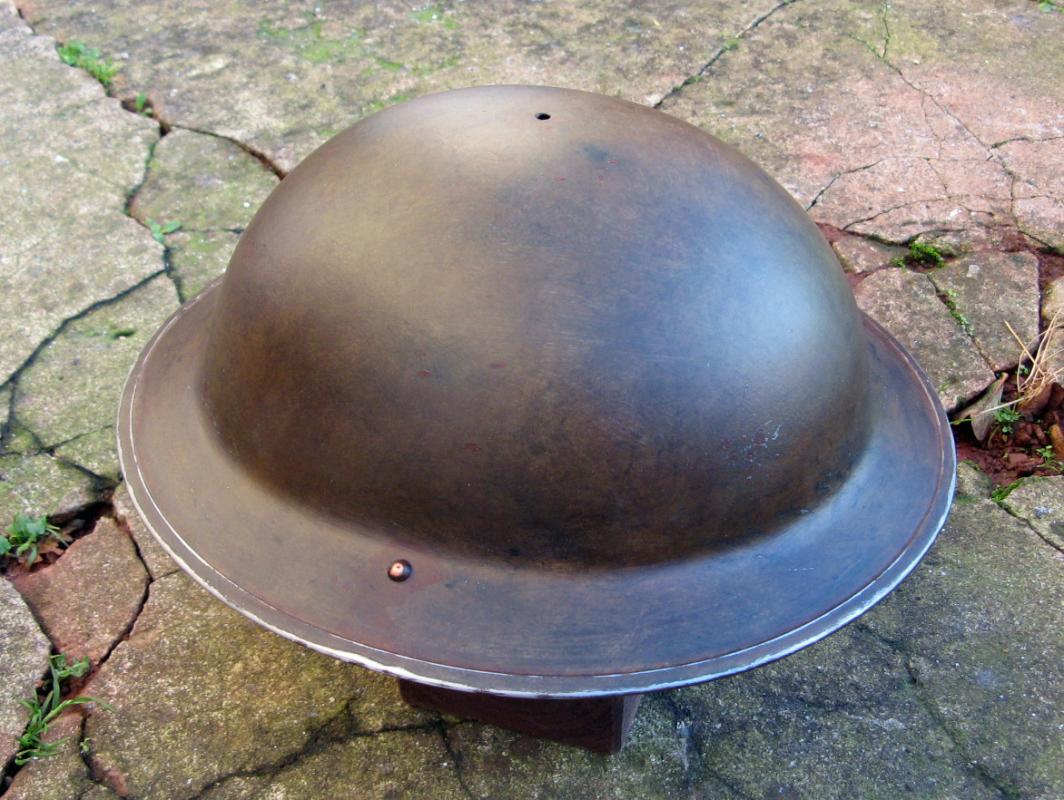
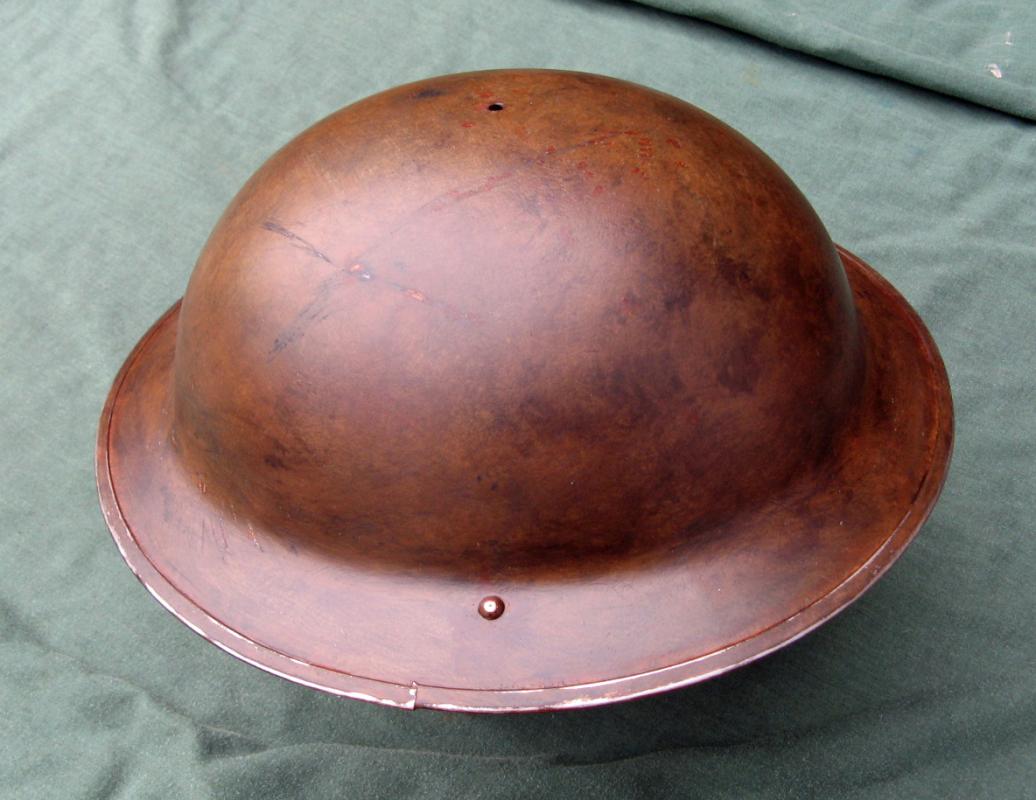
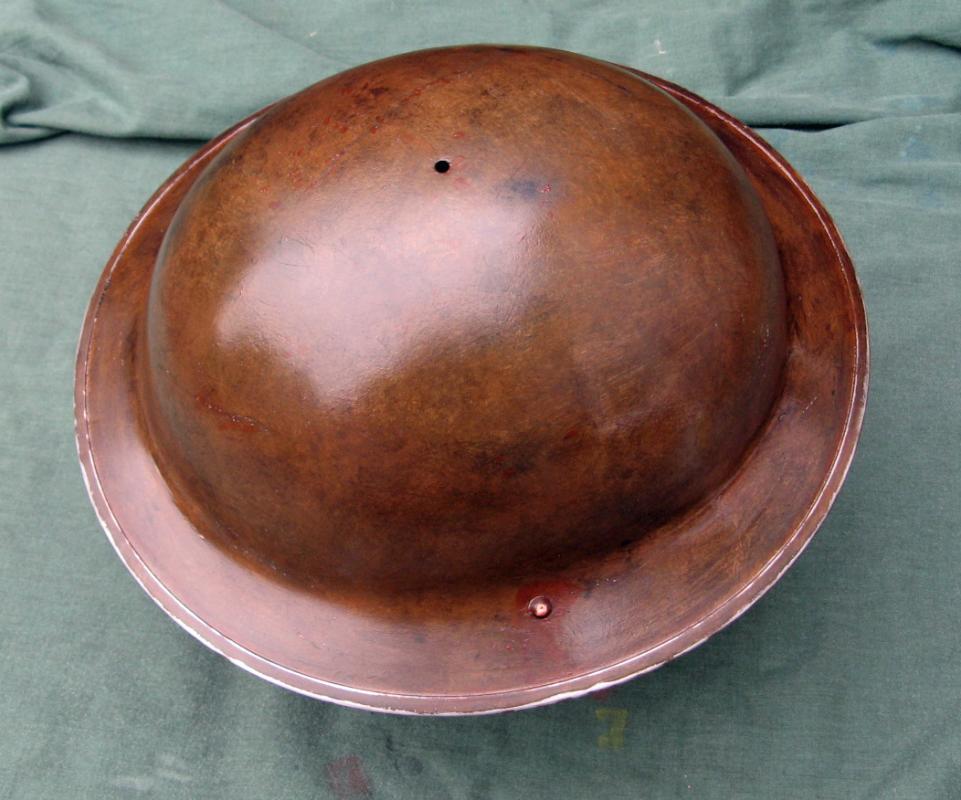
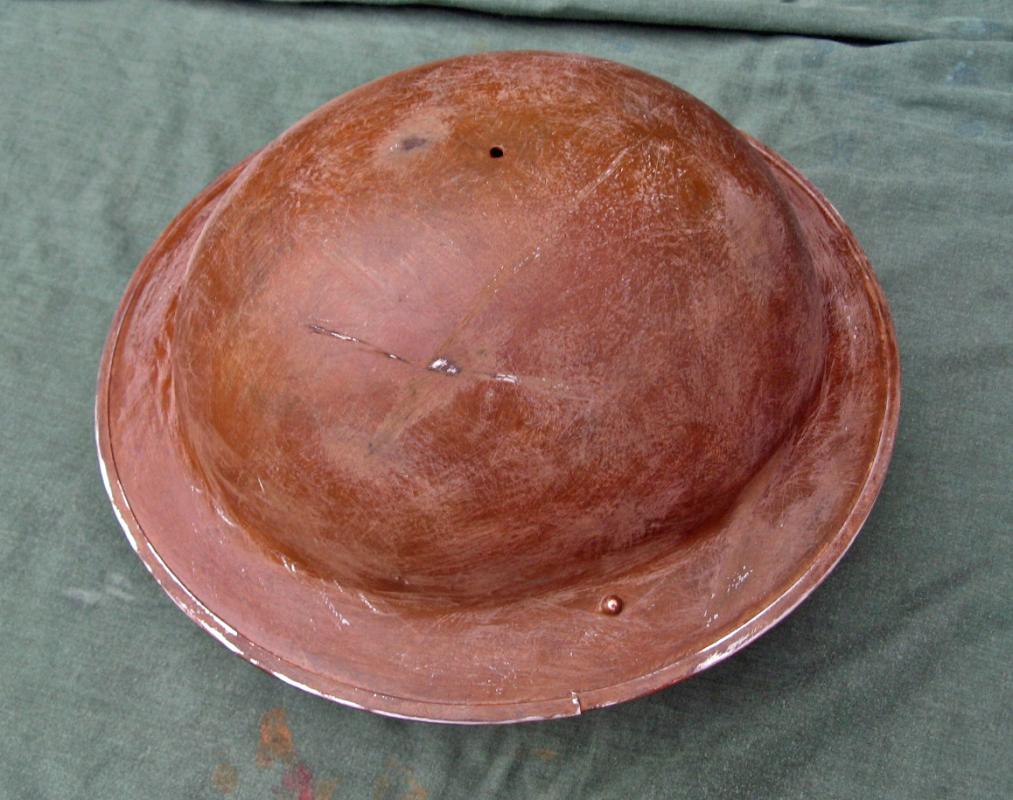
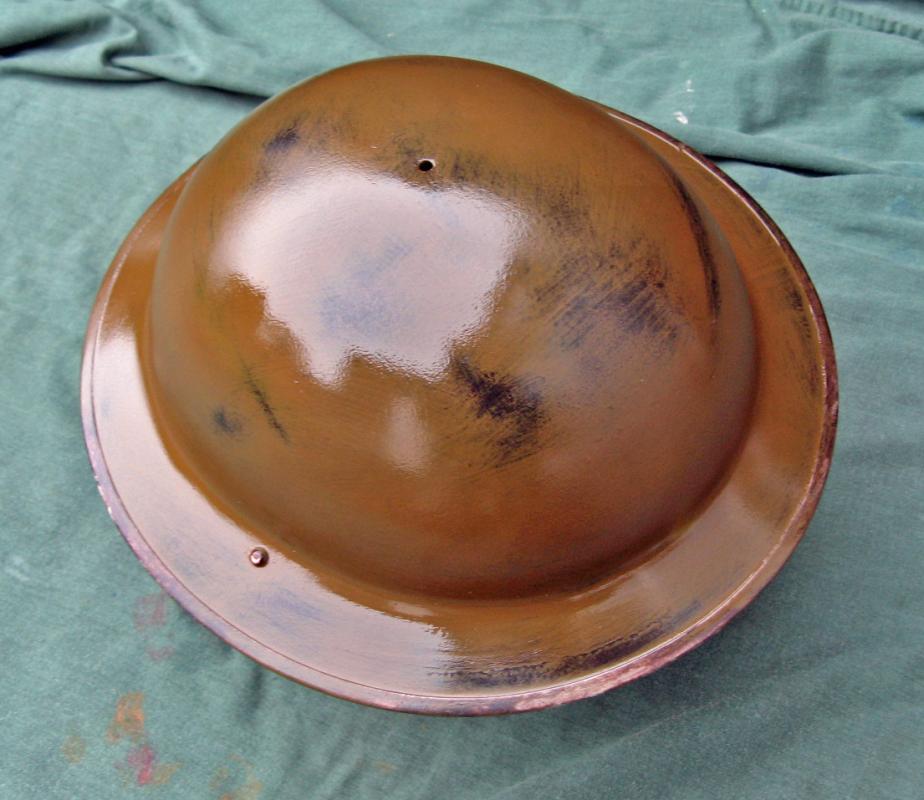
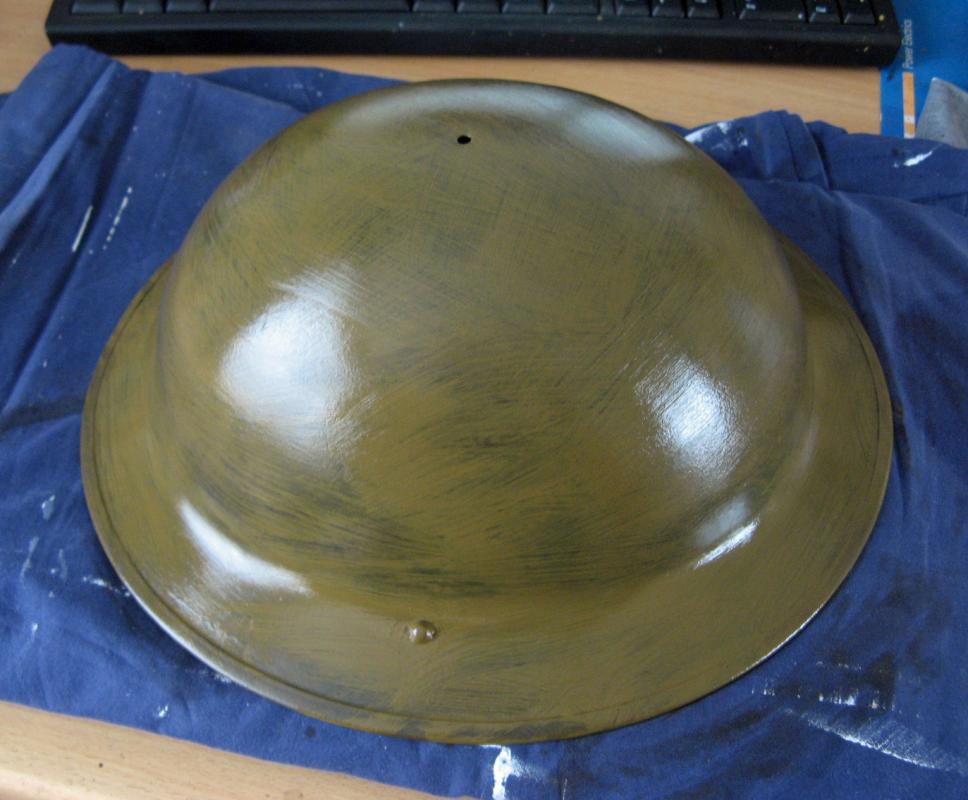
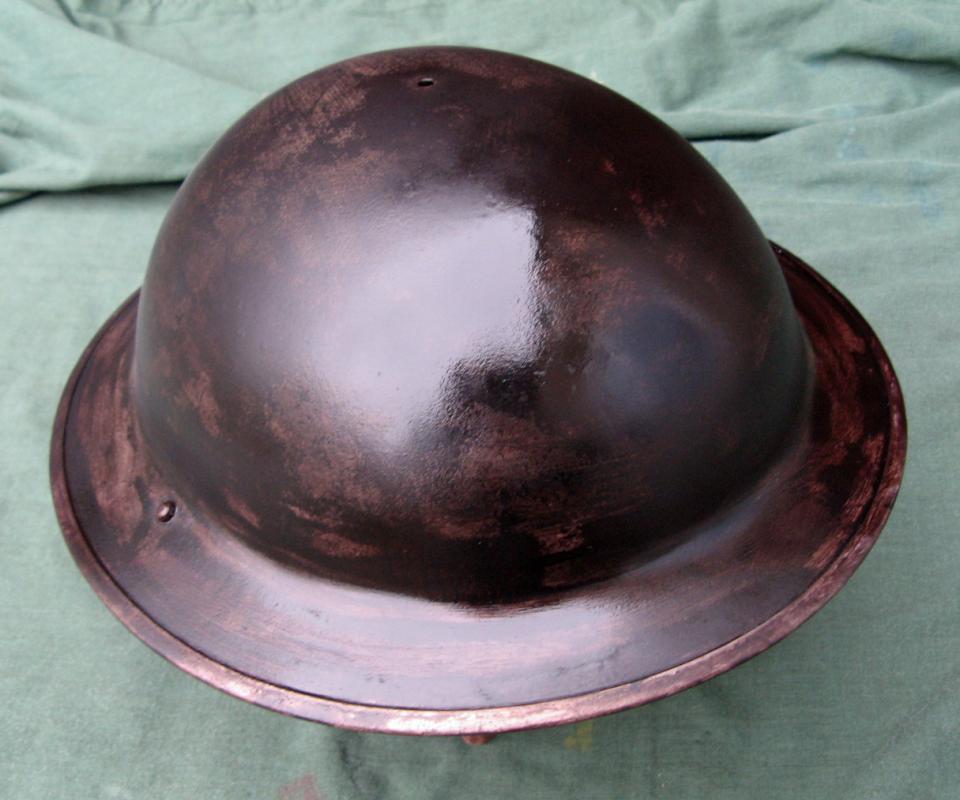
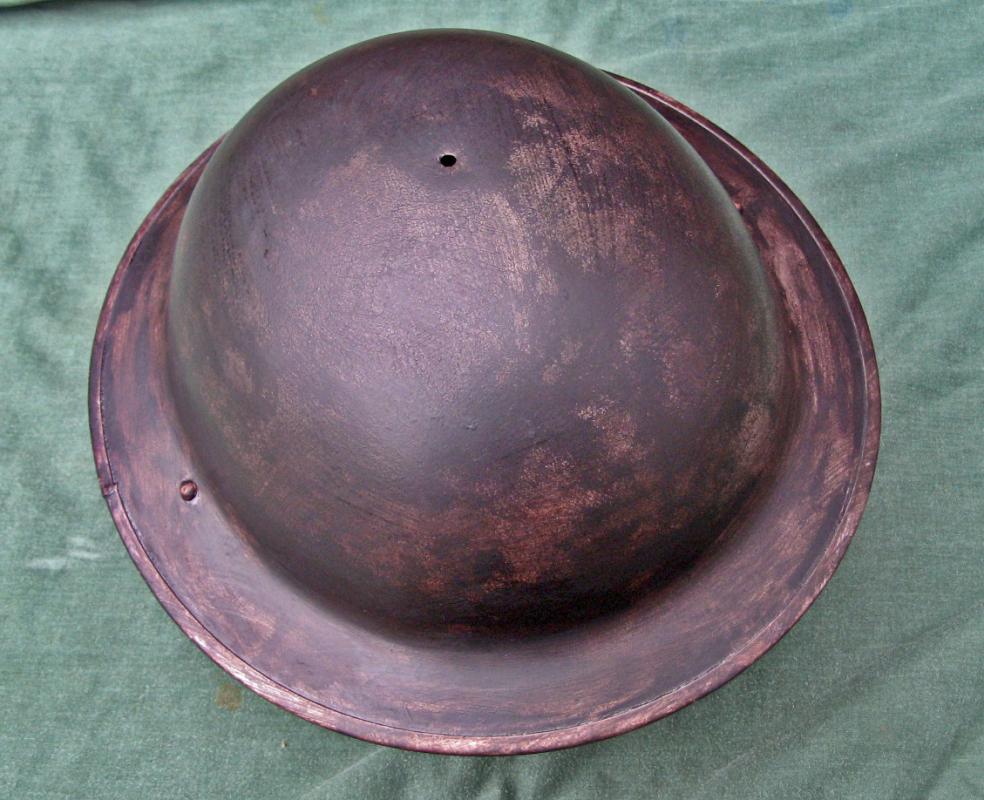
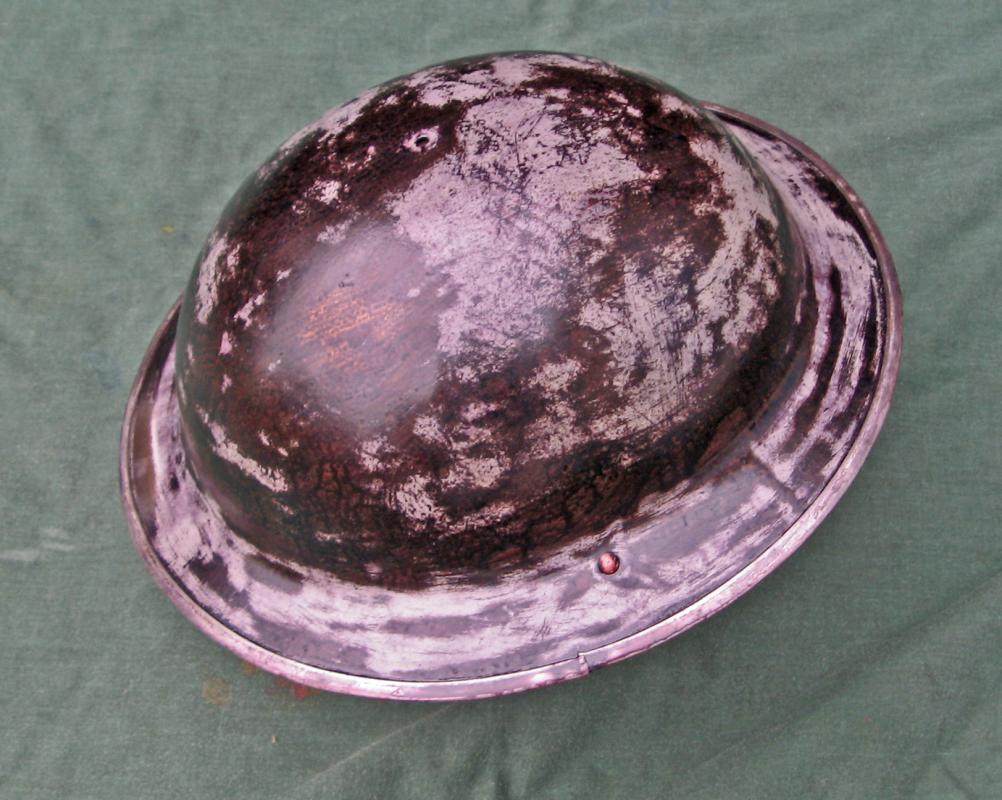
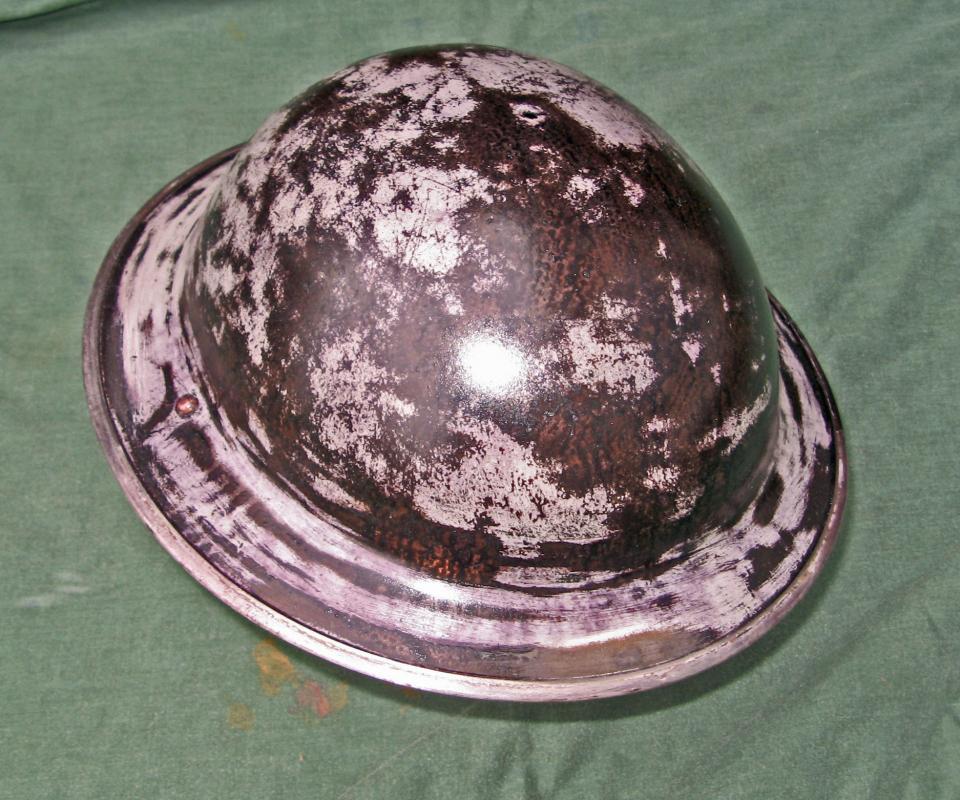
I've taken some more photos this morning that show the colour a bit better.
 0
0 -
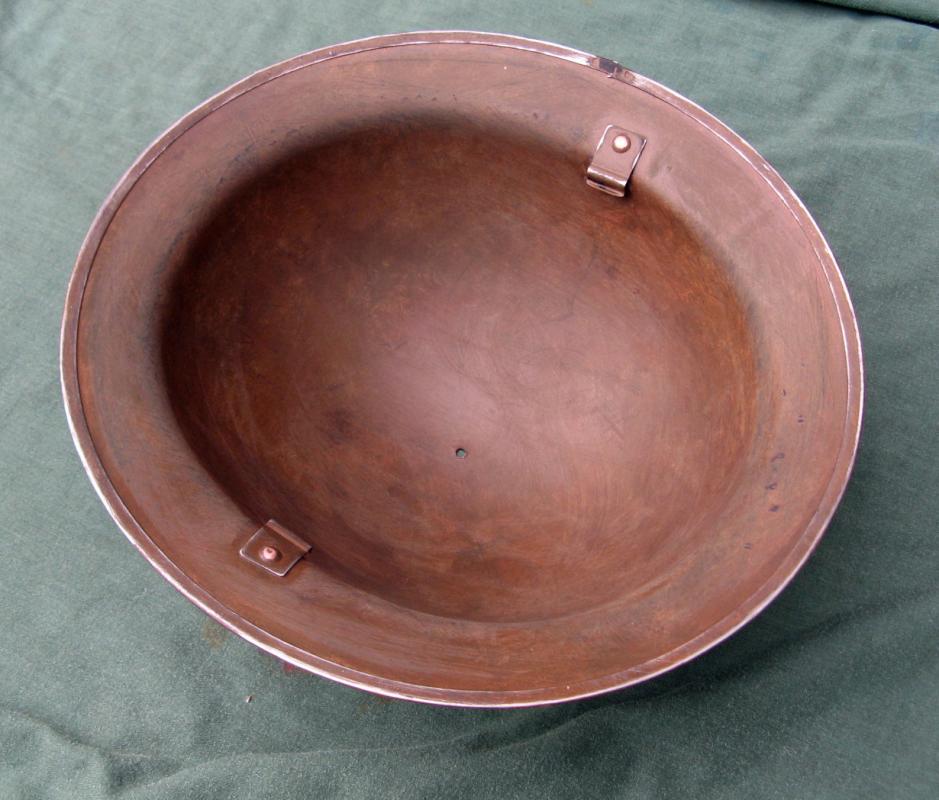
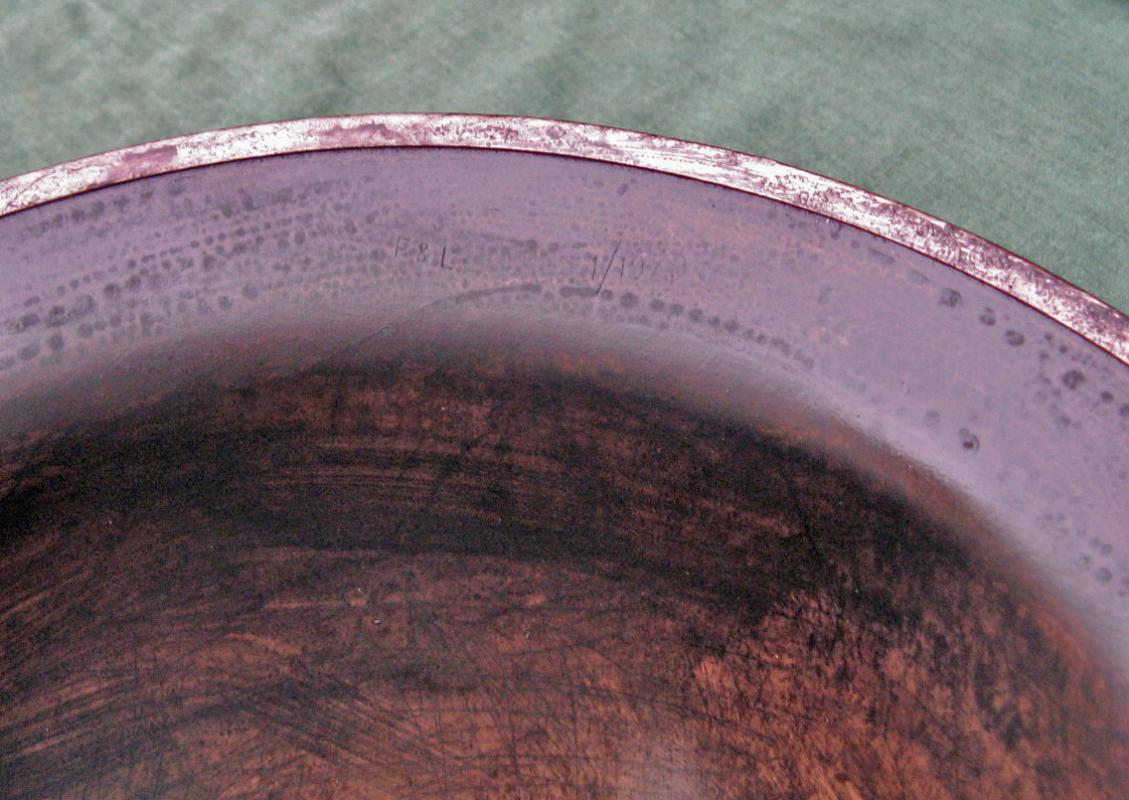
Here it is all done with the lacquer dried. Also the detail of under the rim of the maker's stamp.
This could be where you've finished as you only wanted to repaint the helmet. Just re-build, remembering that you'll need to do a bit of painting on the crown bolt to match.
All done for today. In total I've spent about a full day in the preparation sanding, protection and then the base colouring.
I'll need to take some more photos to show the correct colour, now I look at it the photos make it look too red.
The next bit will be getting detailed paintings onto the helmet as a display piece. Same place, same channel in a day or so. See you there....
 0
0 -
Once all looks good. You may need to work a bit on the maker's stamp with some black and wiping off to expose them so that they are easier read. Then get another coat of lacquer on as this is now complete.
 0
0 -
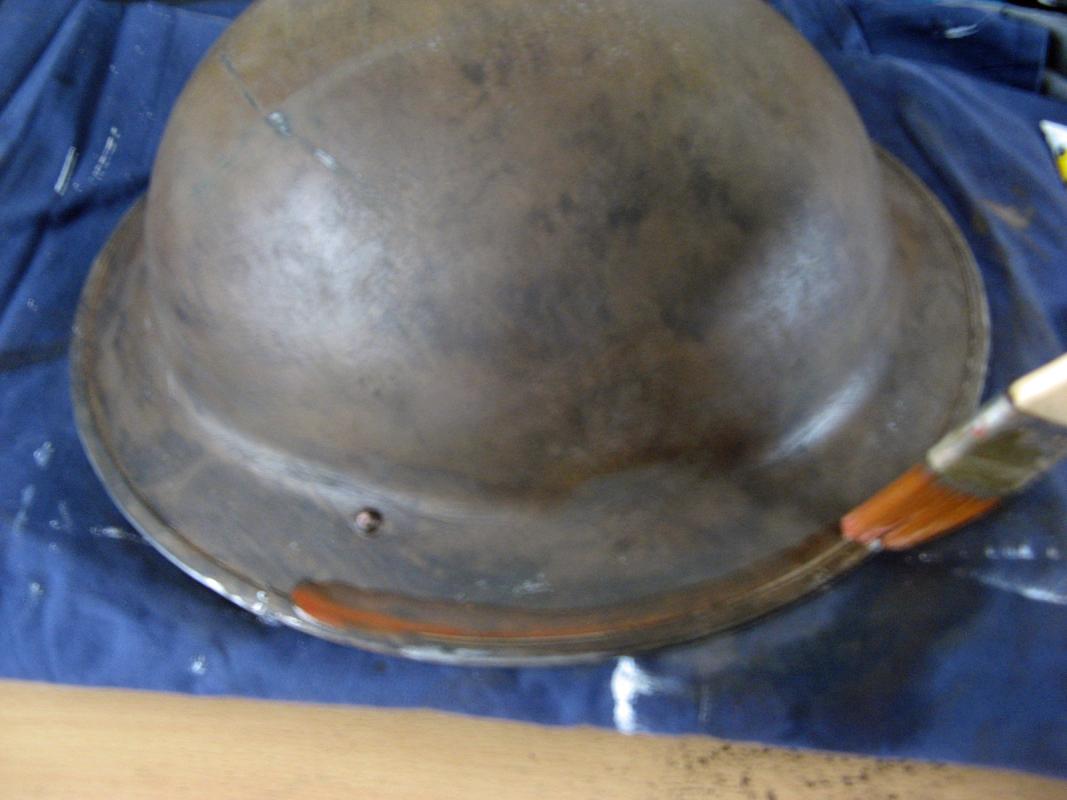
Back to the now clean mixing plate and some clean water in the jam jar. Squeeze out a small blob of Burnt Sienna. This is a great rust colour applied straight.
Paint along the edge of the rim, around rivets, the top bolt hole and around the chin strap clips. Where there's small pin holes of exposed metal across the helmet apply little dots of this colour. Rub the colour edges to blend and dab on straight out of the tube on the little dots of pretend rust.
 0
0 -
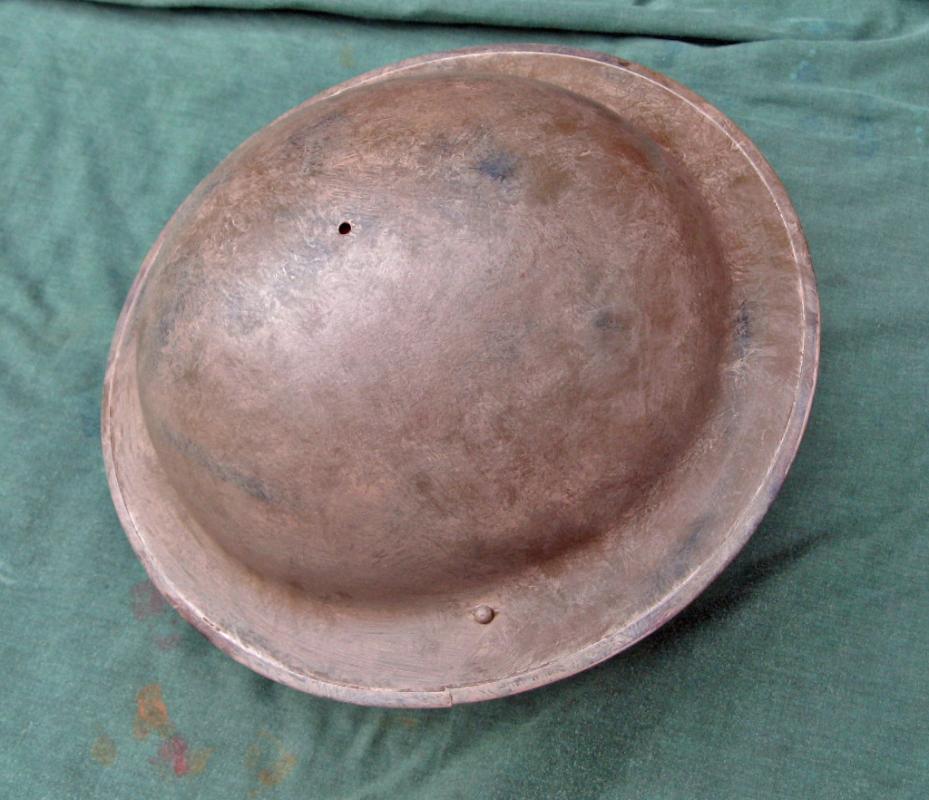
Here's the helmet outside so you can see the colours better. Have a look at how I've sanded into the scratches to expose metal in some small areas working down into the very first colour that was put on. It all comes together now making the helmet look worn and old.
 0
0 -
Go back to your mixing plate and mix a watery black/umber mix. Splash that onto the helmet and let it partly dry. This flows into the scratches you've just made over the whole helmet. Dab and wipe it away to give the desired look. Dabbing takes the whole colour off in part while wiping leaves colour in stamps and scratches. Take your time working until you slowly work the colours on the helmet to where you want it.
Sorry the pictures are a bit shaky but the colours goes on quickly and I'm trying to dab it off before it dries while taking pictures with my left hand.
 0
0 -
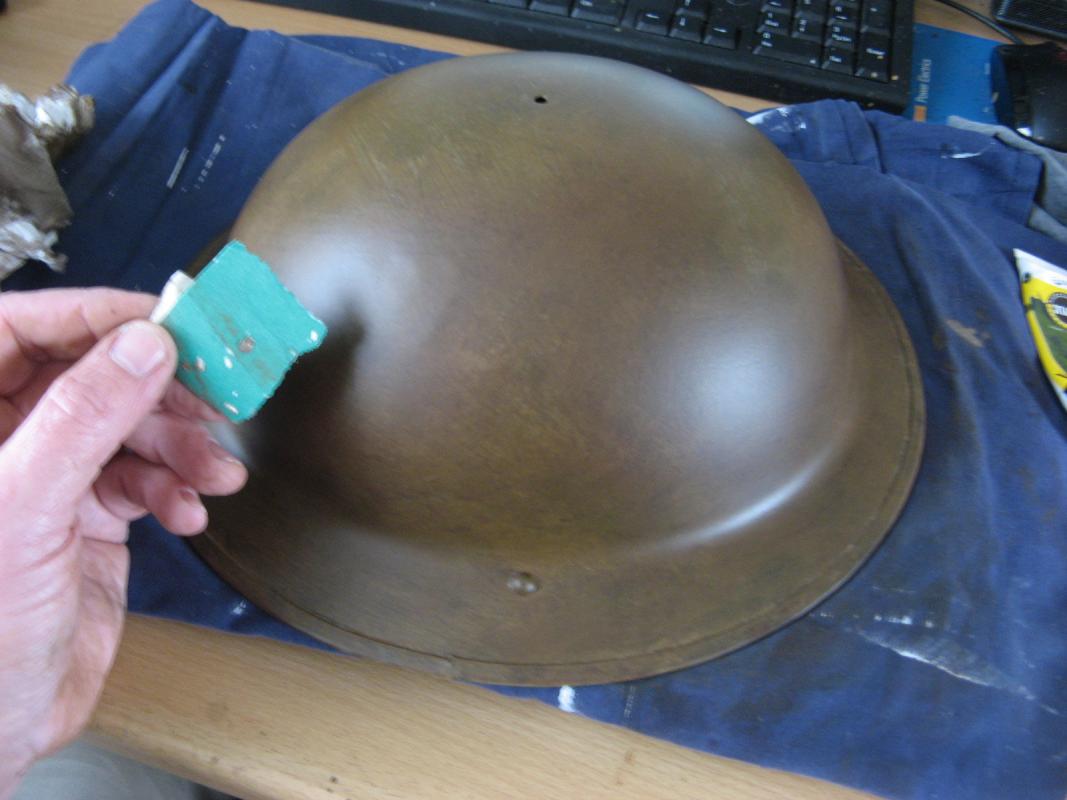
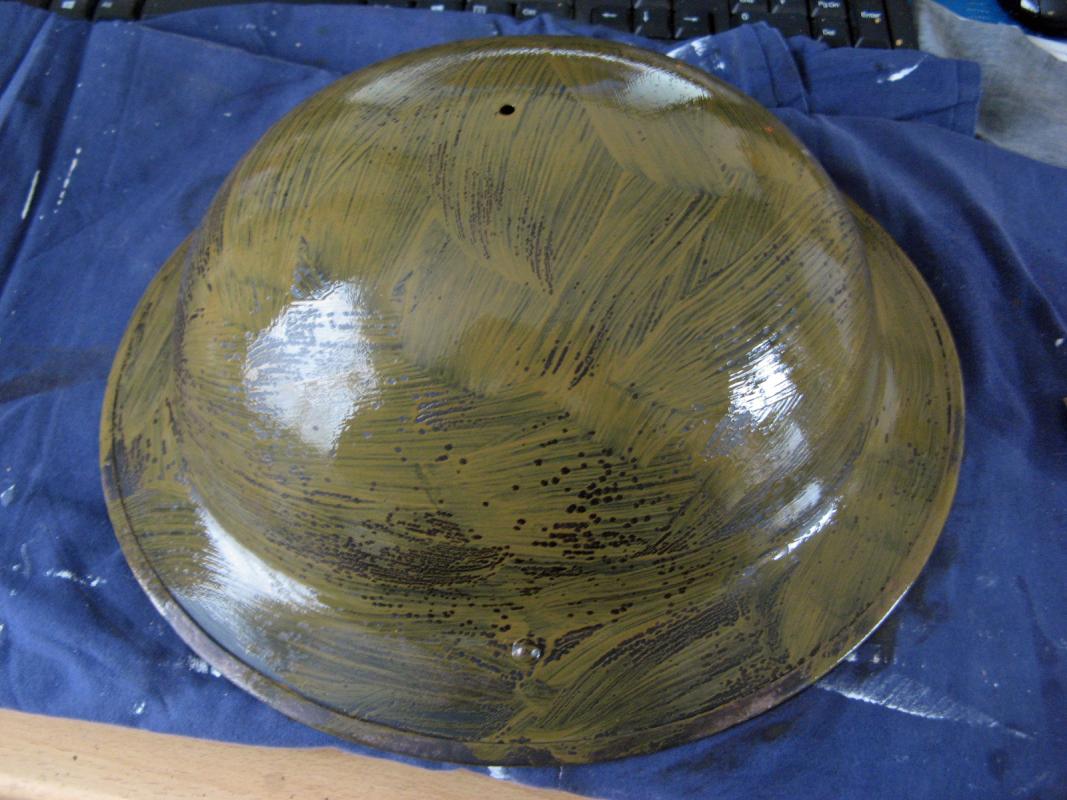
Some wearing now needs to be applied. Take a small piece of grade 80 (or thereabouts) sandpaper and get stuck into the helmet. Use small strokes in every direction to give a well worn look to the lacquer coat. Work around the rim quite hard to remove paint down to the metal. The helmet takes on a sort of dusty look. Take this stage slowly using small strokes of the sandpaper or it'll look unnatural.
Take the paint off of the rivets and on the edges of the chin strap clips to look like they've been worn away.
 0
0 -
Put a blob of each of your colours onto your mixing plate and apply further coats of dark to tone everything down. See how the glazing coats are letting all the colours below show through. This gives a varied deep look across the helmet.
Once you are happy then get another coat of lacquer onto the helmet.
 0
0 -
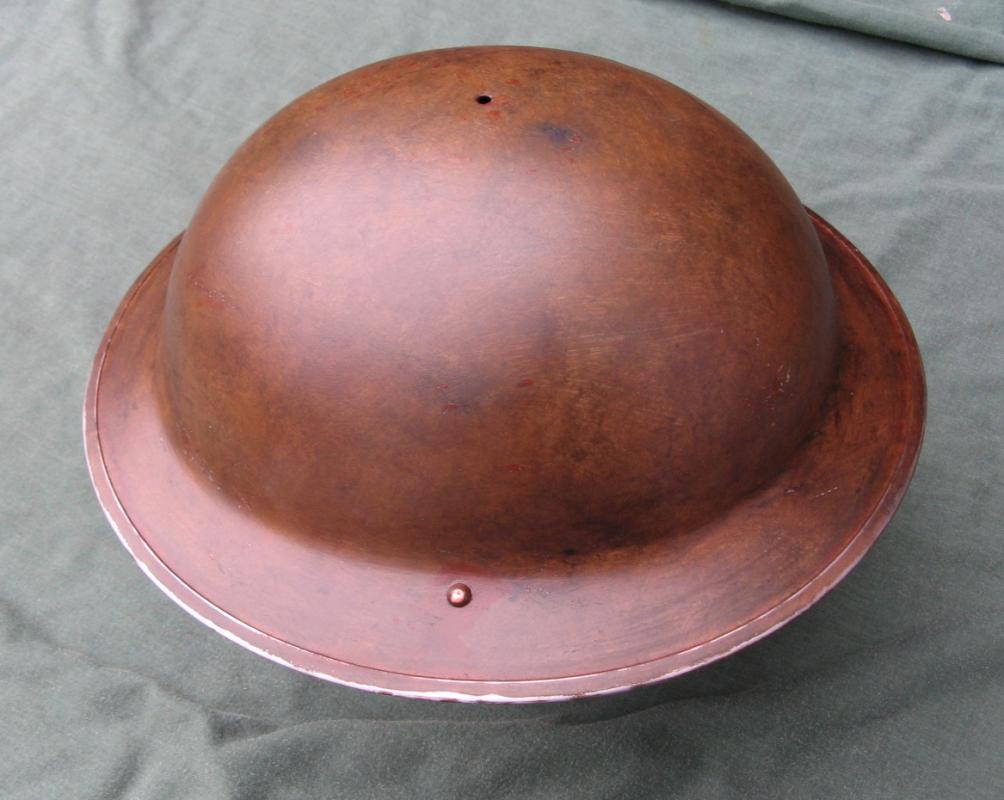
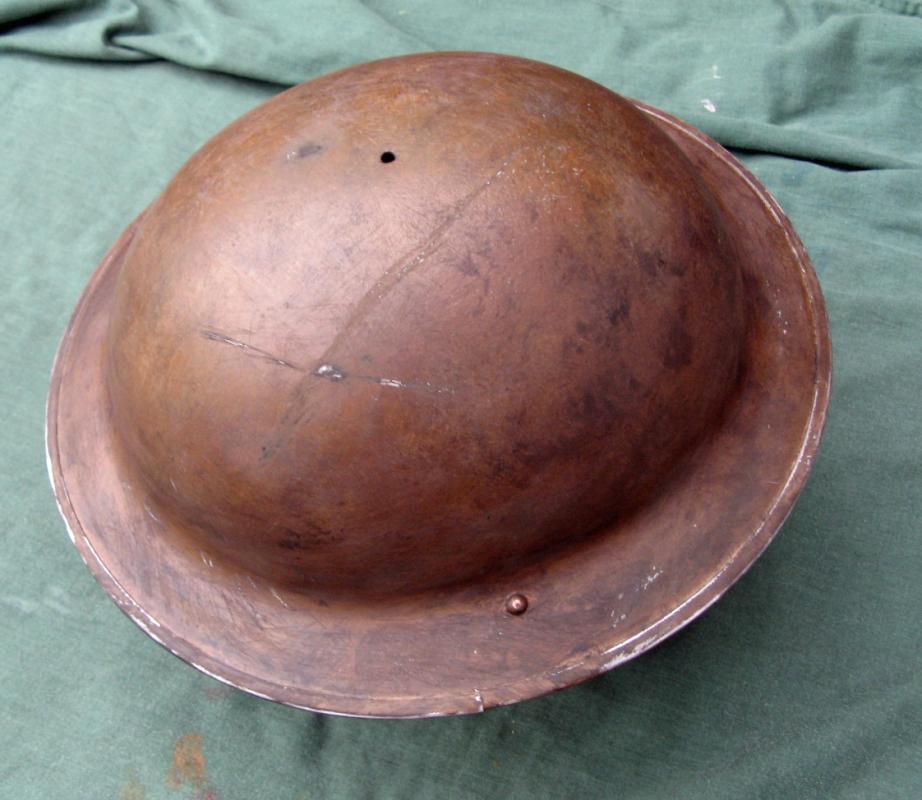
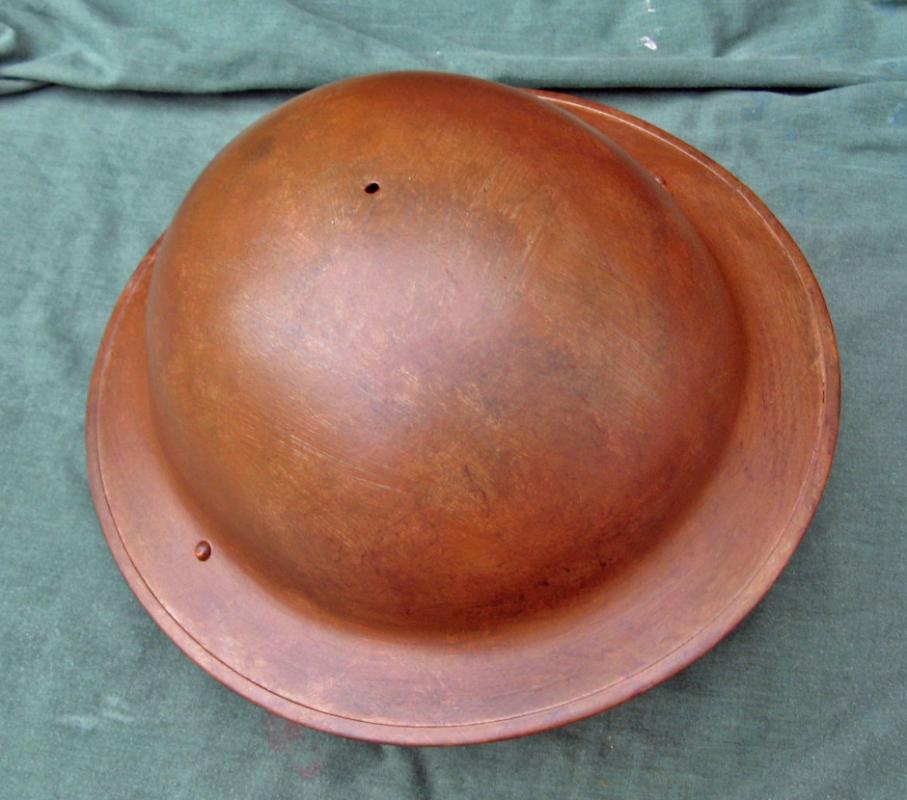
Now we've got to get the colour of the helmet correct for what we want. In this case we're looking for an early war standard brown colour. Old helmets are all multi coloured where they've worn in some places and have even been re-painted or camo paint applied.
Here we use thin glazes to change the colour slightly on each coat and build up slowly to the desired effect. As the coats are going on wet they can be wiped away if it's not going too well. Be brave and play with colours until you get what you want.
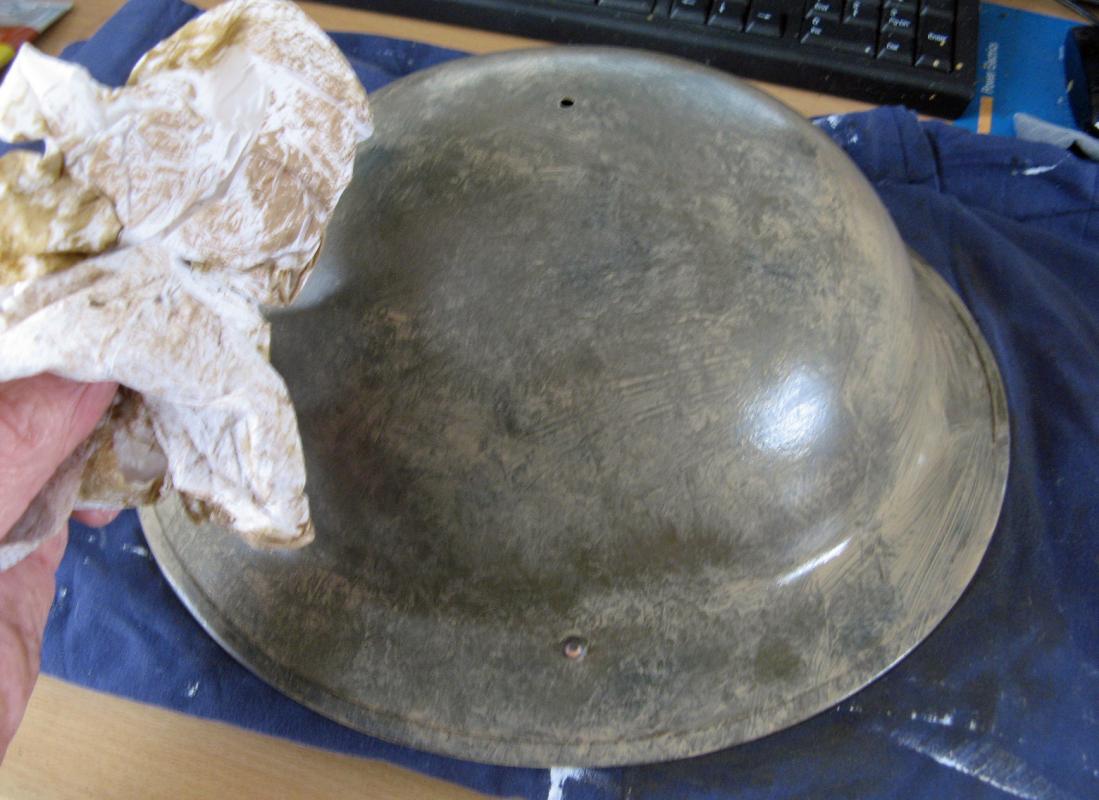
Add a squeeze of white to the colour still in your old mixing pot, add some more water and mix thoroughly. Apply a wet coat and dab most away with some kitchen roll paper.
As you've applied an intercoat of lacquer you can play around rubbing and dabbing, even taking a complete coat off again until you get what you want.
Again the colours look wrong through the camera indoors so there's some more outside once dry.
 0
0 -
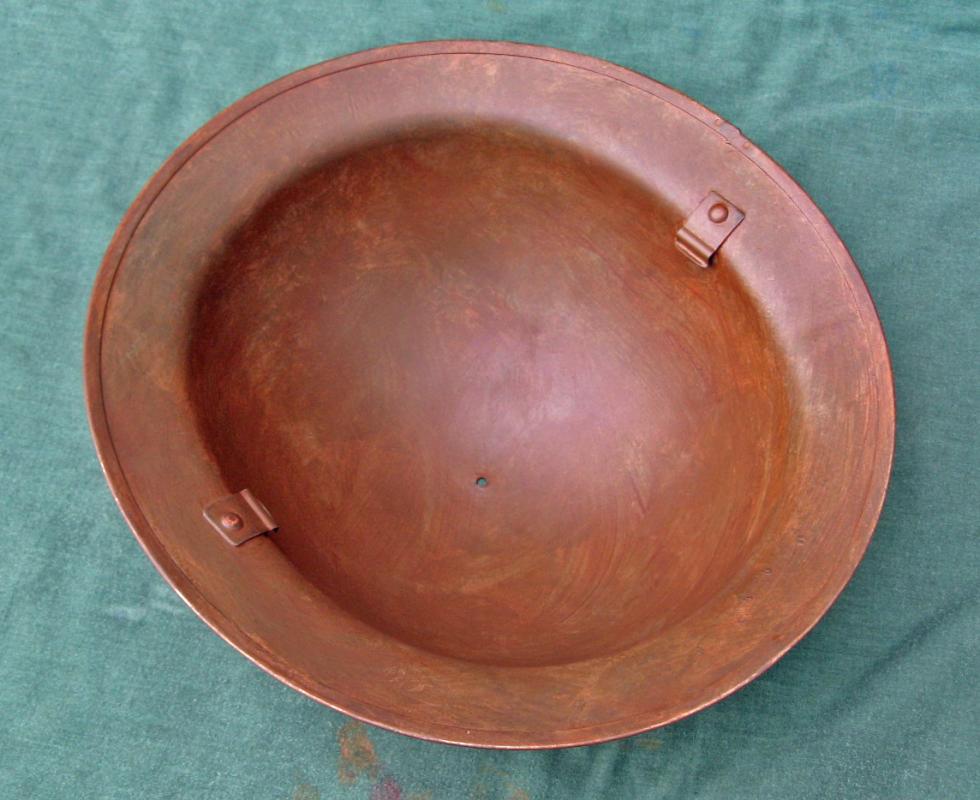
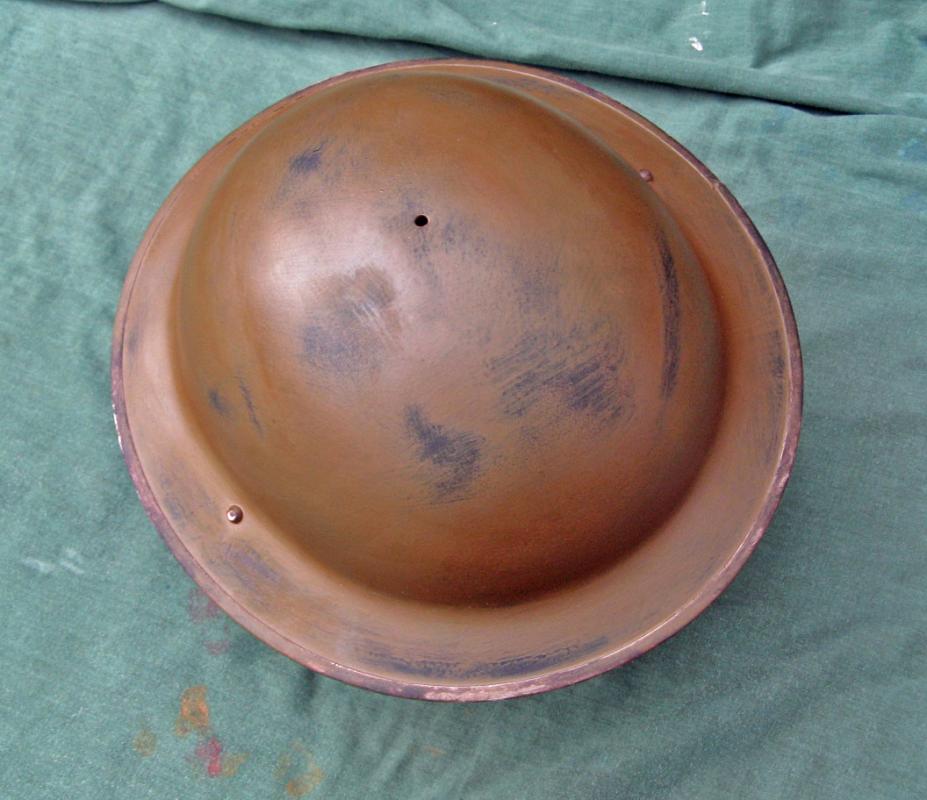
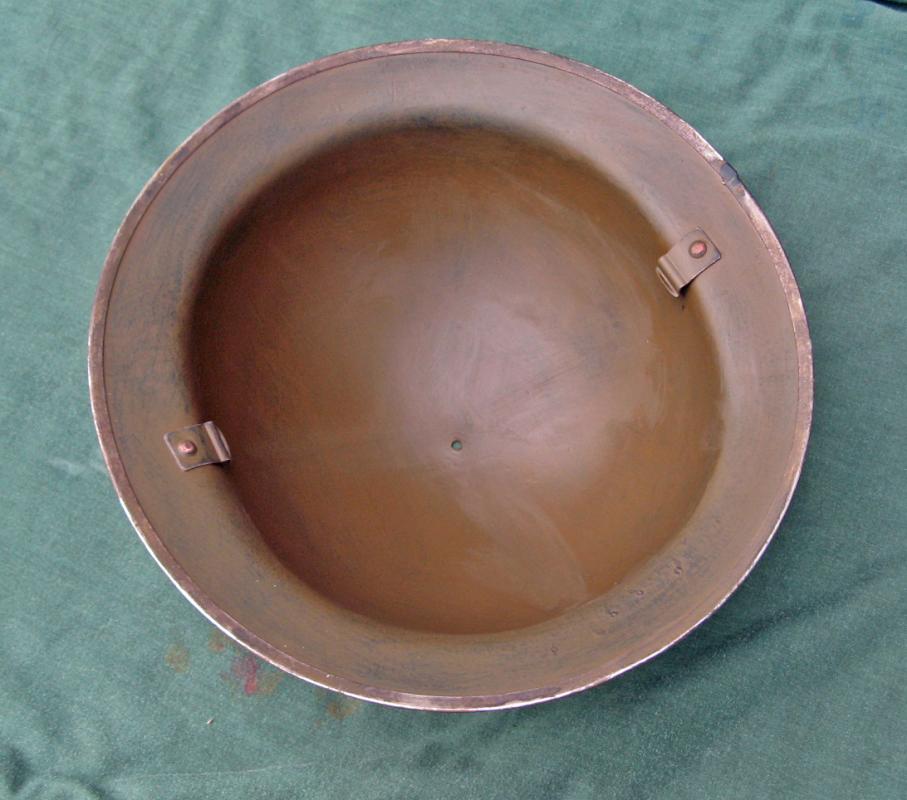
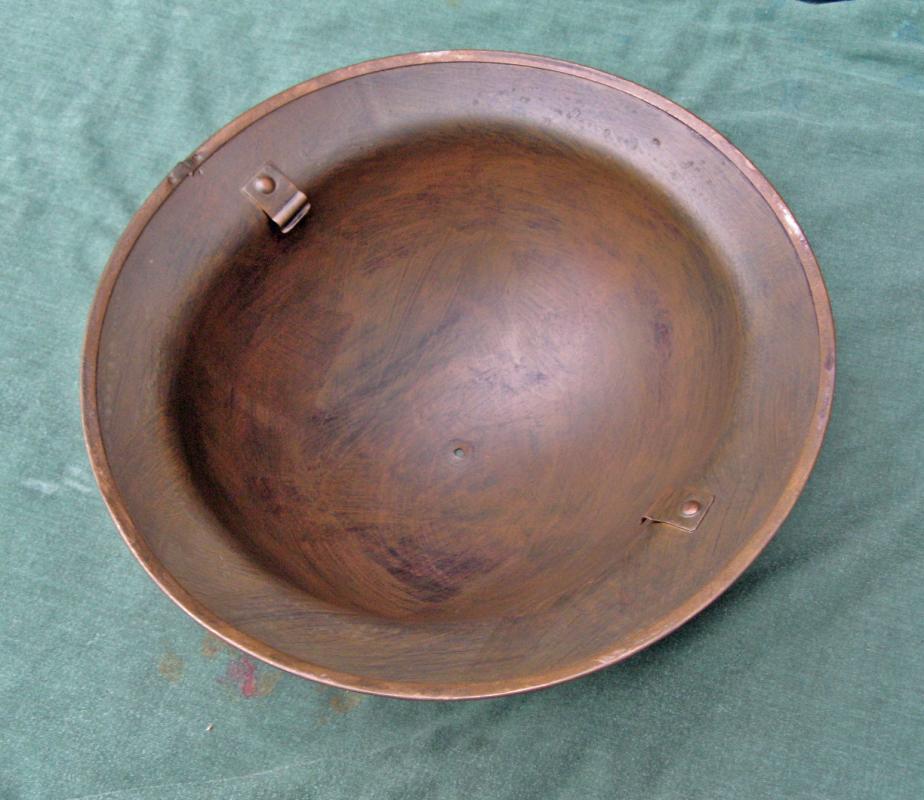
The colour is now rubbed away to give a worn look. Don't get too carried away here, less is more. Just when you think "I'll just rub a bit more away here" then don't.
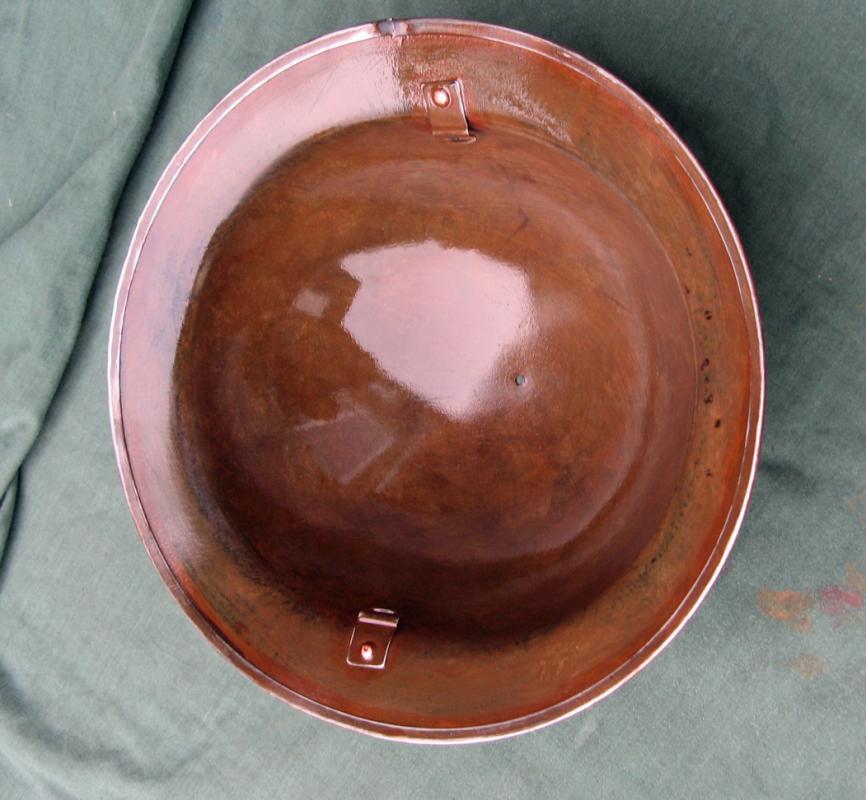
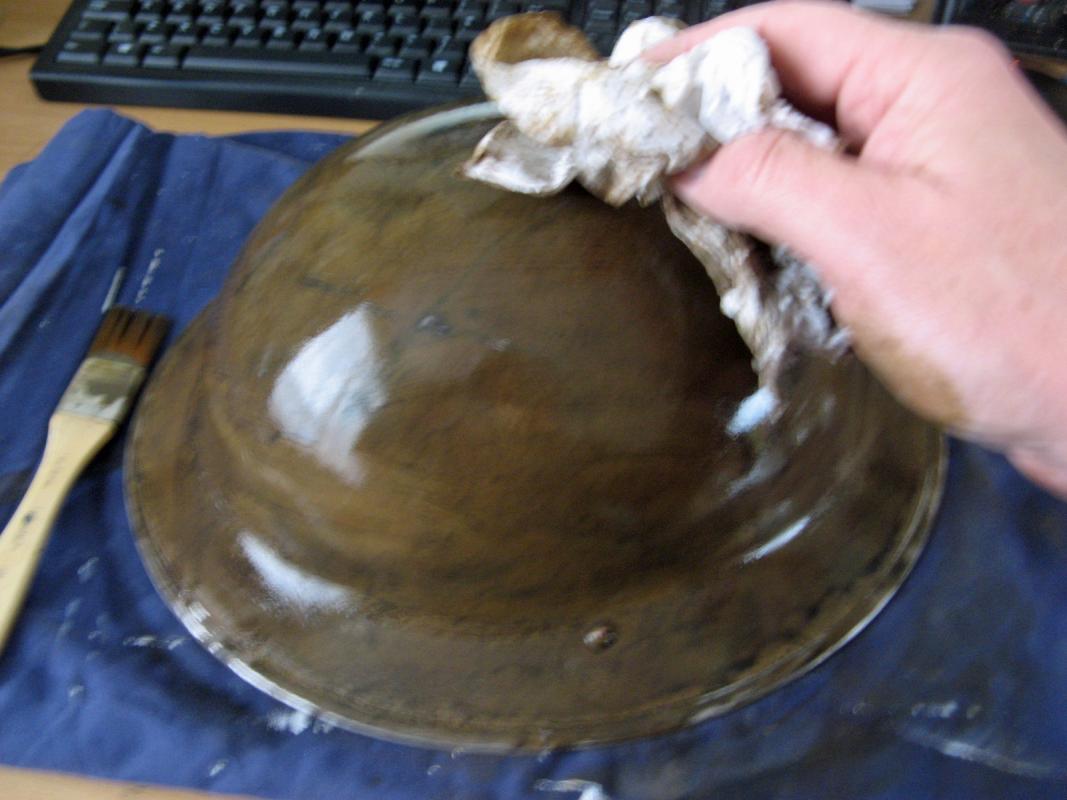
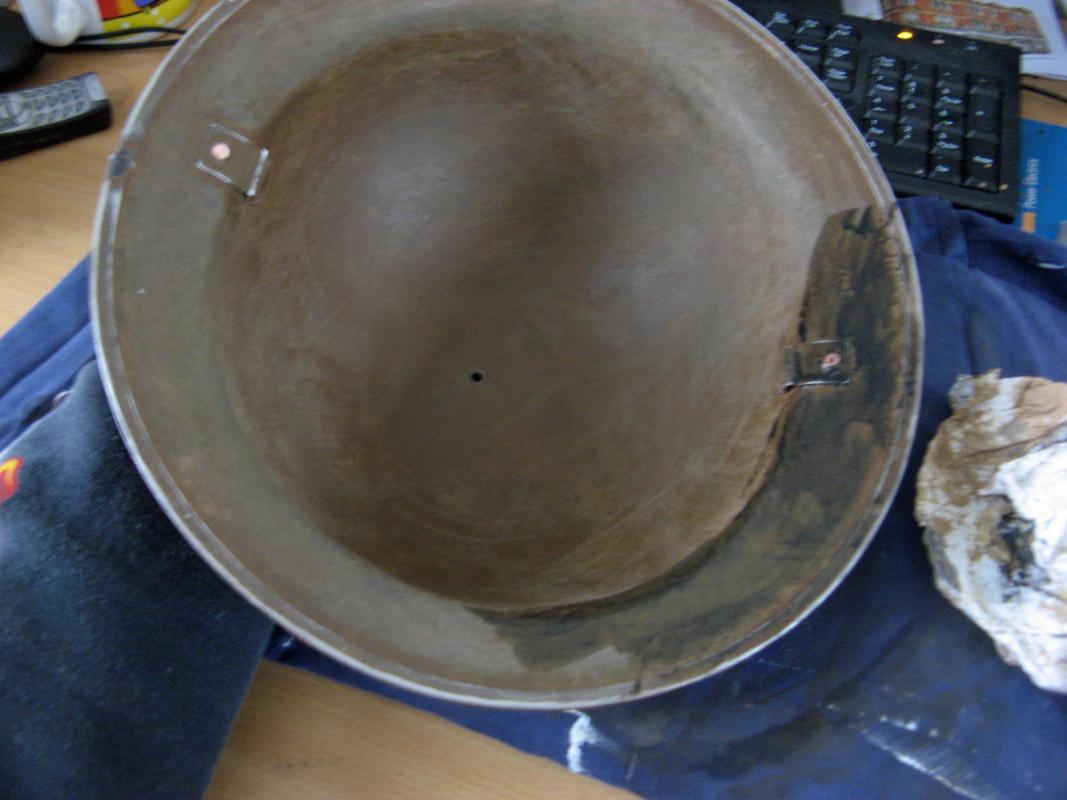
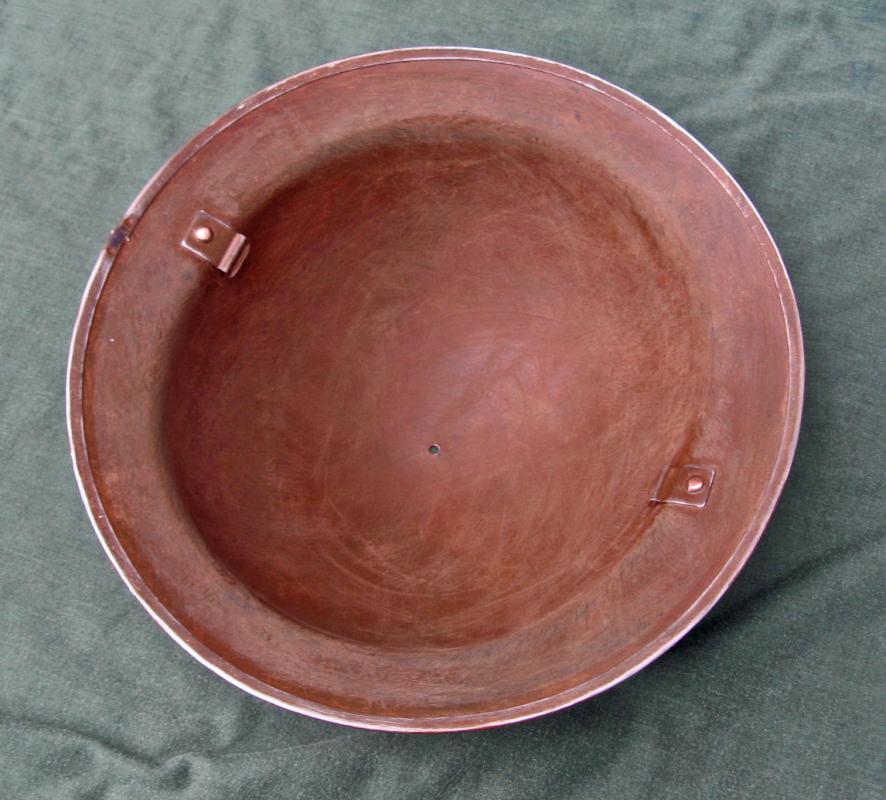
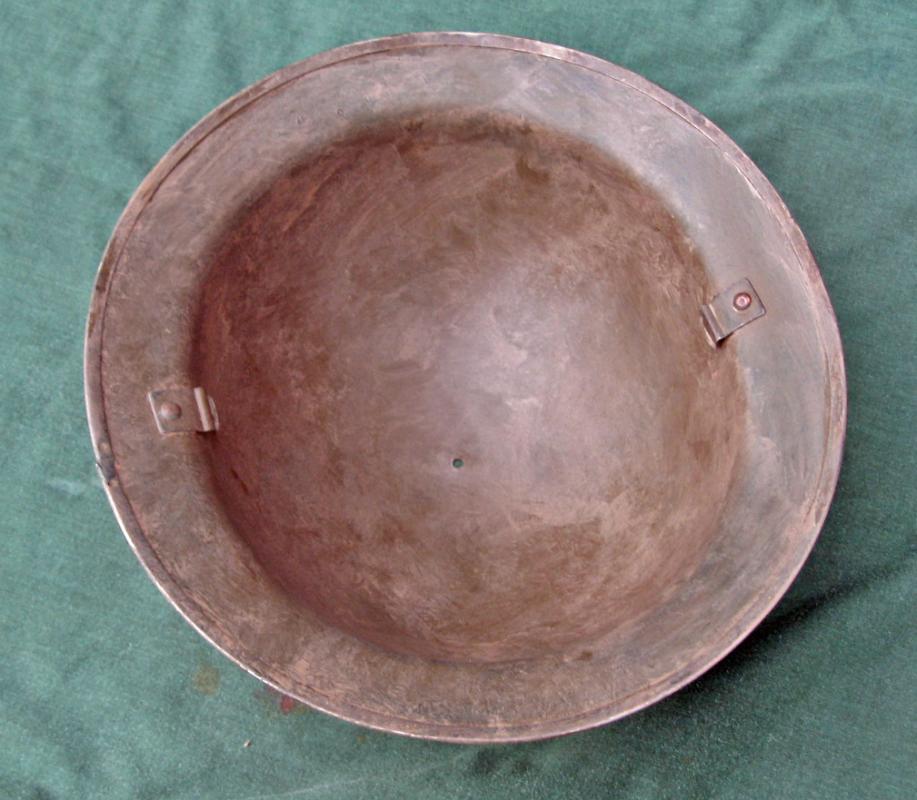
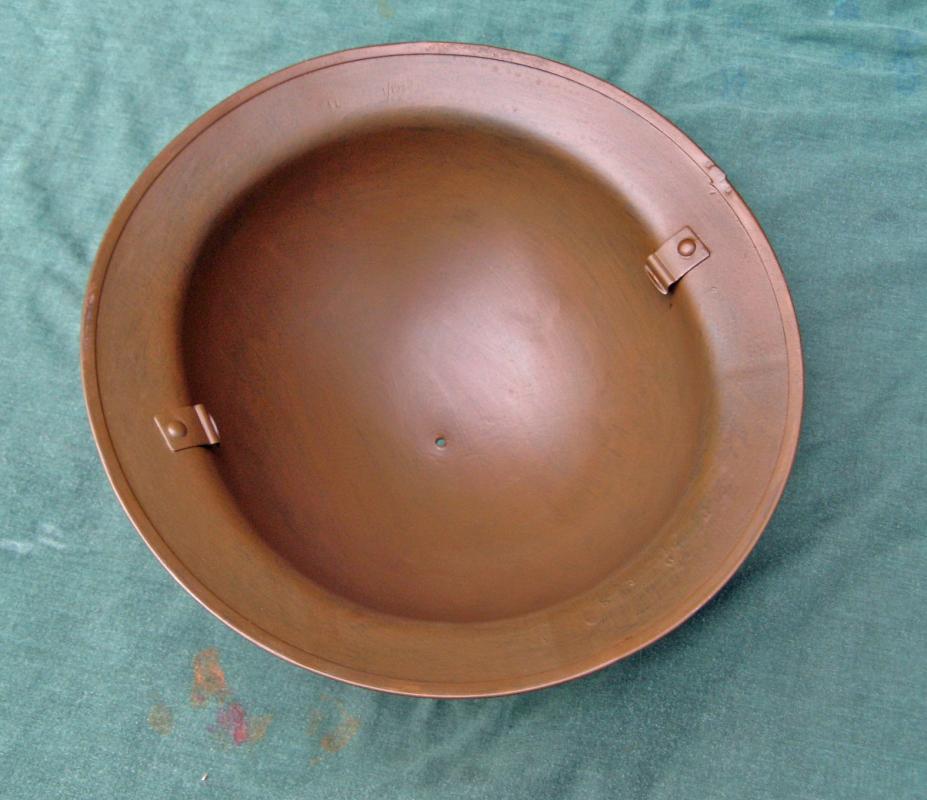
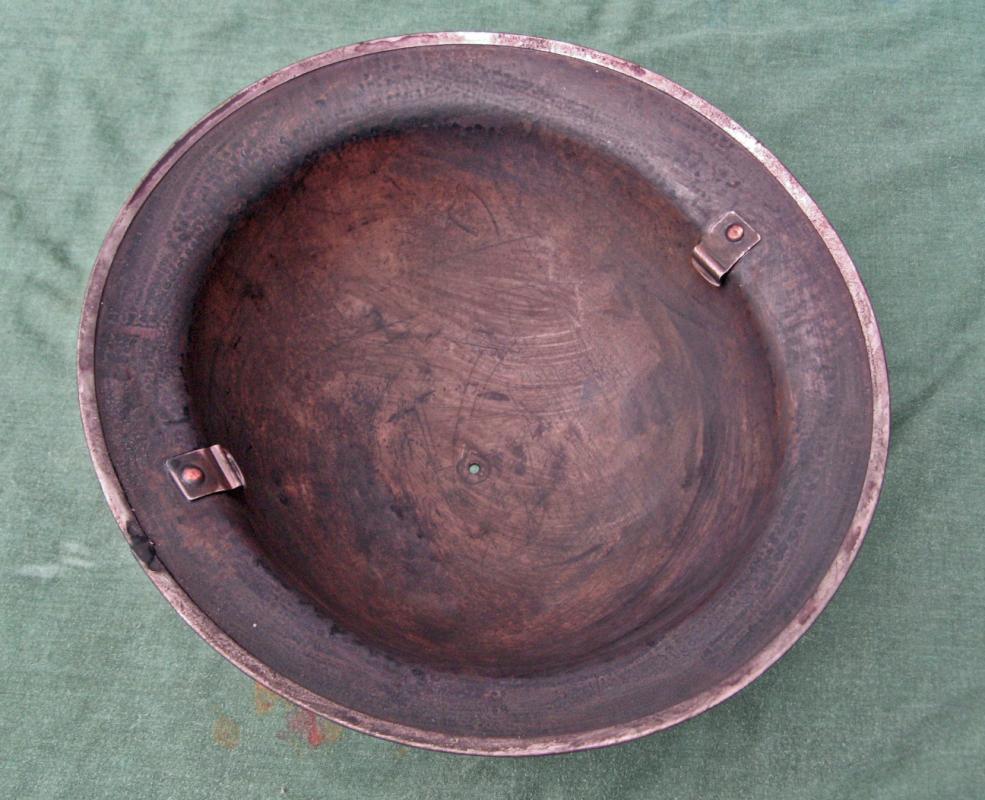
Fill your jam jar with some clean water and dip in the corner of your scourer pad. Rub gently into the paint where it would be worn when handling over many years, where it's been thrown onto surfaces, where the owner looped his chin strap around the front and where he's bashed it in bunkers and scratched pushing through brambles. Use some kitchen paper to wipe away the wet and then dry. Remember to do the inside of the helmet as well. You can rub quite a bit of paint off of the rim - go look at an original and see how it's worn away.
Once it's about right, and dry, spray on another intercoat of lacquer to protect what you've done
 0
0 -
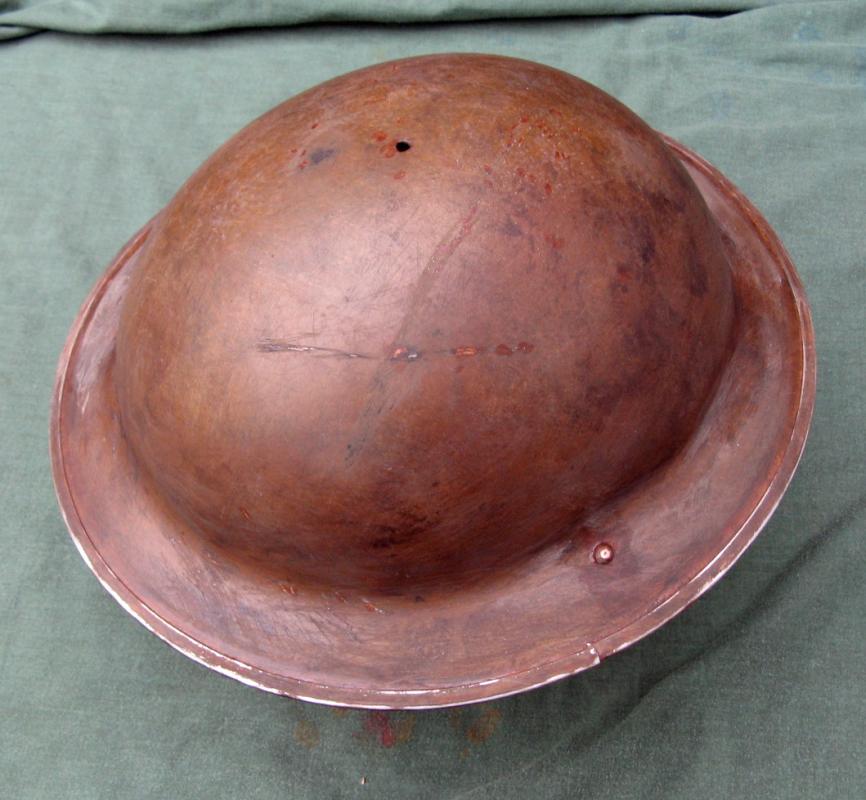
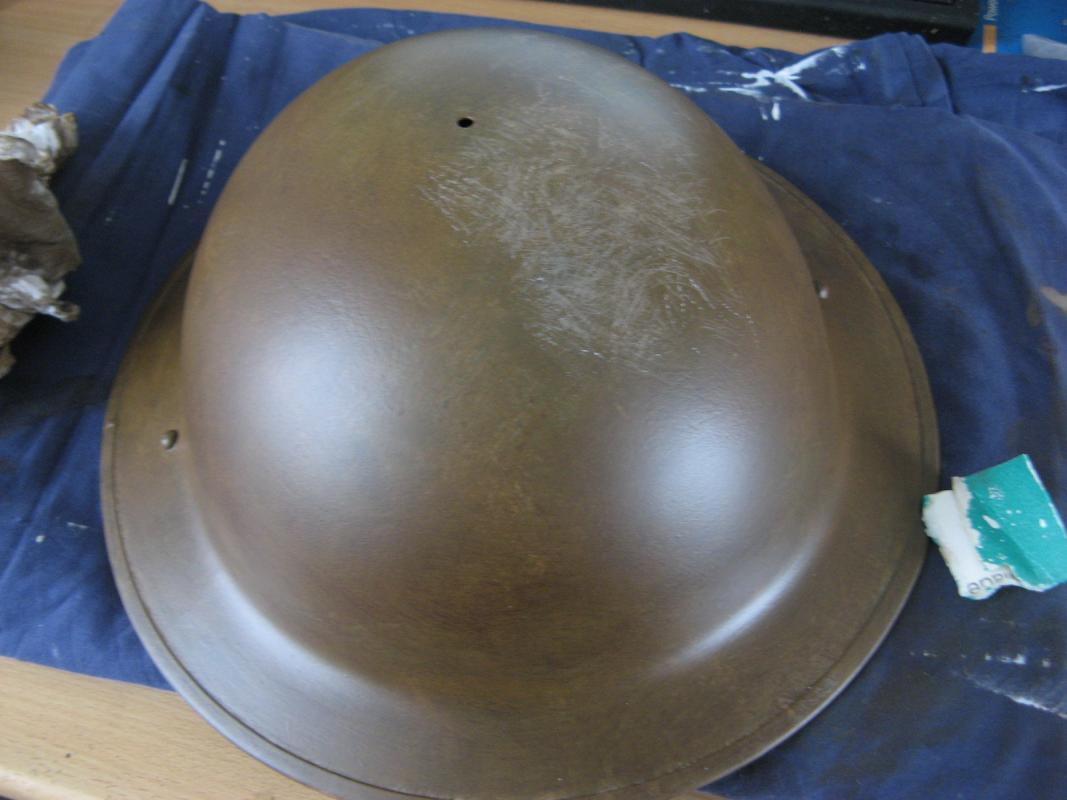
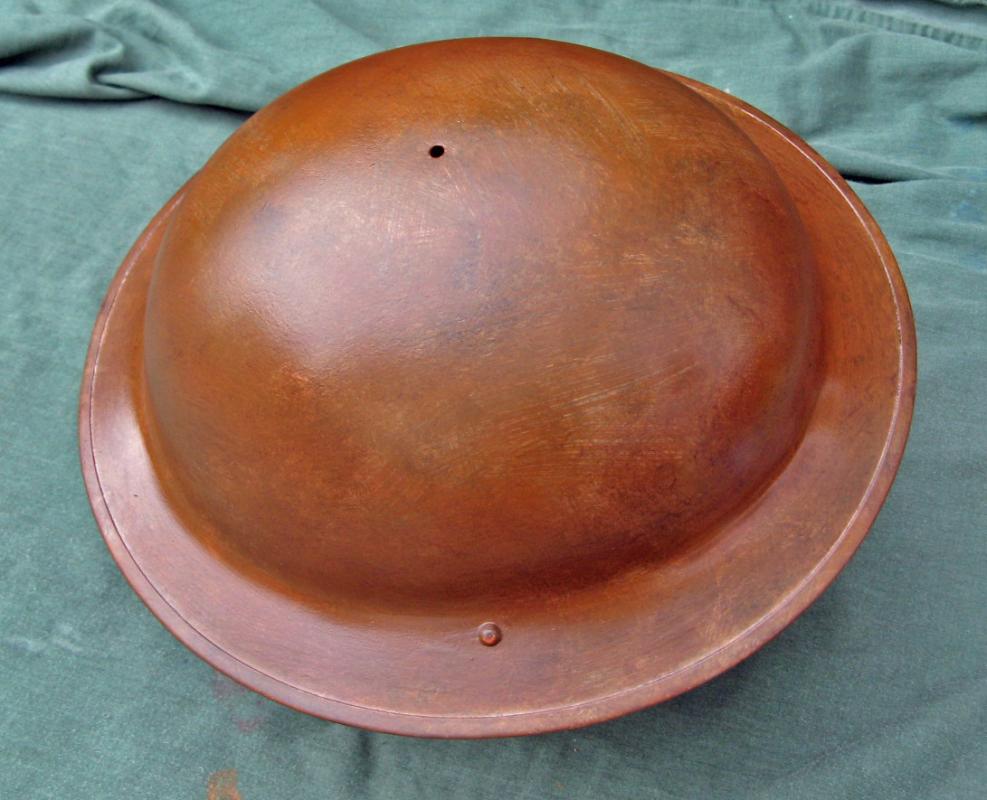
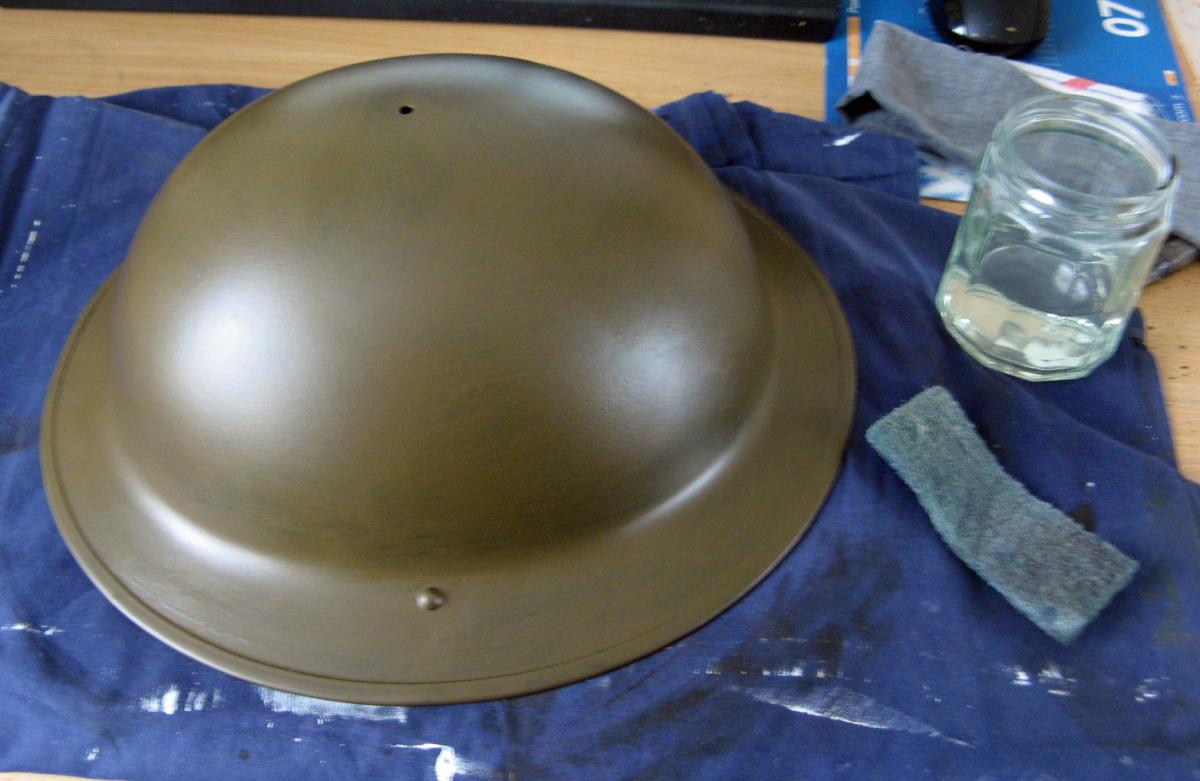
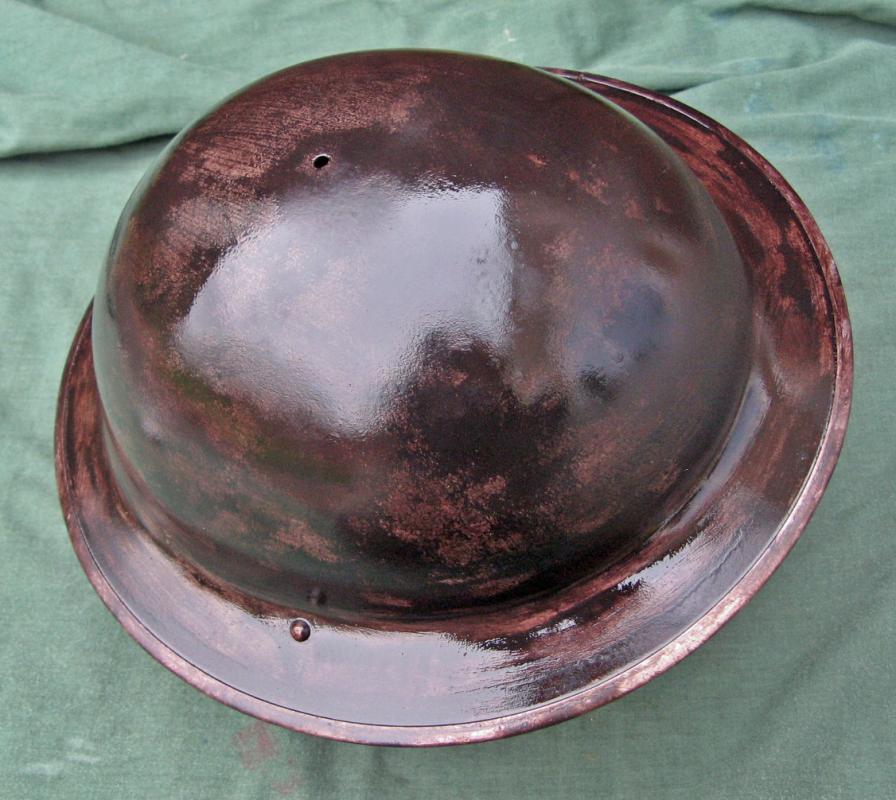
The colour darkens as it is dried with the hot gun. To see the colour correctly I've taken some more pictures outside.
Another coat of the same colour was needed to get it right. Again we're not looking for a completely flat opaque colour just the correct foundation colour for the helmet.
 0
0 -
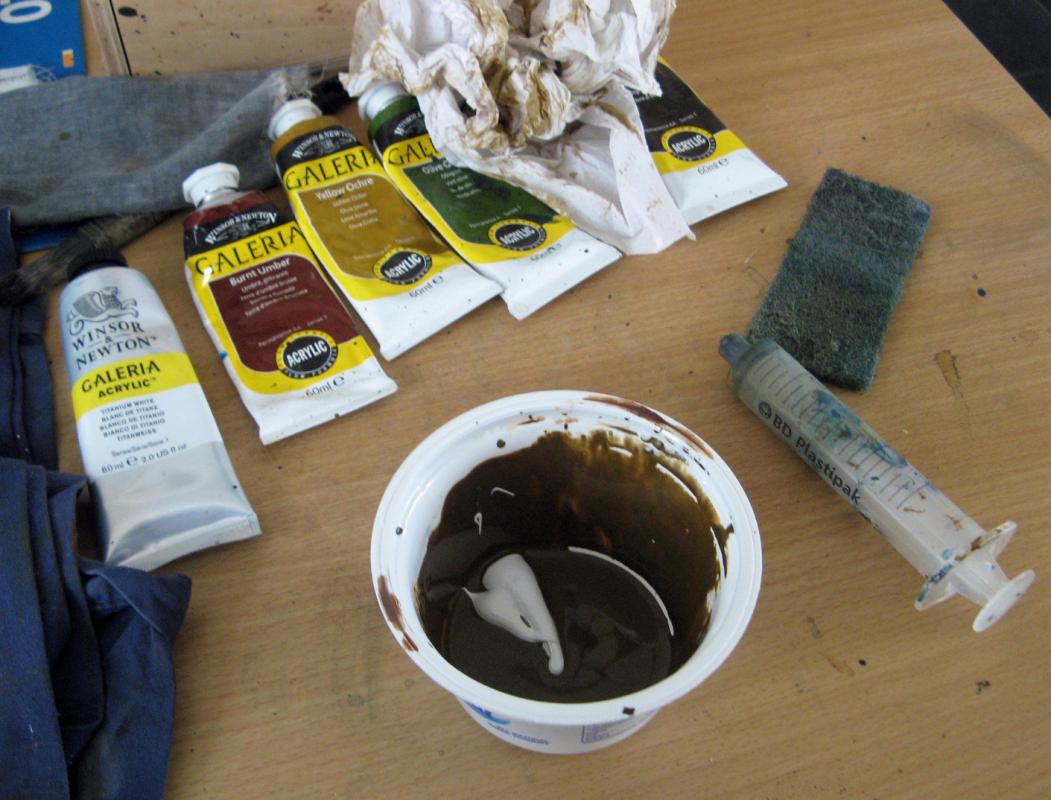
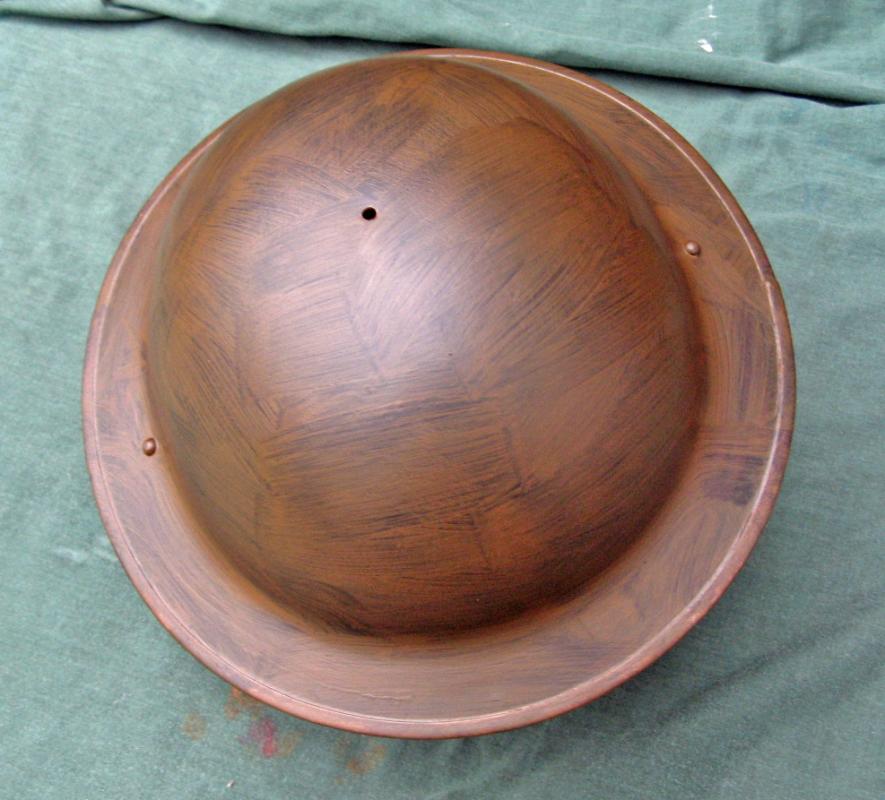
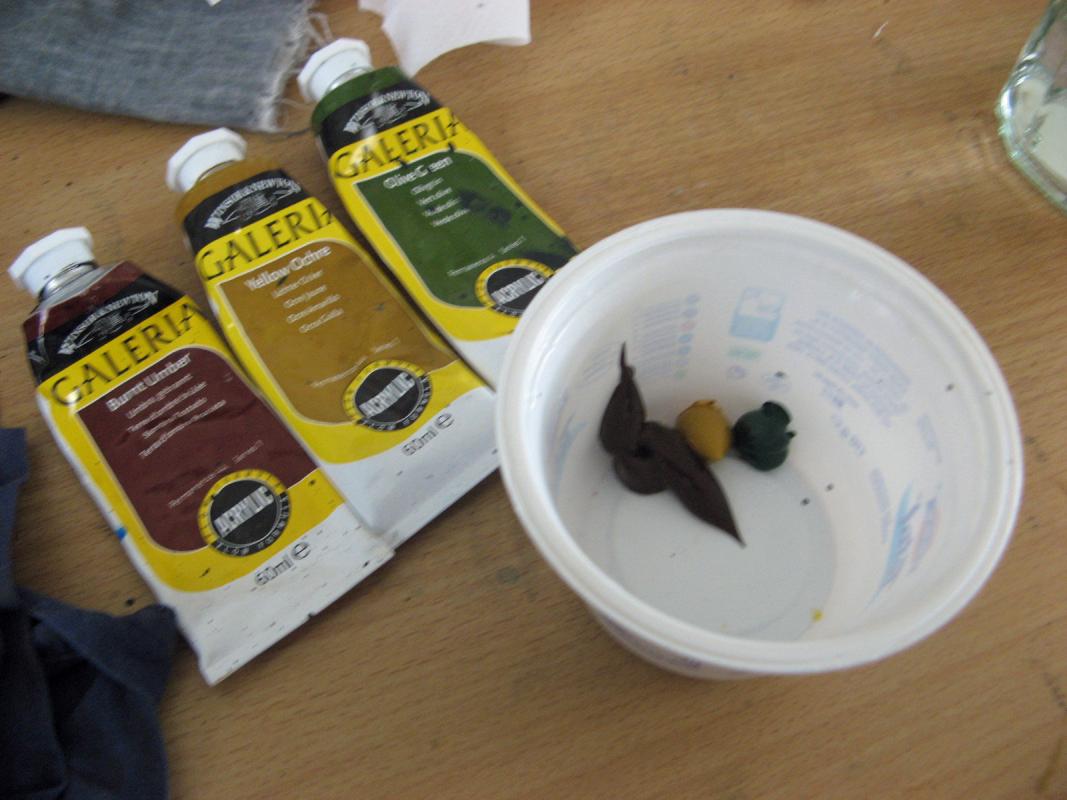
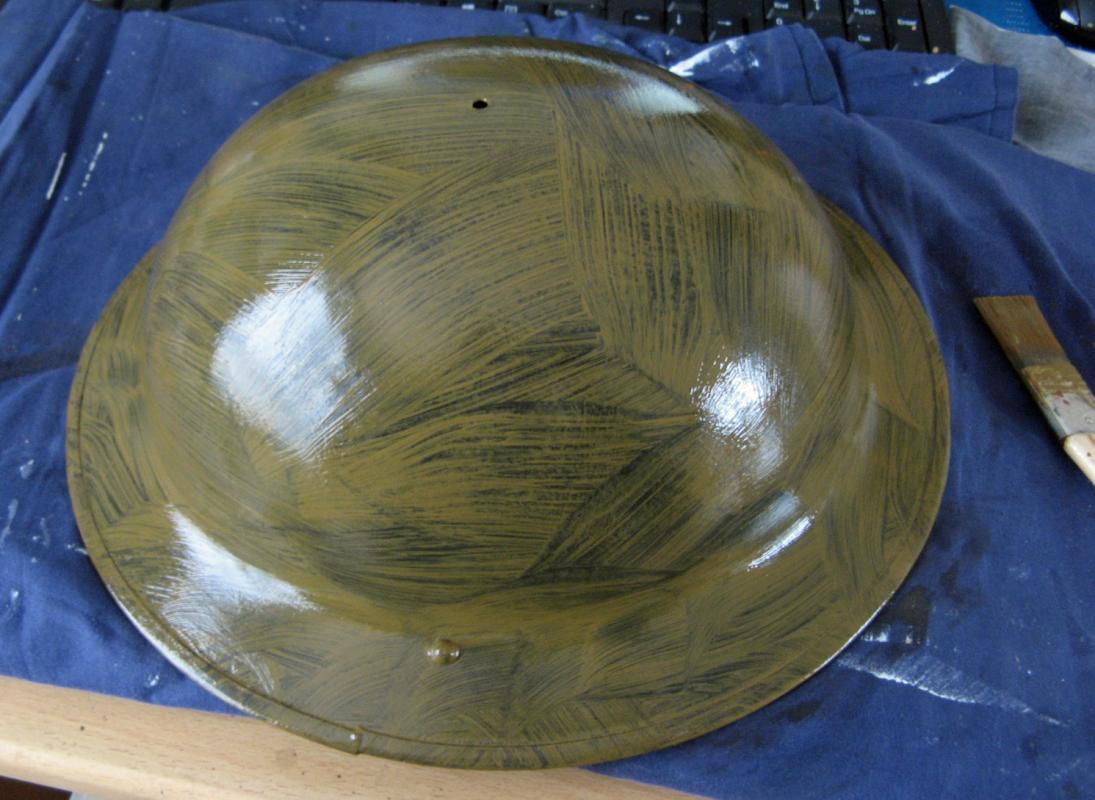
The next colour
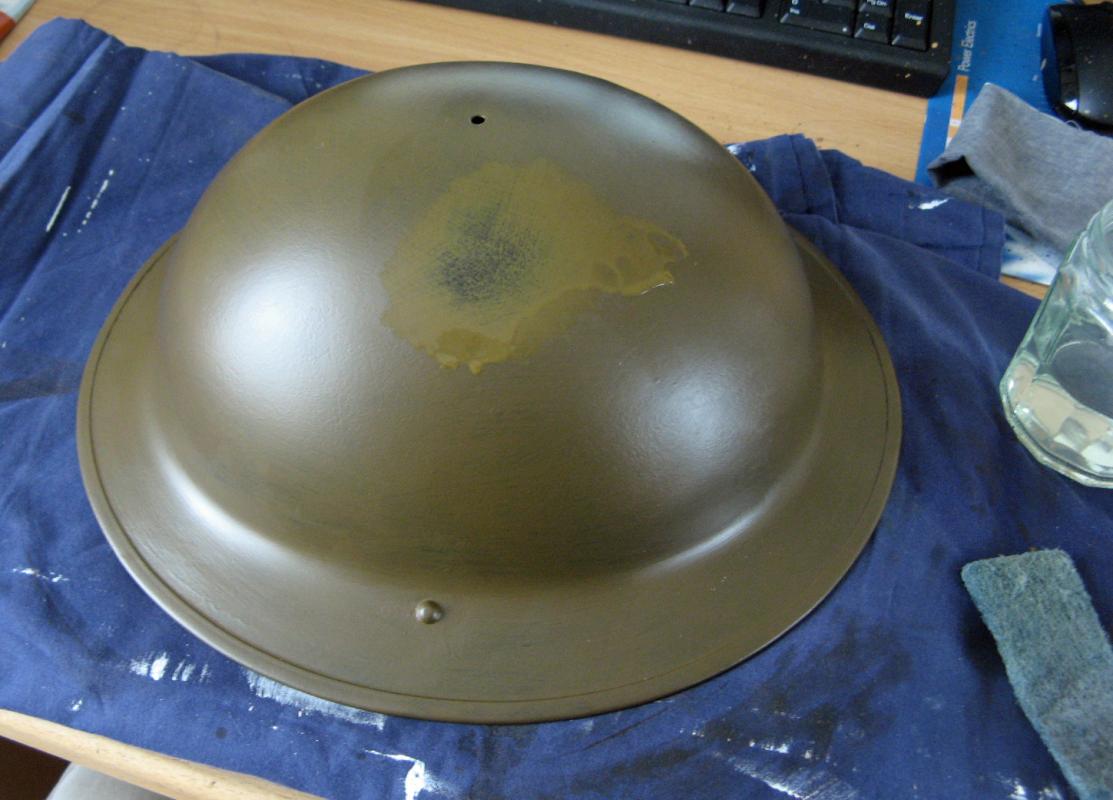
The pictures are a bit fuzzy here but I think you can make out the quantities of paint to mix. Squeeze the three colours into your old mixing pot, Its about 5 parts of Burnt Umber and 1 part of Yellow Ochre and 1 part of Olive Green - don't get too involved in measuring this out - just squeeze the rough sizes I've shown in the pot.
I then use an old syringe to squirt in about 4 or 5 mils of water. You can see how much once the water is mixed into the paint in the pot. Although it looks pretty dark in the pot it looks quite light when it goes on the helmet. The camera has problems with seeing colours indoors, in reality it is not yellow as shown but the difference in tone is about right.
You can see how the lacquer is resisting the water being applied. Don't worry about this, keep working the colour onto the helmet until the bubbling disappears. If this is taking ages then rub the helmet with your fingers through the paint. Once its covering then get at it with the hot gun.

 0
0 -
There's a couple of things you need to know about using lacquer. It smells, so don't use it in the house. It's flammable, so don't use it next to the living room fire. It's not good for you, if you breathe it, it will go on your lungs just as it goes on the helmet and will lead to some horrible things happening to you, so wear a mask. This is particularly so if using a 2 pack resin based lacquer.
Also, if you use a lacquer when it's been raining it absorbs the moisture in the air and can go 'misty'. Don't worry too much about this, another coat over the dry lacquer will sort this.
Purity Seal is a satin finish, I would rather it was more matt but it does look right on a finished helmet. Gloss is ok if that's the look you want. Matt lacquer can be made gloss by using a rubbing compound and gloss lacquer can be made matt by using a scotch brite scourer. They are essentially the same thing, one flows better to give a glossy finish. Once your helmet is finished you can put on loads of coats and shine it up.
Here's how it looks once it's dry. This is the rim with the maker's stamp and date of manufacture.
 0
0 -
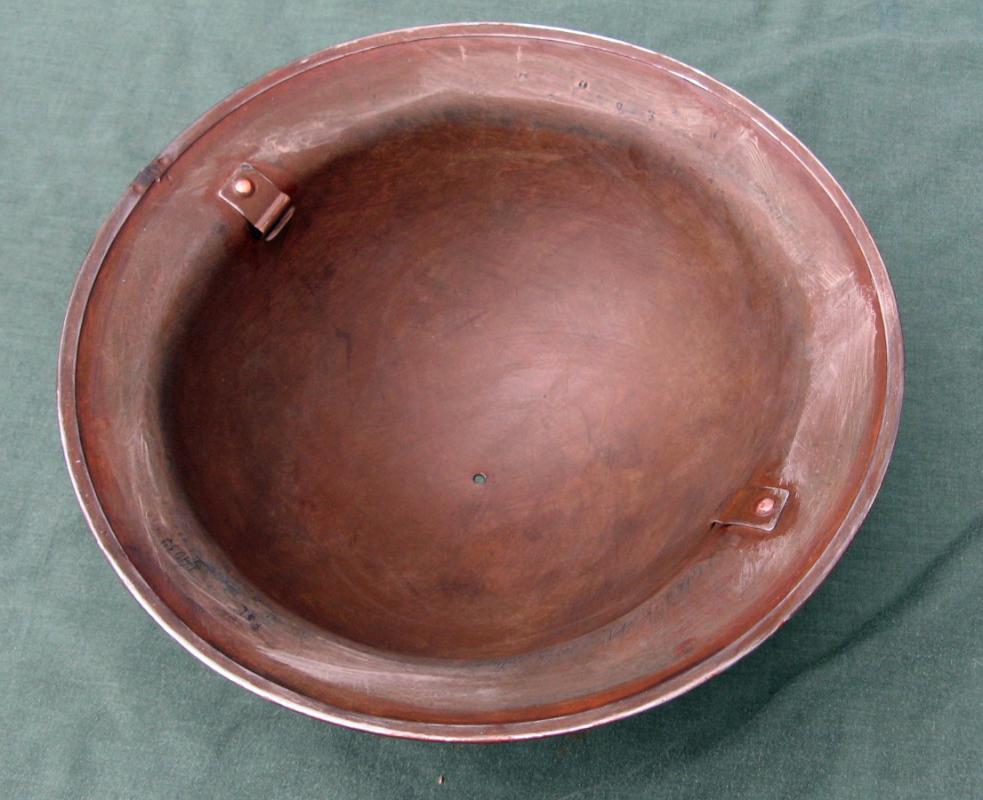
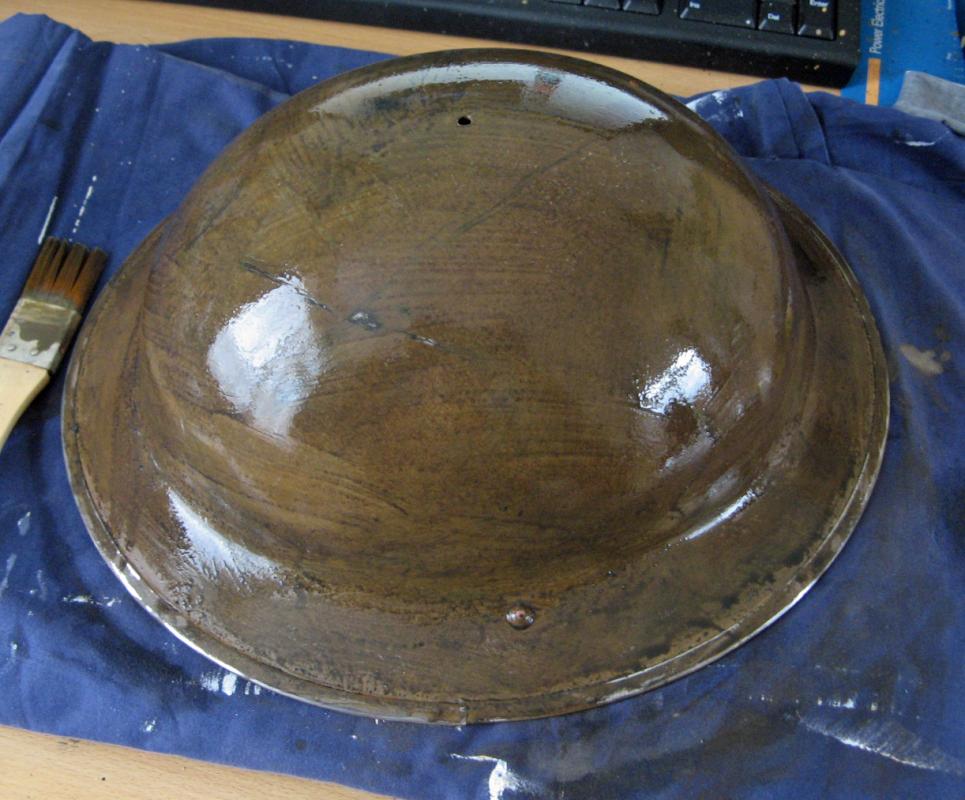
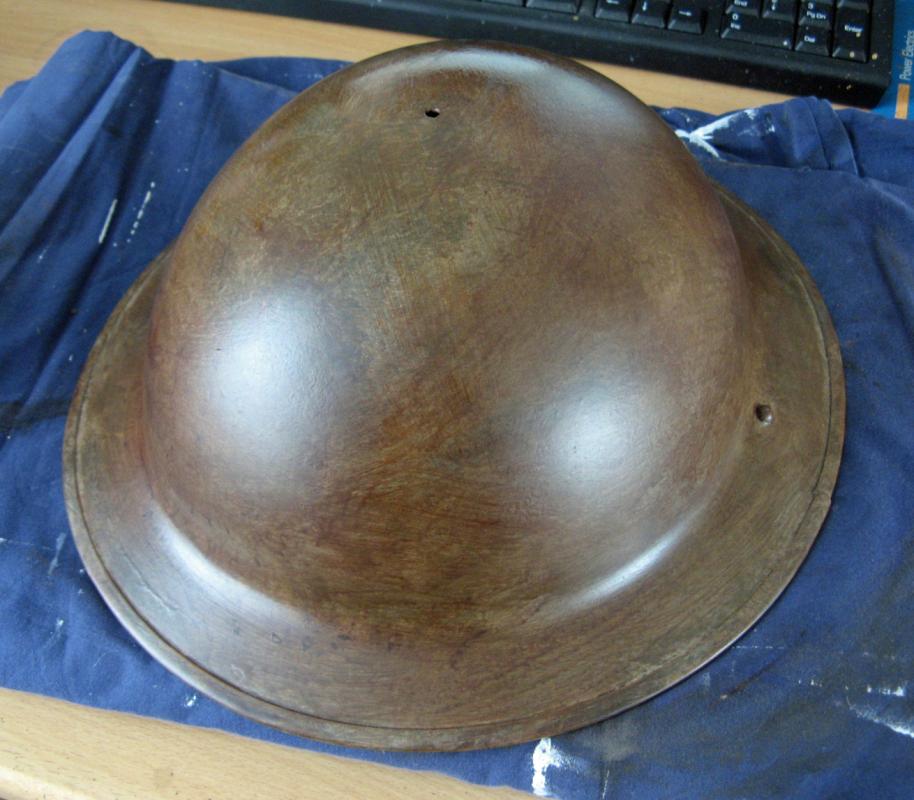
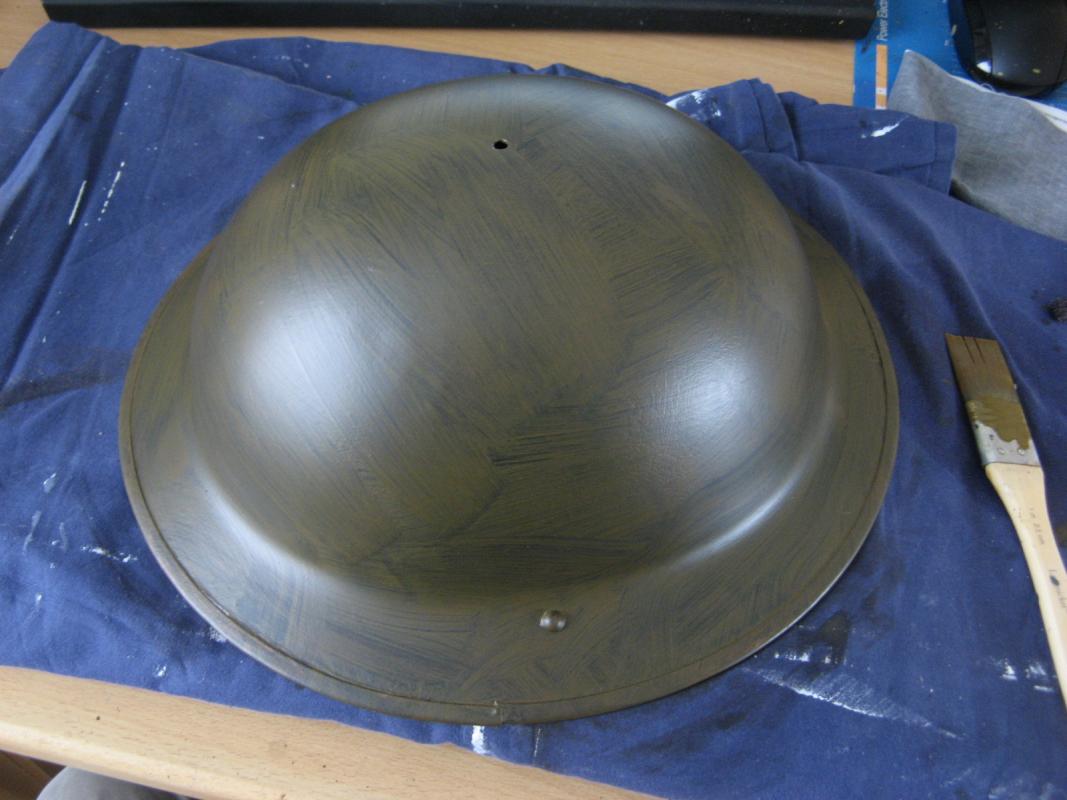
This is the base coat done. This is the colour that you want to show through on your worn looking helmet. If you are doing a German camo helmet this will be a dark green/grey or whatever colour you'd like. Old helmet base colours are very dark so keep it that way.
As we will be rubbing away some of the colours going on top of this, it needs to be protected. So an intercoat of lacquer goes on here.
Shake up your rattle can and spray on a thin coat. The Games Workshop Purity Seal goes on really easy, keep the spraying very light so that it looks wet but no where near running. You're looking to protect the colour below only. It looks really wet in the photos but it is only a very thin coat that dries very quickly.
 0
0 -
A couple of coats and this is what we've got. Each coat has been dried using my trusty paint stripping hot gun. If you are using one of these be careful you move it around to just dry the paint or it'll start to bubble it. Sometimes I intentionally bubble the shiny lacquer I paint over the decals on German helmets to replicate an aged decal and sometimes it can help age paint/leather etc but were not doing so on this one. And these guns get metal helmets very hot, be prepared or you'll be chucking it through the window when you touch a hot bit moving it around.
This is how it ends up. The coats are very thin and watery not thick opaque colours. This is known as glazing. Don't worry if it takes more than two or three coats, you are trying to build up the colour you want slowly. We're doing the 'sneak up on it' technique not the 'make it look ###### in one coat' technique.
 0
0 -
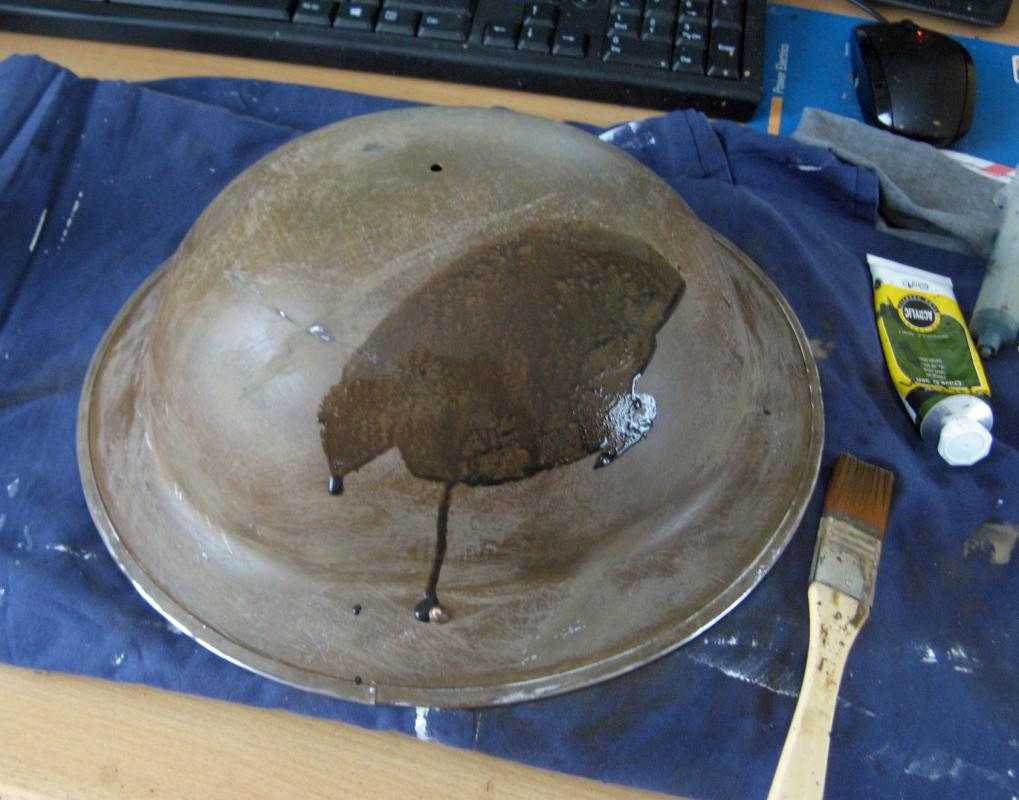
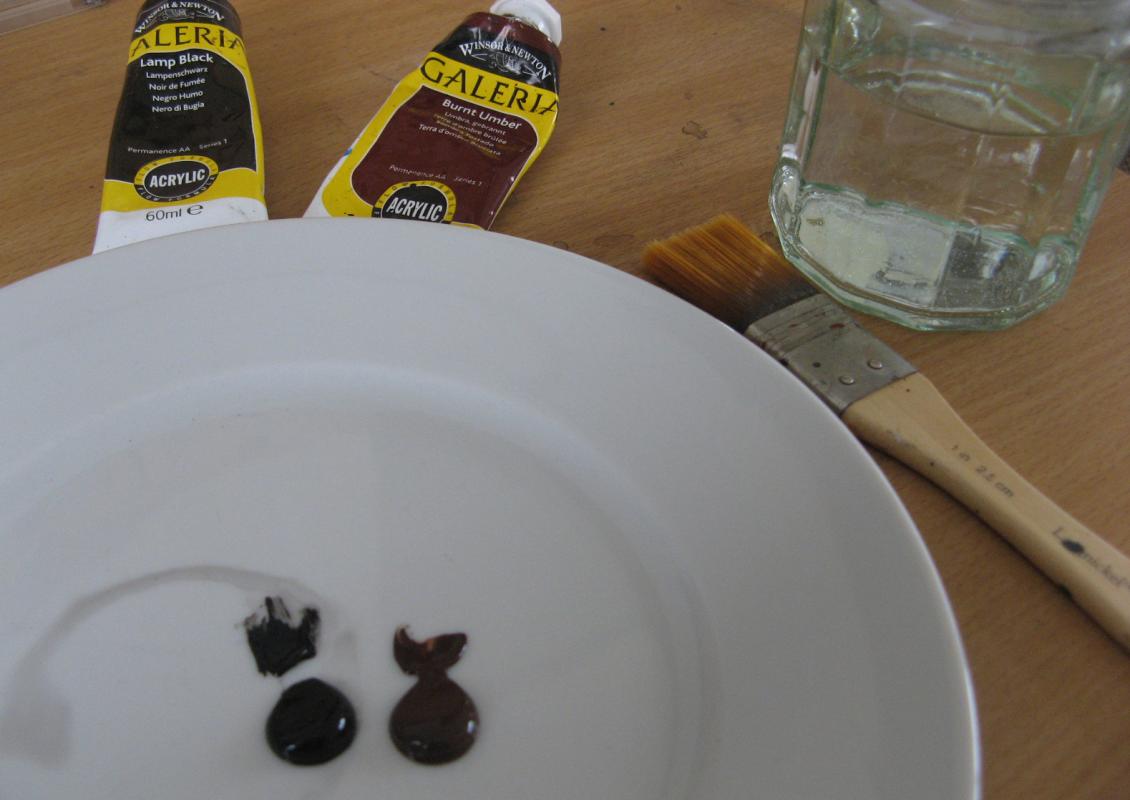
Get your jam jar of water, a middling sized flat brush (a 1- 2 inch DIY brush out of the shed is fine) and a blob of Burnt Umber and Lamp Black onto your mixing plate.
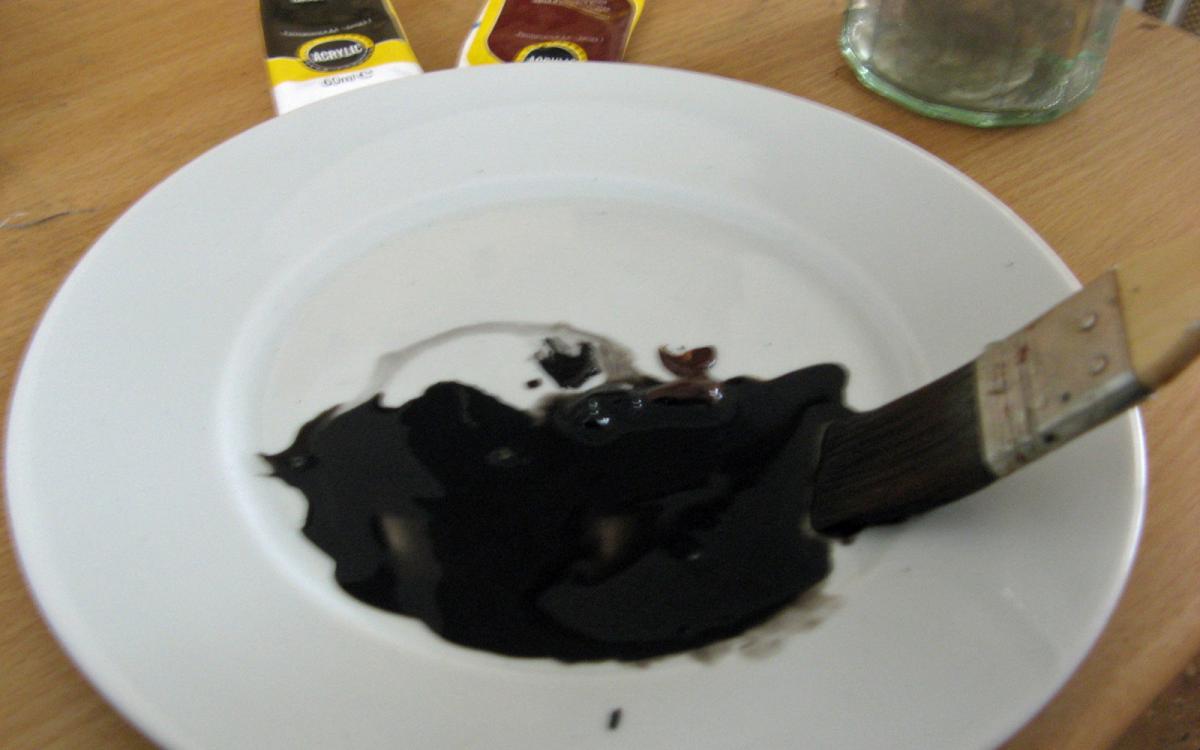
Add water until you get a puddle and drag some of the umber and black into the puddle. Mix around until all the streaks of pure colour have mixed. Whack it on all over the helmet.
Work the colour on with your brush to get an even colour across the helmet. Don't worry that you can see through to the colours of the helmet below - that's exactly what we want.
A word or warning here. Because you are concentrating on getting the helmet right, you'll not be noticing that your flicking motion will be splattering paint over everything in the room you are working. As this is acrylic paint it will obviously stay wet on the helmet but dry instantly on your now spotty wall/curtains/pc screen/desk/ceiling/dog etc. There's no getting round this, even working outside the splatters get everywhere so make sure you've told everyone that this will happen. The last thing you want is for the other half to see these instantly she walks into the room and you trying to make up an excuse - there isn't one.
 0
0 -
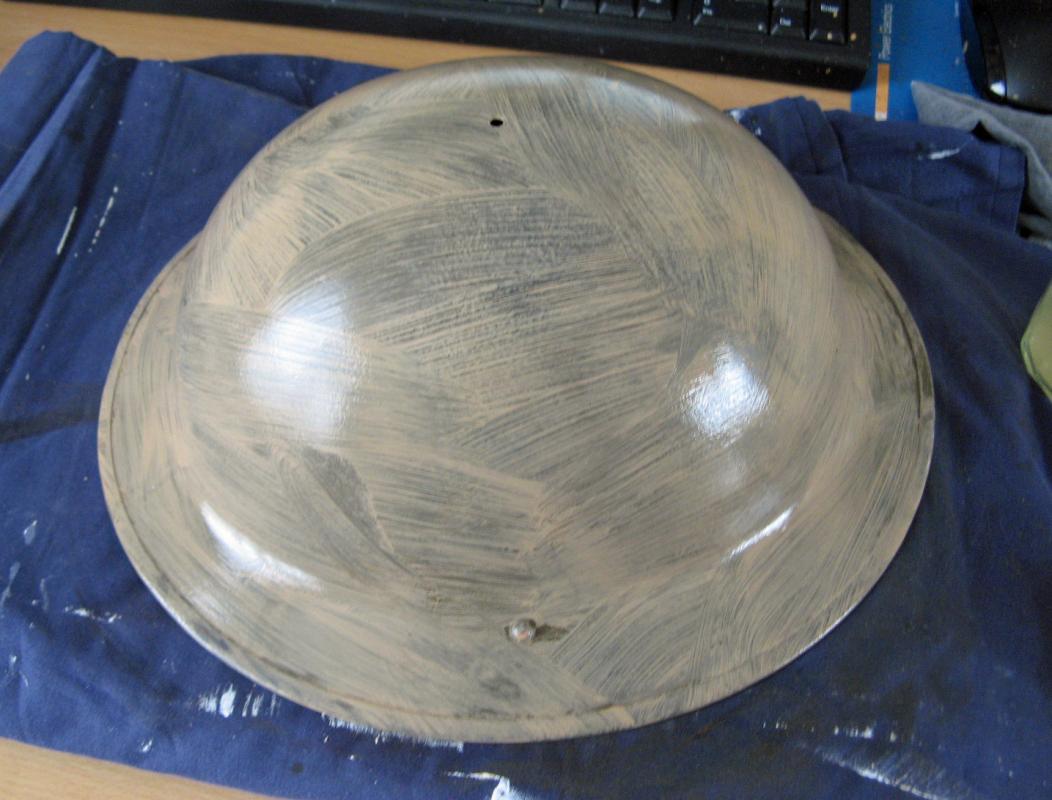
Getting the base colour onto the helmet
I've sanded again and put another couple of coats of cure rust on. Now we have a good base to build up on.
If you're working on a relic you would have treated the rust in the same manner. Then cover the holes with either a glass fibre (you'll need to use this if you're making up rims that have decayed away or straddling large holes) or a fibre based filler (this will straddle holes of up to a 5p piece size easily). Then use a quality body filler - don't buy the cheap stuff as it turns into concrete and is a pain to sand - to fill the rust pits and generally get the helmet level. This usually takes a couple of fillings and sandings. Don't try to get the helmet up to car body standard as the small defects actually make the helmet look a lot better when using the 'sneak up on it' painting we're going to do below.
 0
0
Painting stuff
in Military Art
Posted · Edited by Spasm
Robin and Frank - thank you Gents.
Frank, you've either tried a wash on a painting - which came out rubbish - or it's me not explaining what a wash is. A wash is a weenie bit of colour in loads of water. Even thinner than ink. When applied it runs and drips off of the surface so some mopping up kitchen roll is required otherwise you'll get a punch in the ear from the Admin Staff for painting the carpet.
If applying to a painting, say a water colour, then the area you want to wash is painted first with clear water to make the paper wet. Then apply your already mixed wash colour and move around with a big soft brush. On helmets etc, I'm trying to change the colour slowly. I don't put on the clear water, I just put on a wash (or glaze), dry it with the hot gun, and see what I've got. I then add another wash, maybe of a different colour, dry it, and look to see what I've got. I compare to the colour I'm trying to achieve (if I've got a sample or what I'm imaging in my head). And again apply another wash to get to where I want to be. Sometimes I can over do it and want to take the last wash off, this is where an intercoat of lacquer is handy otherwise all of the wash layers come off.
Acrylic paints tend to lift when applying a coat on top and dry darker than when wet. This is just something to get used to through trial and error.
Always try to work from light colours to darker colours. It's very difficult to go lighter. Which is why I give each element to be painted on the dark helmet a base of white which is then darkened to the finished item. Exactly like doing a custom bike tank with an airbrush. So anyone wanting Harley Davidson, flames and an Eagle on an M1 helmet, urrrgh, let me know.
Go get your brushes out of the shed.