


Spasm
-
Posts
1,869 -
Joined
-
Last visited
-
Days Won
7
Content Type
Profiles
Forums
Blogs
Gallery
Events
Store
Posts posted by Spasm
-
-
Tony - maybe I should have actually looked at it properly, sorry
So 7th Battalion, raised 11th Sept 1914 as part of Kitchener's Army. Joined 51st Brigade, 17th Northern Division.
Division moved to Dorset and in 1915 on to Winchester. After reversing the selection for Home Defence, off they went to St Omer, France in July 1915. Familiarised for trench warfare in Southern Ypres and took over the front lines there. Spring 1916 saw them in action at the Bluff, South East of Ypres on the Commines Canal.
They then moved South to the Somme and saw action in the Battle of Albert when the Division captured Fricourt and fought in the Battle of Delville Wood. 1917 saw them off to Arras in the First and Second Battle of the Scarpe and the capture of Roeux. They then moved to Flanders and fought in the First and Second Battles of Passchendaele.
1918 saw them in the Battles of St Quentin, Bapaume, Amiens, Albert, Havrincourt, Epehy and Cambrai - Maybe William saw those first ranks of tanks go into battle.
0 -
Tony - that's about it I think unless there's some way of finding his Bn so that Steve can do a bit of research on locations, battles etc during WW1
Steve - lots to go on now. Go join a research site (ancestry/find my past etc) and see if you can't track him down through census records etc, would be nice to see some more history on your Granddad including his police service.
0 -
Sergey
Absolutely outstanding! I love the Tancer picture.
 Great artwork0
 -
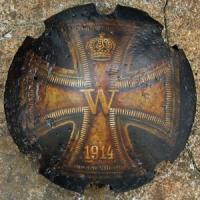
Here's William's medal card
 0
0 -
Steve
Welcome to the forum. Lots to see and enjoy.
Ha, a new member - that's my forum bonus sorted just in time for Christmas (Mervyn, send the cheque to the usual place).
Paul (thanks Geezer) has sent me your Grandfather's medal card so I'll post it on that thread.
0 -
-
Tony
Yes, you'll need all the colours to get the brown we're looking for. We're going to be doing the 'sneak up on it' painting technique. A bit of mixing and quite a few layers of thin glazes until we get the look we want.
They will also be the ones you need if you want a WW1 apple green to a WW2 feldgrau so they'll do for almost any helmet you'd like to do. If you want to go for an Air Force, Navy of indeed French Adrian then you'll need Windsor Blue as well.
0 -
Paul - the WW1 group (his Grandfathers) are here
http://gmic.co.uk/index.php/topic/64442-medal-group-research/
Mervyn and all, thanks very much, I'll be passing all the medals back to him tomorrow and I'll pass on the information
Keep coming up with info though, if you can, I see him most weeks and he'll be most grateful for anything you may come across. I'll also insist that he joins so you can all say hello yourselves.
Cheers Gents
0 -
The lacquer
I've used nearly every lacquer ever dreamed up. Right from the cellulose days when I had to come out of the garage to breath before I passed out, through the mixed 2k stuff (which is what you need for a helmet for use outside as well as your custom Harley and Hot Rod) to the stuff sold in the car spares shops.
This is the stuff I use for these helmets. It's sold by Games Workshop and called Purity Seal. It's intended for those little plastic Space Marines, Orcs, Chaos Marines, Eldar figures on table top battle games. It's quite expensive at around £9 ($13) a can. But it is an absolute joy to use, is very forgiving, dries very quickly (just a few minutes) and is quite durable. I would never use it anywhere near a car or a motorcycle tank, but for the finish on helmets its just great. It dries fairly matt with a touch os satin - which suits the helmets. If you want a slightly shinier finish you can buff up like any lacquer. I also use it for an intercoat (a light coating to protect the paint you've just put on while you work on the next layer).
If you can't get this then go for a matt finish rattle can lacquer from the local spares shop. You don't need a resin two part mix, go for the world friendly acrylic lacquer. But make sure you test a little squirt of it on the inside of your helmet BEFORE you gamely lay it on your artwork.
Will be back in a couple of days campers so get yourself all geared up in the mean time.
 0
0 -
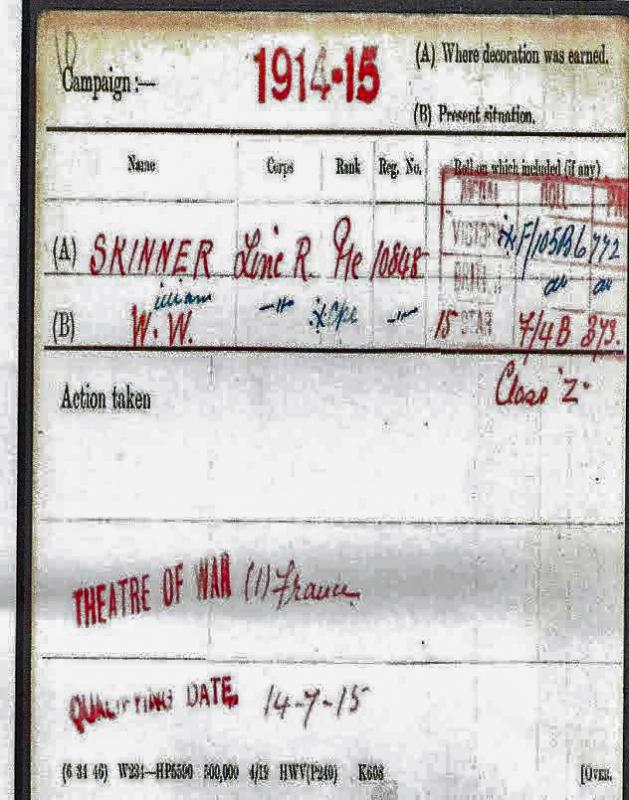
The paints
I use these colours all the time. They will all be used for our helmet - these colours will also do all the German helmet colours - other than Air Force or Navy which will need some Windsor Blue.
The paints are fairly inexpensive Acrylic paints. They mix easily with water, wash easily in water and are used much like watercolour paints but are a lot more 'robust' when applying. Lots of people don't like them as they tend to 'wash' off the colour underneath and dry darker than when wet. Once dry they form a hard resin/plastic that is pretty durable - especially if spilt on clothes or the carpet. Or splashed up the wall when flicking your brush around while painting a helmet. If you spill any you'll need to get to it quickly as acrylic dries almost immediatley when it hits something you didn't want to paint.
So, what you are looking for is 60ml tubes of acrylic artists paint. I've never used the kiddies stuff but I expect it'll be ok but there's no point in getting the expensive top range professional artist stuff. The ones I use are from the local cheap shop and sell for about £3.50 per tube (about $5 I suppose). There's enough to keep me going for about 6 to 10 helmets.
The colours you will need are:
Titanium White
Lamp Black
Yellow Ochre
Burnt Sienna
Burnt Umber
Olive Green
Go for those exact colours, not 'brown' or 'green' or 'mars black' or any other colour. These work very well and match the colours within almost all camos of the world. Not bothered about the maker of the paint go for the exact colour names and acrylic paint. Not watercolour or oil paint or spray or airbrush or pre mixed or tablet. Just get the tubed acrylic.
If you are going to the art shop, get some middling and weenie detail brushes while you're there, you'll need them later for the detail stuff.
 0
0 -
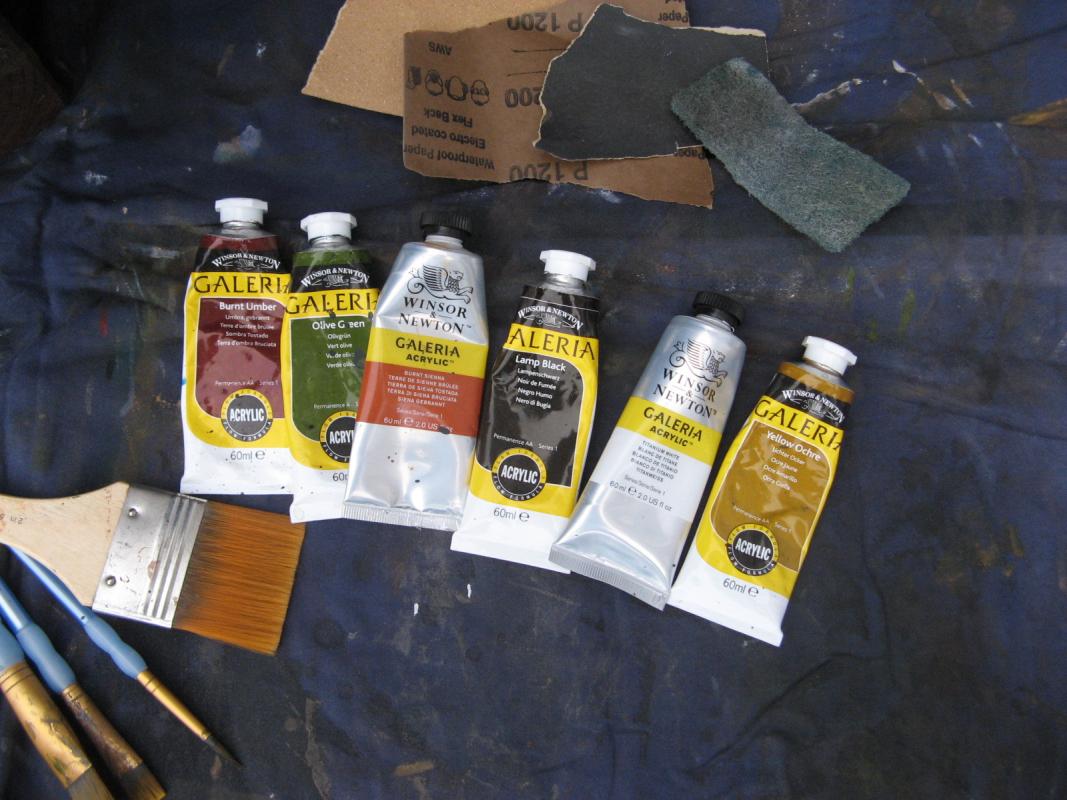
This is the stuff you'll need to get the base colour done. It's the most fun bit, happens pretty quickly, but probably the most difficult to get right.
There's standard colours that you can go off and buy but a plain single colour just doesn't look right. The early WW2 helmets were British Service Brown BS381 499, later war Middle Bronze Green BS381 223 and tropical/desert were Light Stone BS381 361. I think they are the correct but we don't want them for this project.
We're going to mix our own, splash about a bit and sneak up on the colour we want.
So, any old end up, we want our nicely sanded and protected helmet, an old yoghurt pot for mixing enough colour to cover the helmet several times, an old jam jar for water, an old white crockery plate for mixing colours, some kitchen roll for dabbing, wiping up etc. Some sandpaper and wet and dry, around 800 - 1200 grade, a scouring pad (not soap impregnated), a selection of brushes (your 1 inch DIY brush will do as the paint needs to go on pretty quickly), a selection of paints (more about them further down), a rattle can of lacquer (more about that further down) and a heat gun (a proper one that strips paint, a hair drier will do but takes a bit longer and is a bit less risky)
 0
0 -
Fantastic group. I can't resist EK2s.
Thanks for showing a great picture too.
0 -
Ah, that'll be the National Archives then. Mumble mumble. Been there, found a combat report by him but no recommendation for the DFM. Probably me as I find it a difficult site to search.
0 -
Black over lime green over dark green, hopefully not painted inside as well - watch those split end thumbs.
The paint we're going to be putting on isn't thick. It's meant to expose scratches and stamps to bring out that nice patina so the markings should remain. I've had some very very lightly stamped helmets and have even left a blended in patch of bare metal to leave them exposed. It'll be under the rim so I think a bit of missing paint is worth the stamps being seen.
I'll hopefully be base painting the helmet in the next day or so.
0 -
Paul - PRO site? Sorry, tried to think up what the letters were for but failed.
0 -
Tony
A lot of relic helmets are so rusty that removing it would mean that there'd no helmet left. If it's small areas of rust then I'd suggest you get rid of the rust even if you're left with a hole. The hole can then be filled quite easily using the glass fibred fillers available these days. Don't get too overly concerned about the rust, remember we're trying to get as good a base as possible to create something that's going to sit on a shelf, not worn jumping around in the woods or on a motorcycle.
If woodland jumping or 'ride it like to stole it' is where you want to go then don't use an original, go buy a reproduction and paint that like you'd paint your car or helmet for road use. Without getting too much into the science (because I can't remember it), rust is basically an electrochemical process. It needs to be able to transfer electrons from iron to oxygen. To do this it needs water (and obviously oxygen and iron). So, if one, or some or all of the elements are not present then the process cannot take place.
What we're doing is to remove the oxygen (a bit, as there's some in rust) and the water (it's going on the shelf in a warm cosy house where we don't like having loads of condensation running down the walls). There will be water vapour in your house, war room, display case, cupboard etc so we cover everything up with a few coats of lacquer which will keep water away and help protect your beloved piece of art from the cleaning lady's over vigorous dusting.
Although we can never fully protect we can make things an awful lot better.
I use a heat gun a lot, as you'll see later, but I don't use it on the cure rust to try and let it penetrate. I doubt it'll make much difference as it reacts pretty quickly with the rust making a hard surface with rust underneath. Sand over and retreat until you feel it's gonna last longer than the pyramids and it'll be fine. Trust me, I'm a doctor.
Let me go have my dinner and I'll be back.............
0 -
Gents
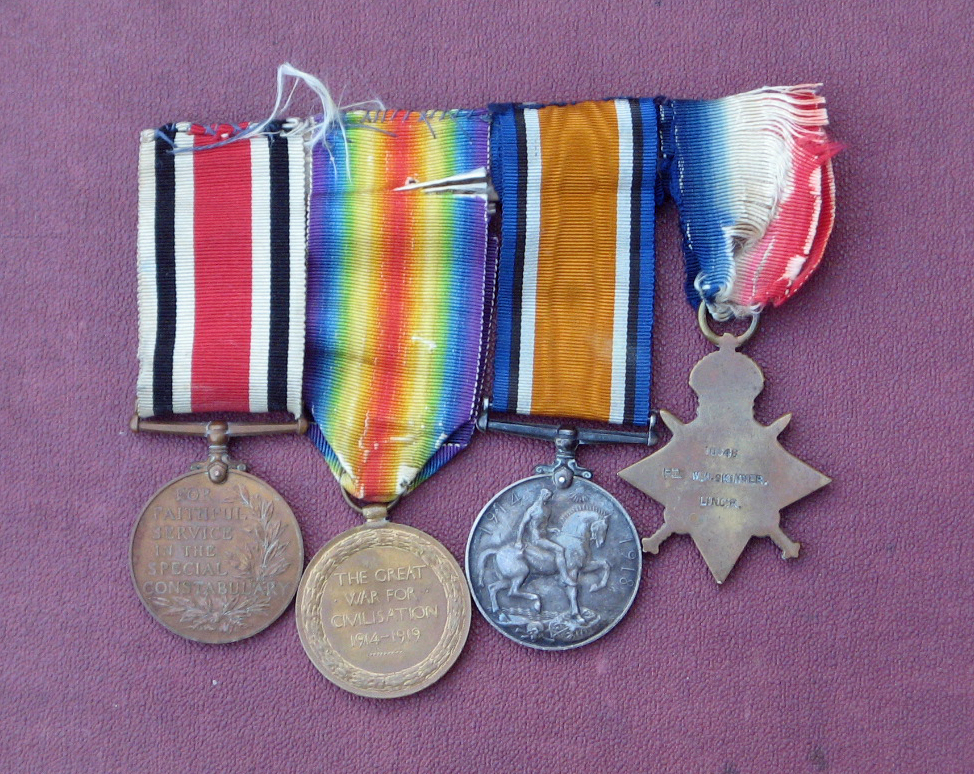
Can you help with medal card, regt history and stuff that I can print off and pass onto the Grandson. The set is home mounted onto a strip of cardboard, obviously done by William himself.
14-15 Star is to 10848 PTE W W SKINNER LINC.R
War medal and Victory medals are to 10848 CPL W W SKINNER LINC.R
Special Constabulary faithful service is to WILLIAM SKINNER
Thanks in advance

 0
0 -
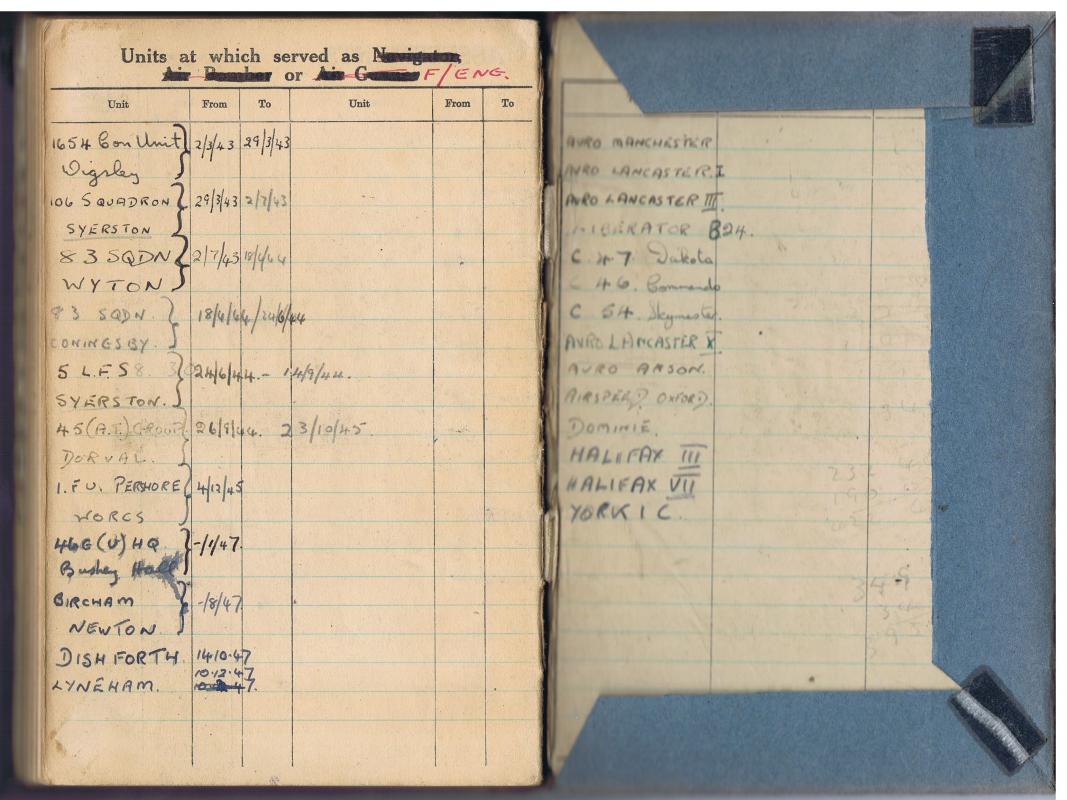
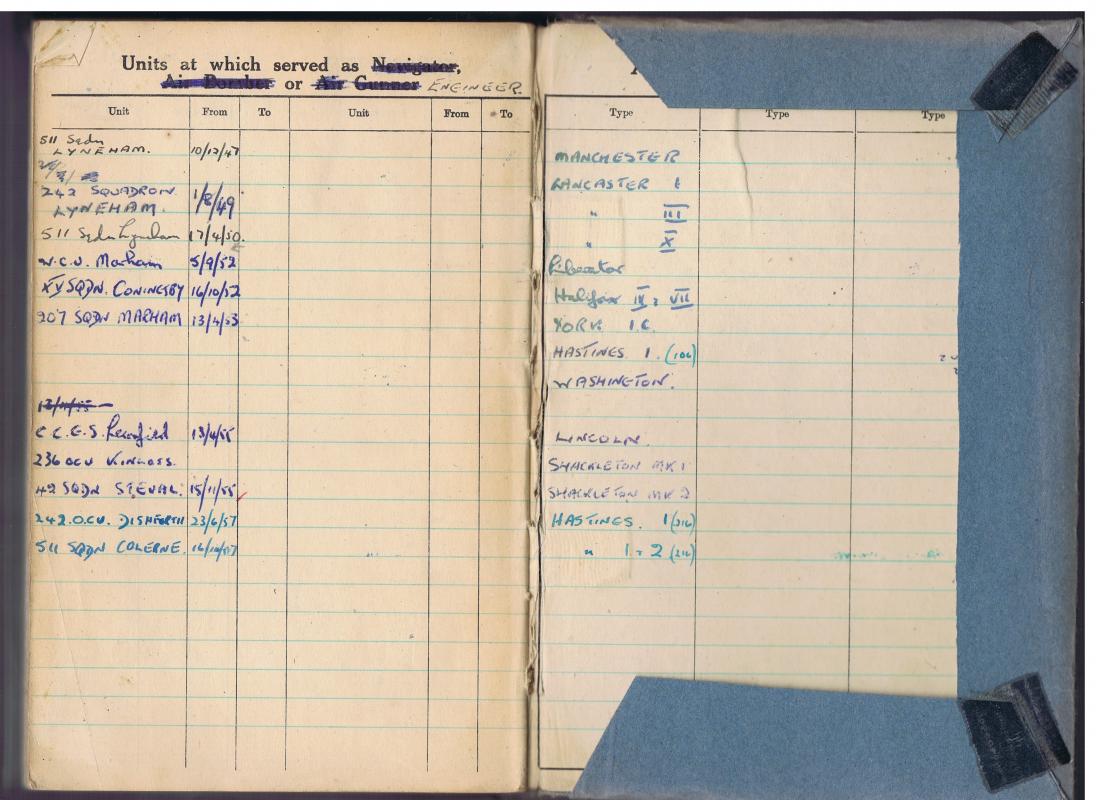
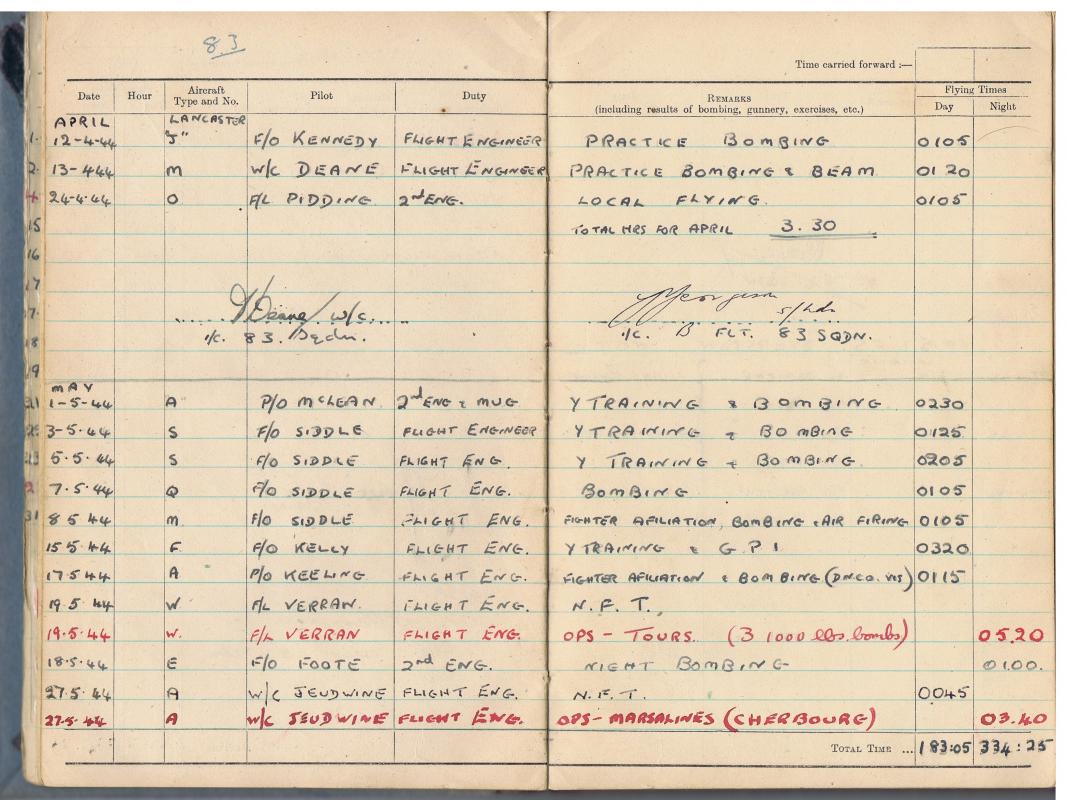
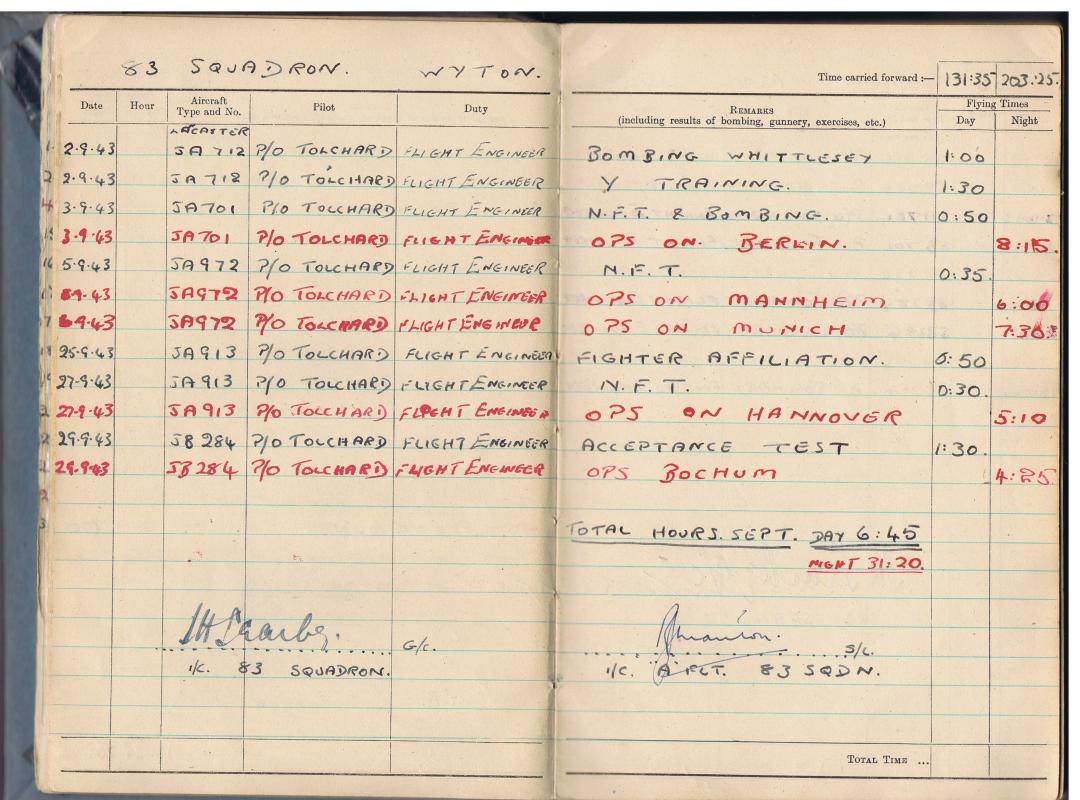
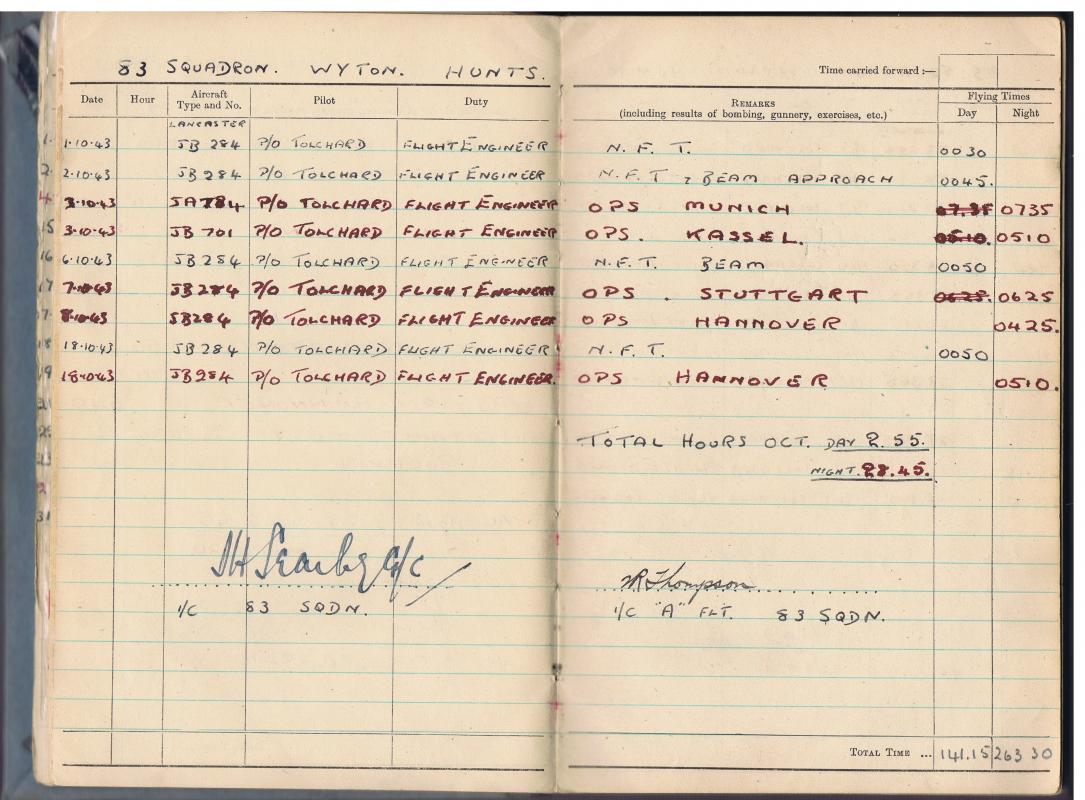
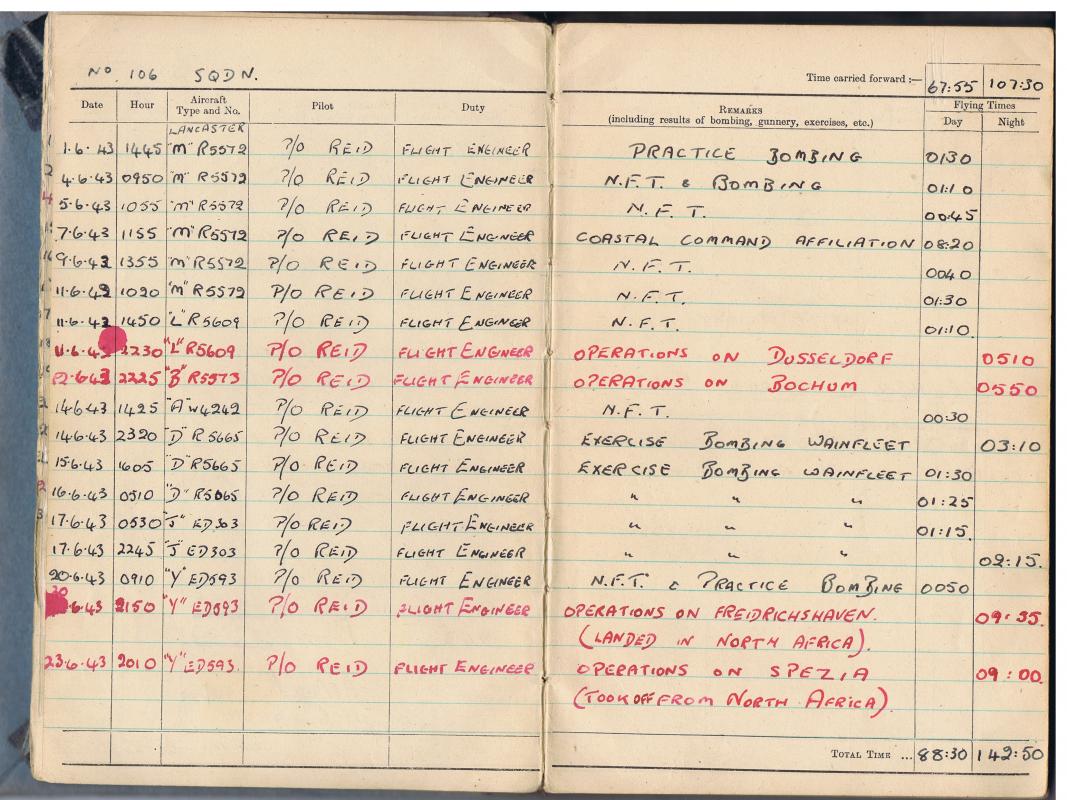
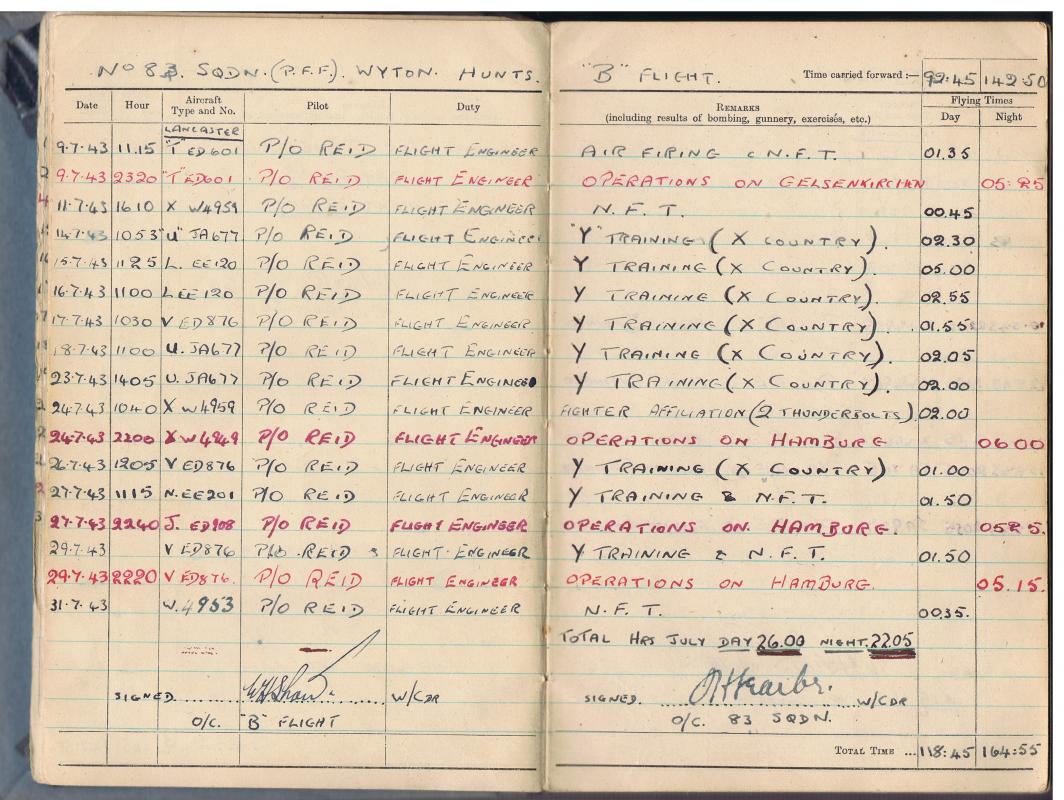
And the last two pages from both volumes showing Squadrons and Aircraft
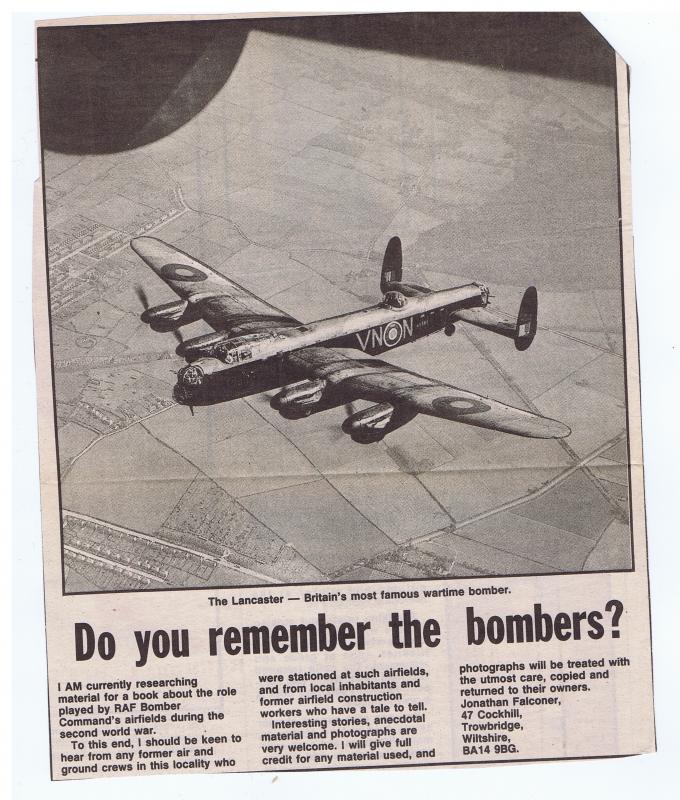
and a piece folded in the back from a newspaper
 0
0 -
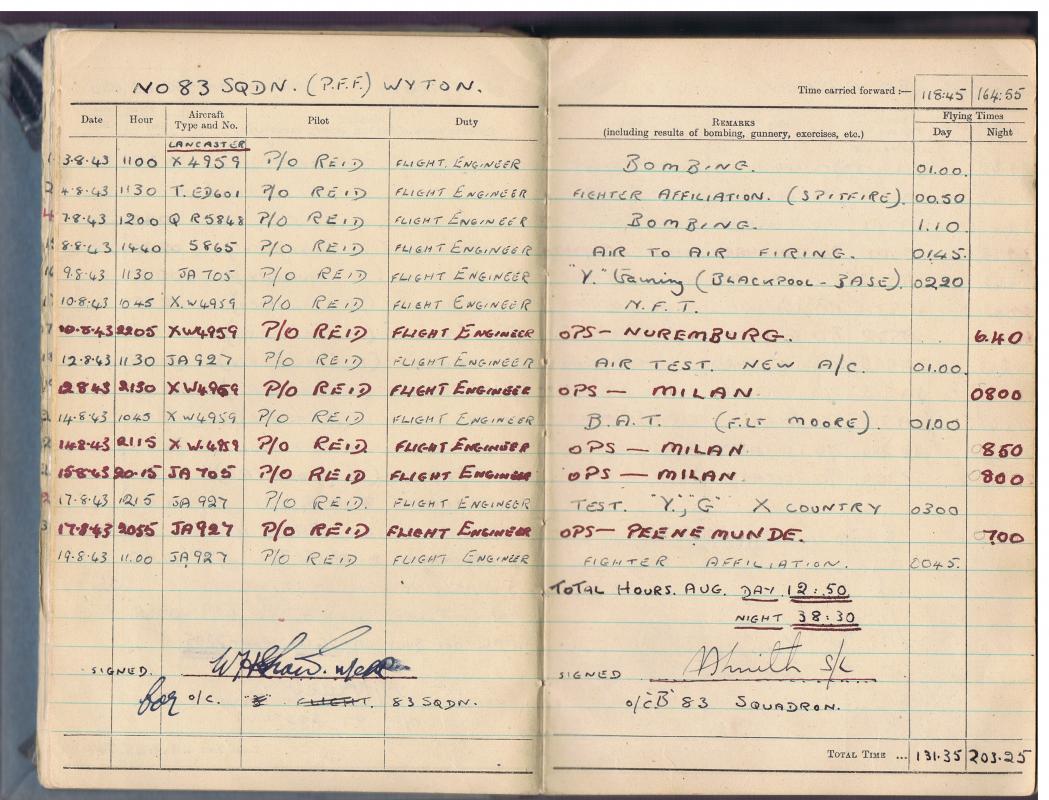
3 x 1000lb bombs didn't make someone's night
 0
0 -
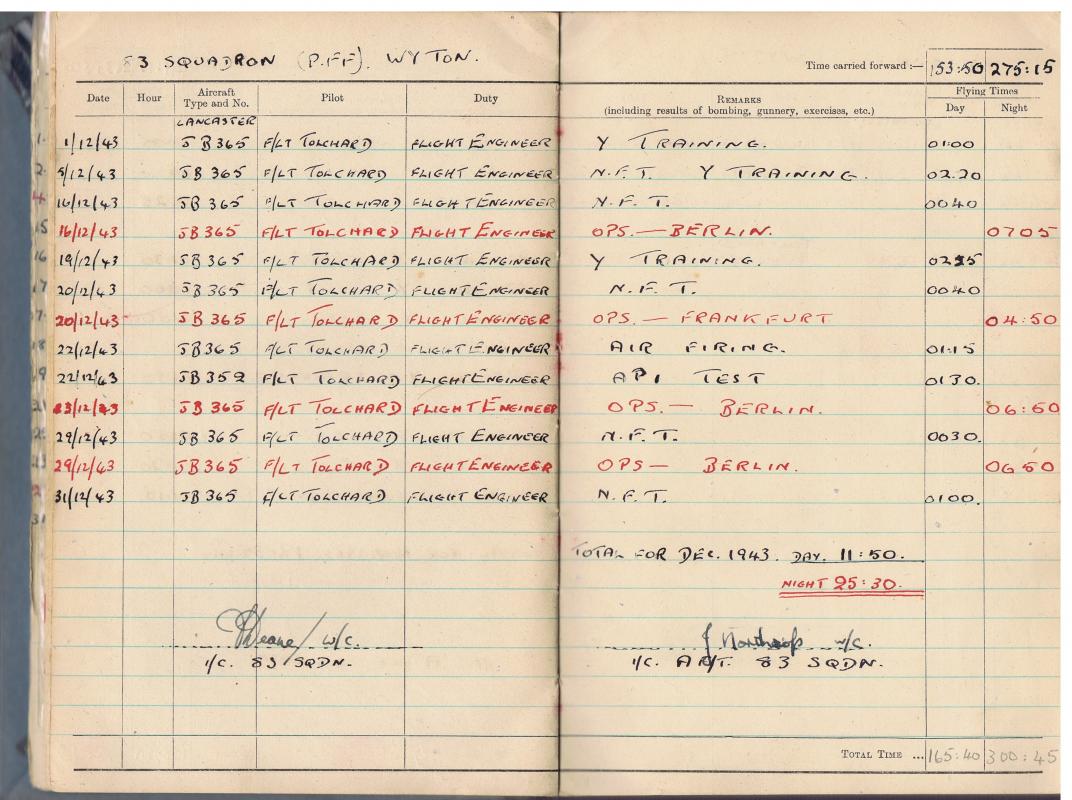
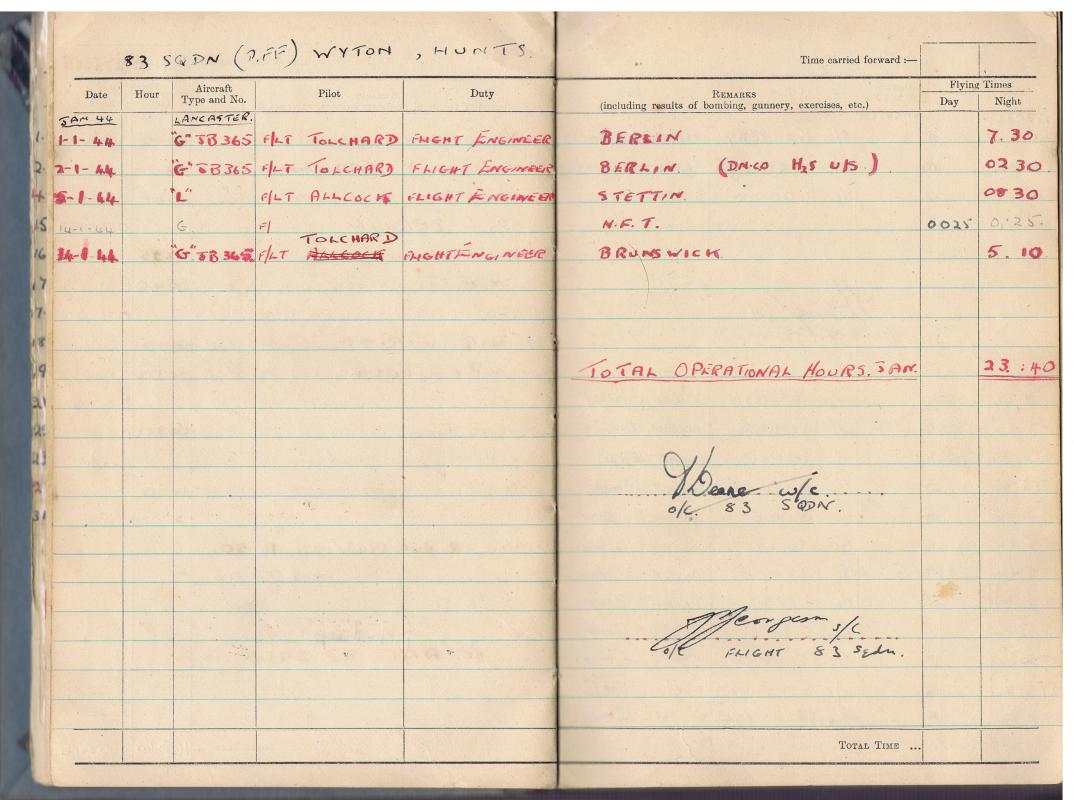
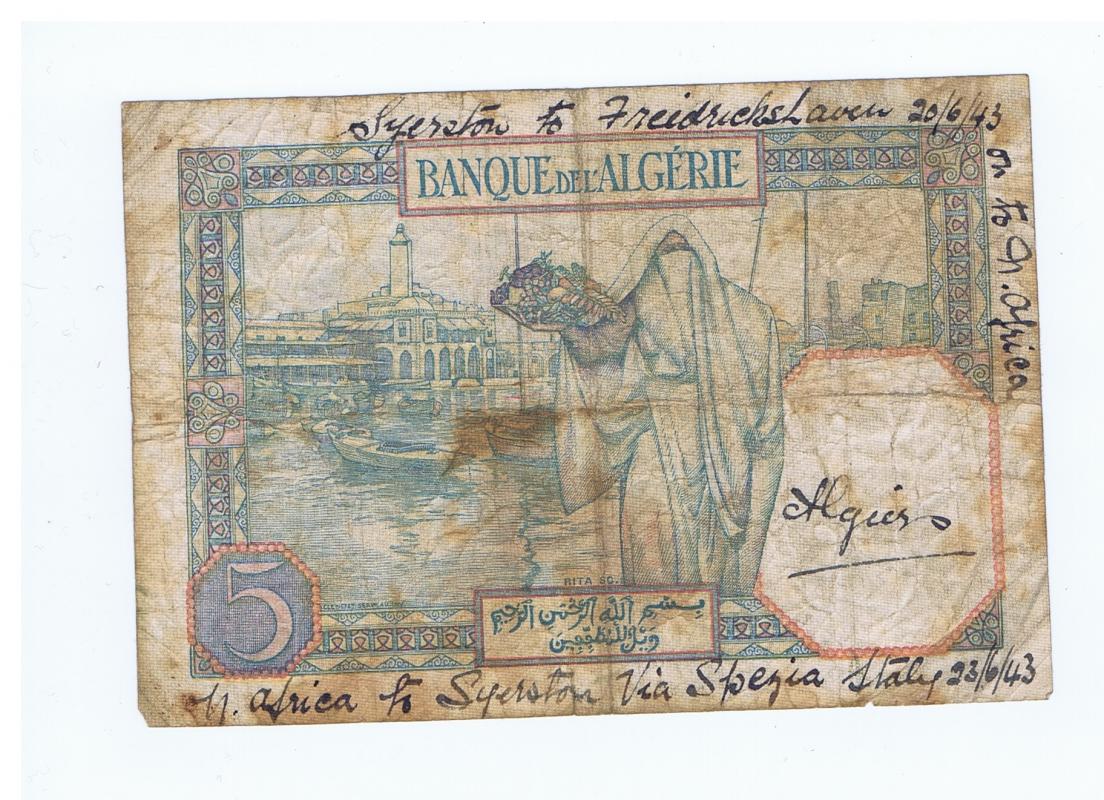
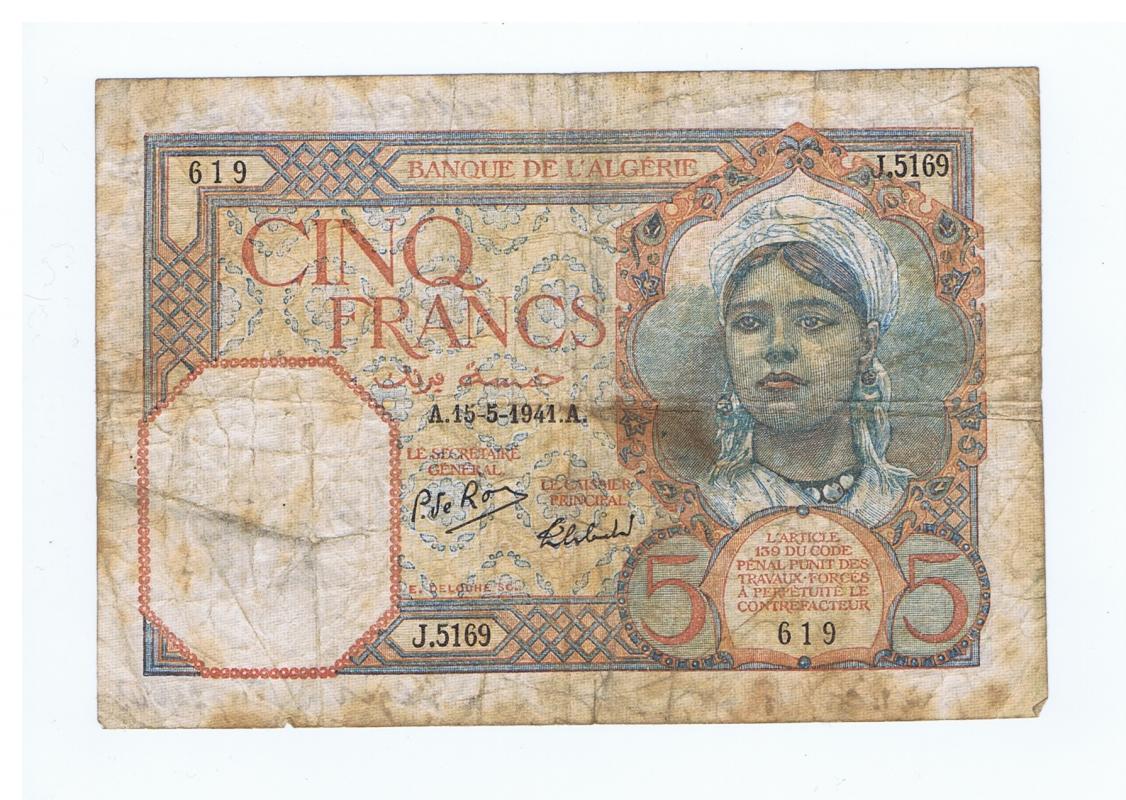
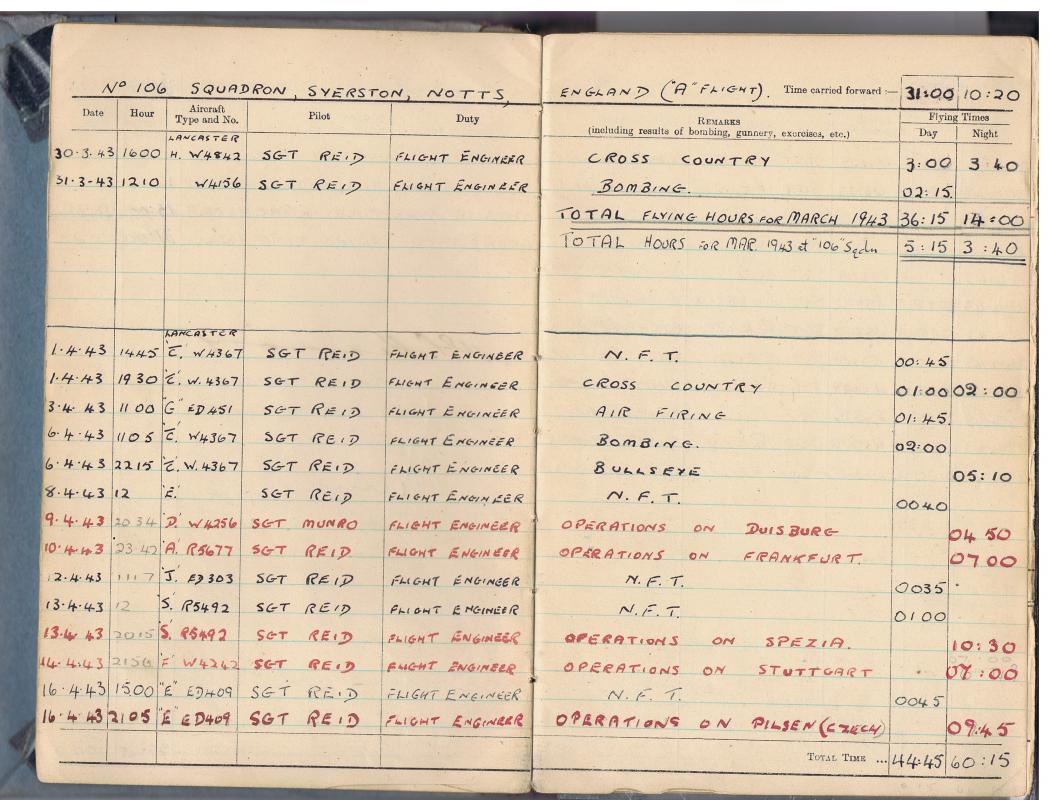
A few more
Some of the flights ended in landing in North Africa - hence the notes on the money
 0
0 -
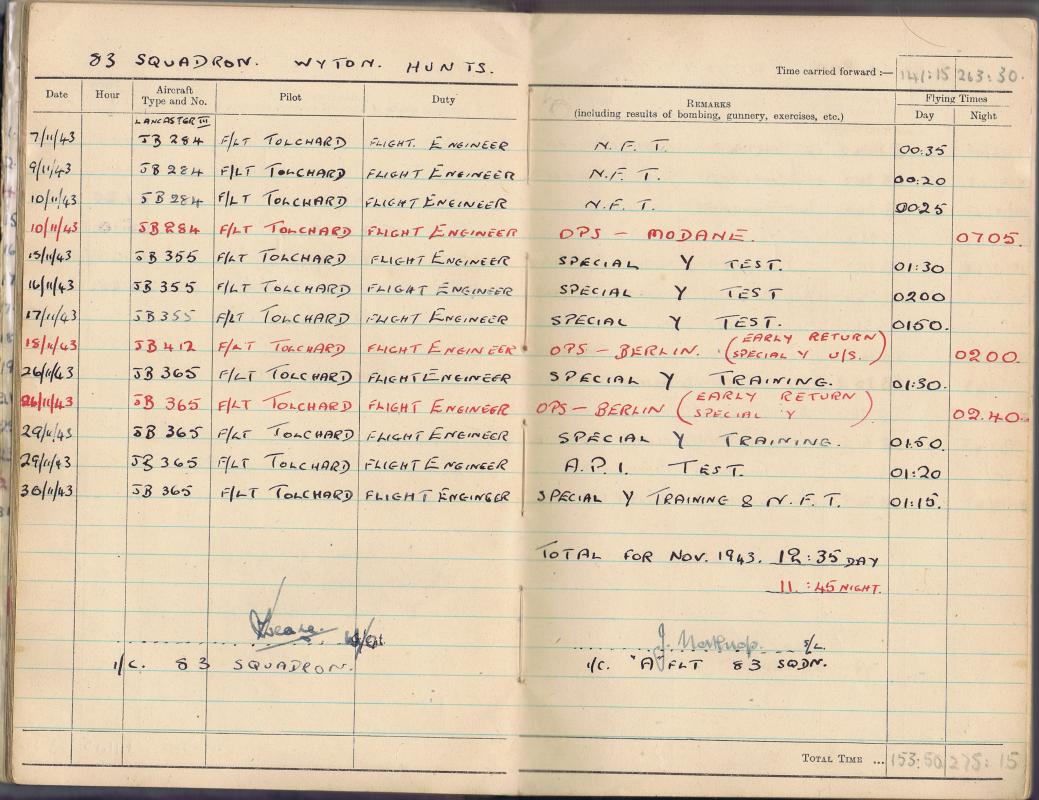
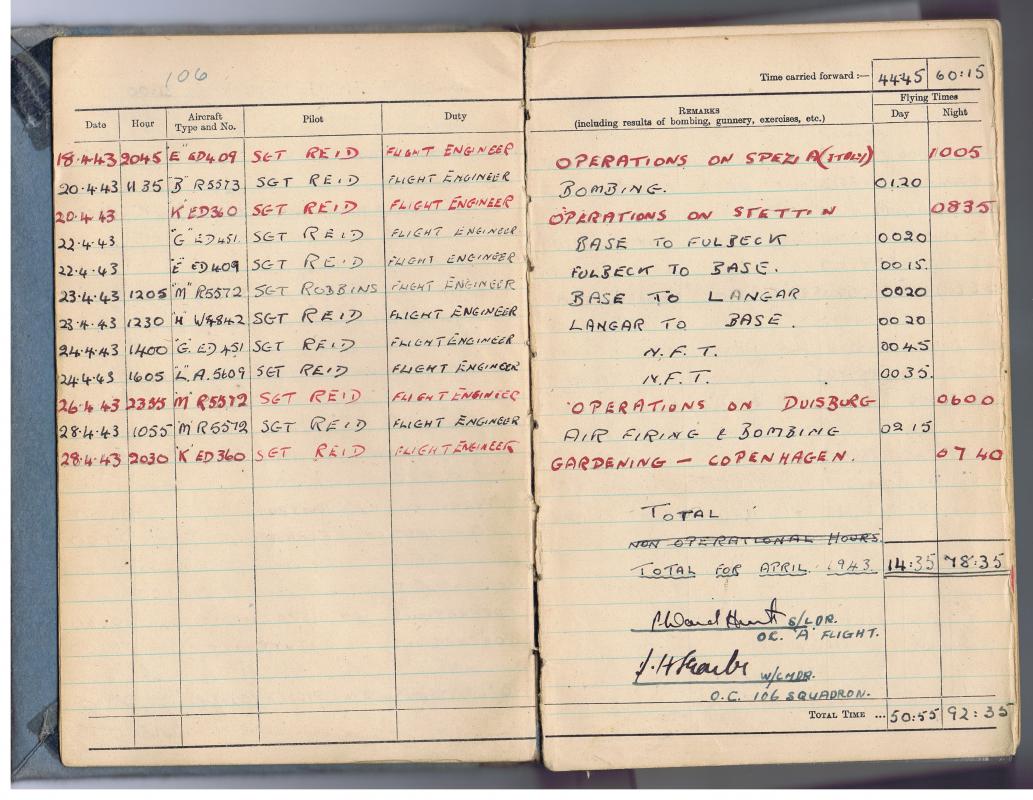
Some of the pages from Log Book 1 - Night Flights are in red
 0
0 -
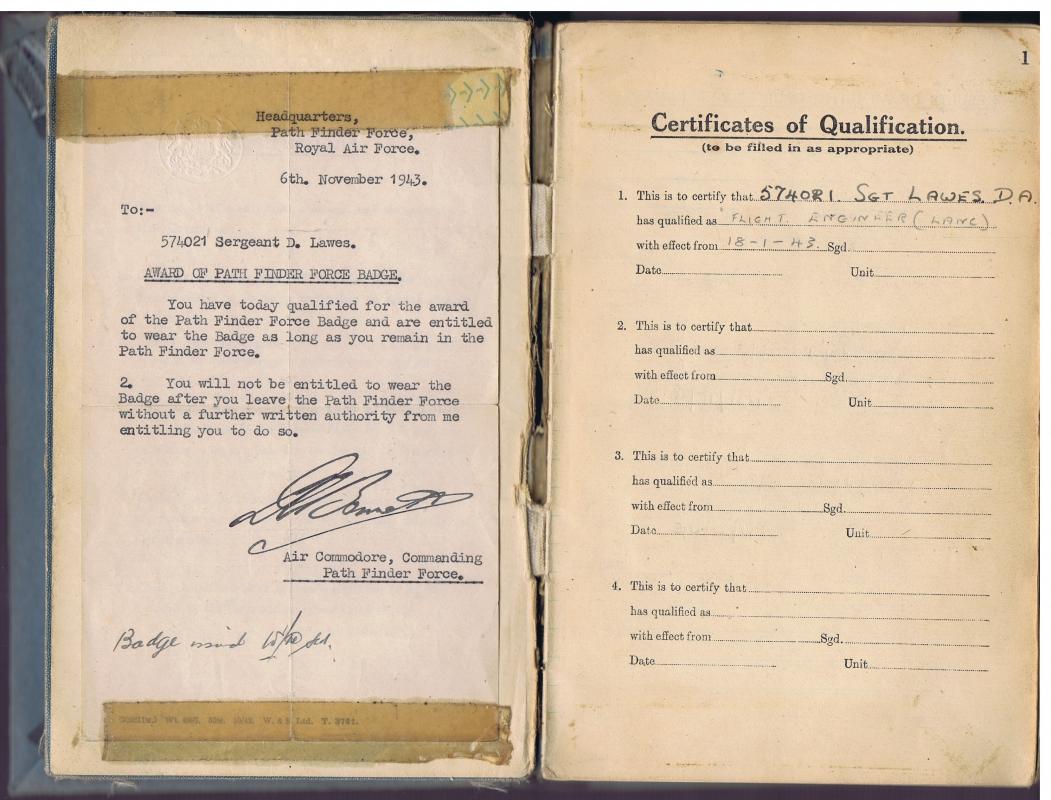
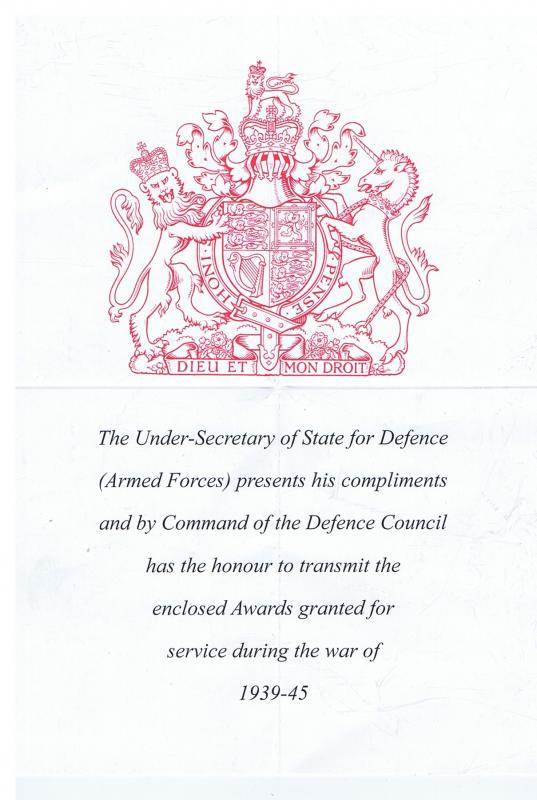
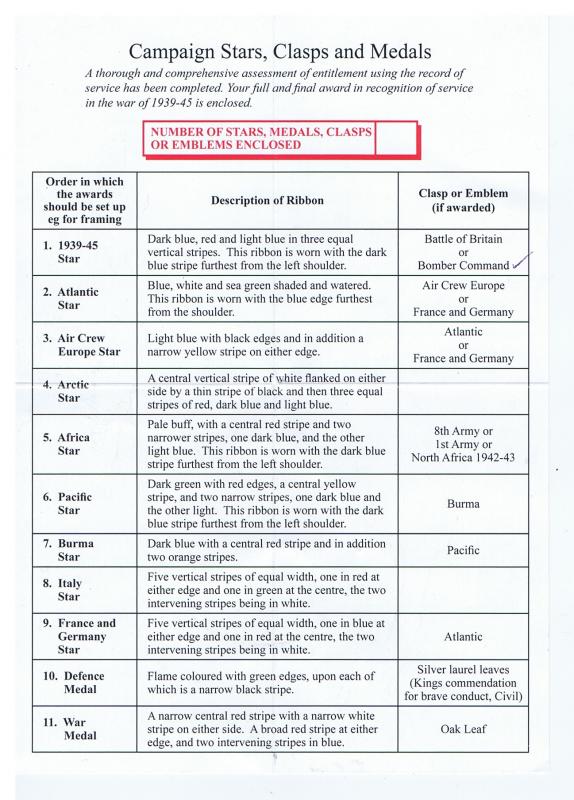
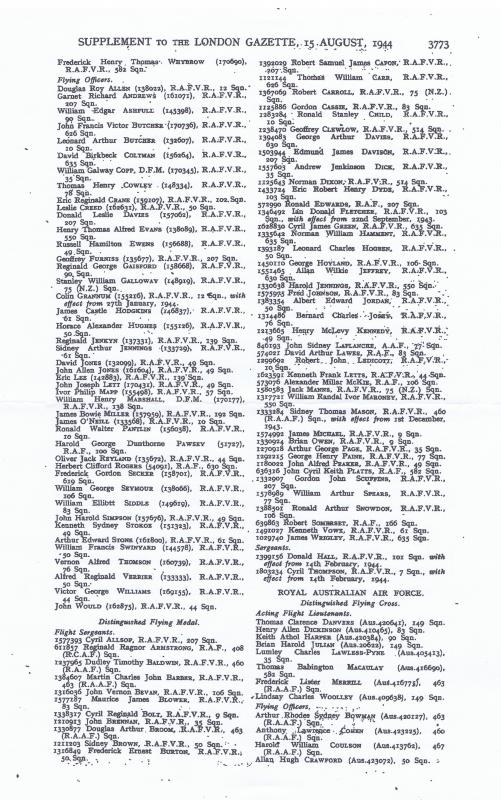
Here's the bomber command award paper and the entry in the London Gazette of the DFM award
Isn't the Gazette website horrible to search (it was easier to use google to find him)
 0
0 -
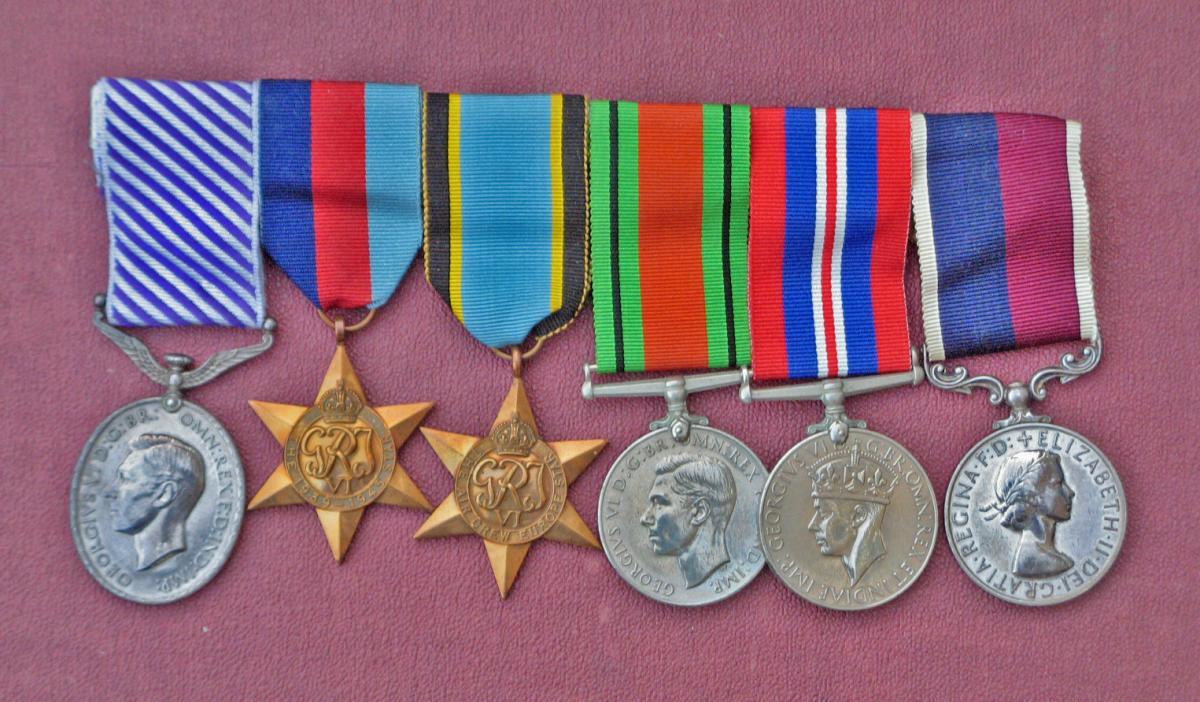
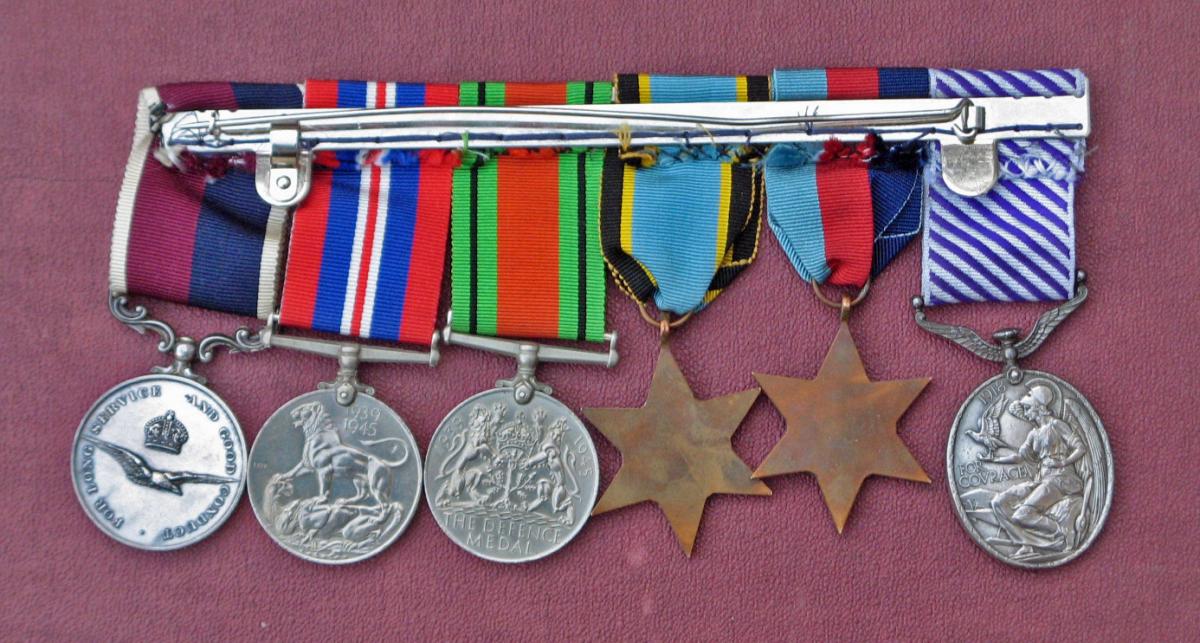
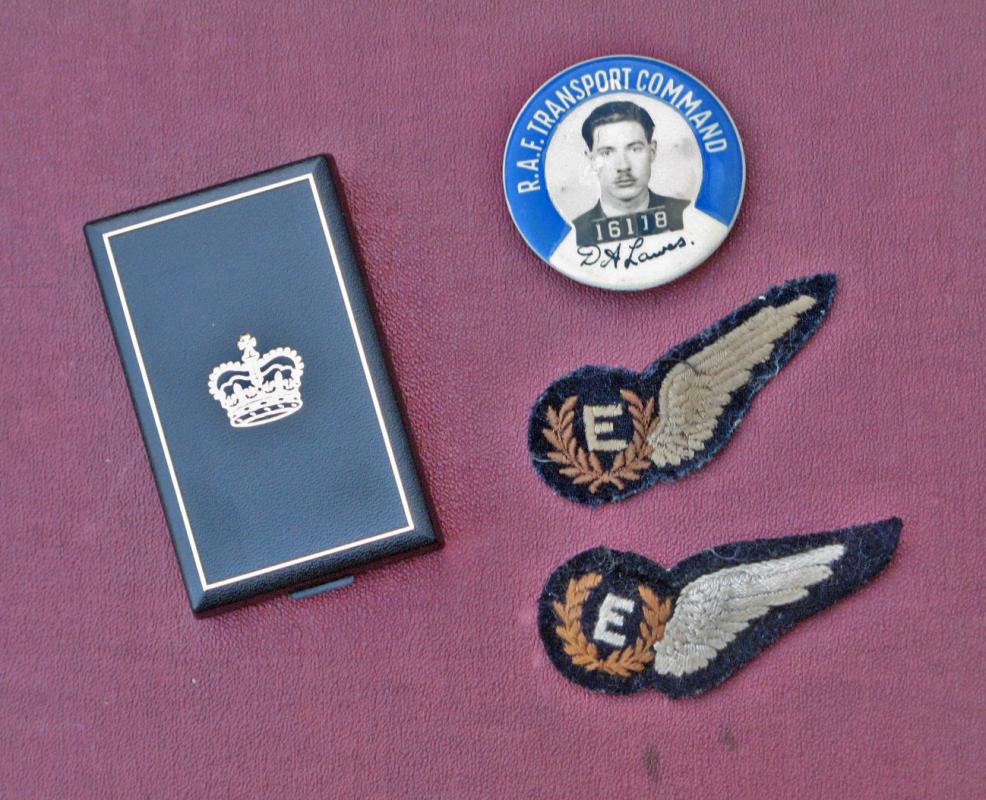
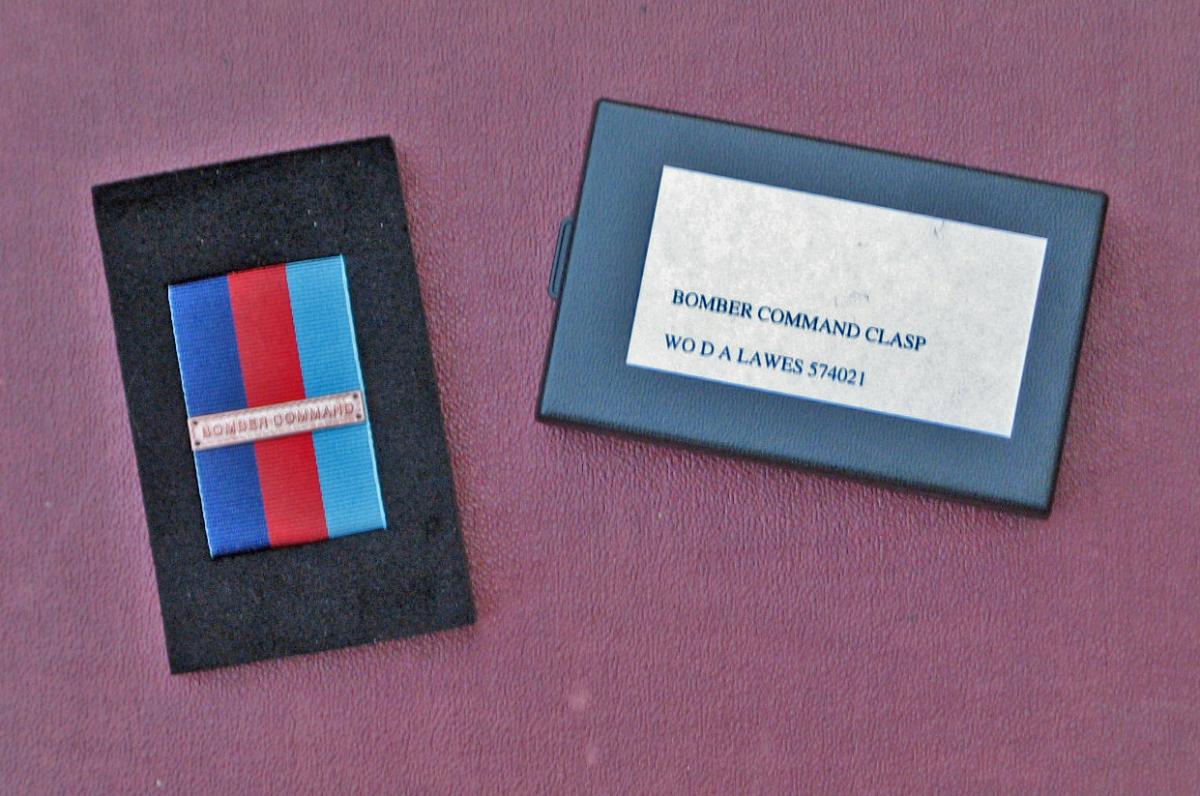
Better photos with bomber command clasp and RAF transport command ID badge.
The edge of the DFM is inscribed 574021 F/SGT D.A. LAWES R.A.F. and the long service is inscribed M.ENG D.A. LAWES (574021) R.A.F
Again, any further copies of info from websites/books would be greatly appreciated. The medals etc are going back this week.
Thanks in advance Gents.
I've also got a couple of log books and bits that I'll start to scan and get on here.
 0
0 -
Larry - hopefully you'll have a go
We're going to do this an army brown so the next stage will be mixing the colours and working up a used patina brown. At this stage I'd be more or less sorted on what theme is going on the helmet.
Usually a commission to commemorate a relative or regiment or an idea that I'm working up for myself to sell on at a later date. I would normally, therefore, have some reference material already collected - pictures of medals and regimental badges, paperwork and photos and some images that I'd like to get onto the helmet once it's the right base colour.
I don't really have any definite ideas for this one as yet. As it's army we can pick numerous WW2 battles along with the characters involved in them, that'll then lead to portraits and medals and give a sort of title to the helmet. We can do copies of documents, newspapers and signatures that can help tie the images together around the helmet.
It'll be a couple of days or so before I can get on with this so any ideas? It has to be army as I'm trying to show how to paint an army brown but the same methods can be used for Air Force or Navy and tropical or desert.
0
Medal group research
in Great Britain: Research, Documentation & History
Posted
A lot to digest and to research. I'm sure Steve will be kept busy for some time now before he gets these medals mounted for display.
Thanks Gents