


Spasm
-
Posts
1,869 -
Joined
-
Last visited
-
Days Won
7
Content Type
Profiles
Forums
Blogs
Gallery
Events
Store
Posts posted by Spasm
-
-
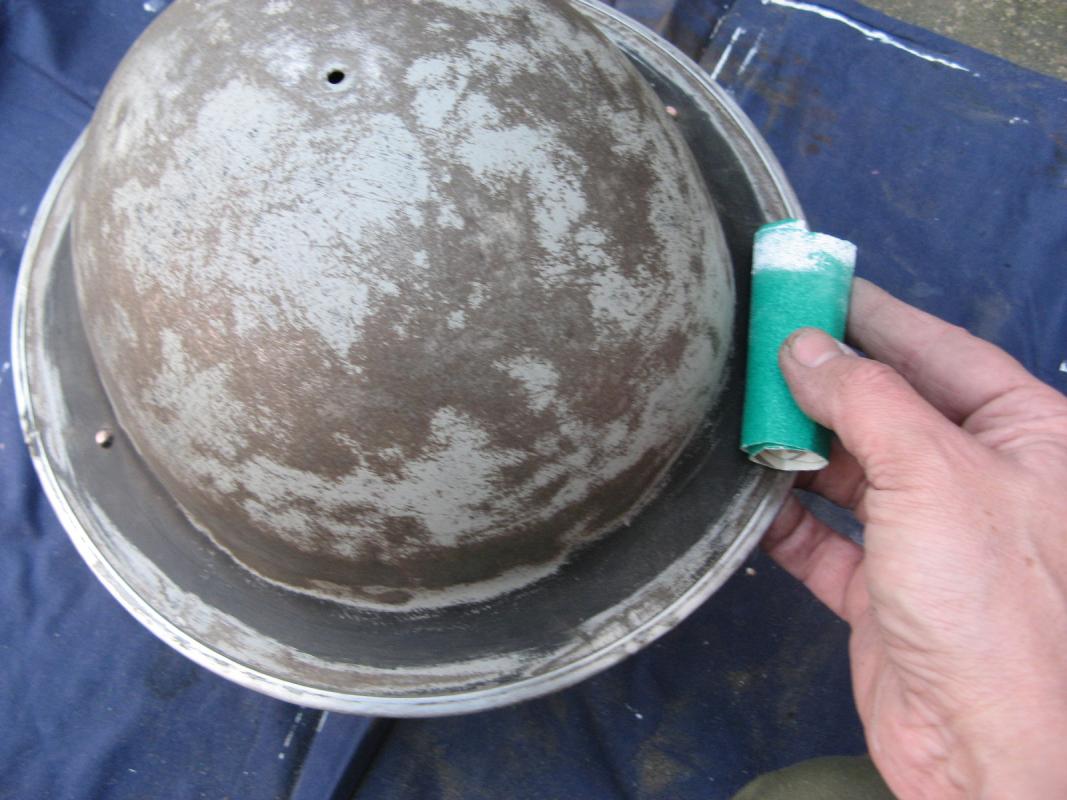
Once the rim is all done then its the strip between the dome and the rim. Roll up the sandpaper into a tube and crack on. Do the little fiddly bits around the chin strap rivets just to check for rust. These are normally ok but it's worth sanding down so that you don't get a lip in the paintwork.
Then get inside the helmet. Do the rim again in the same way, expose any manufacturing stamps and get rid of the rust in the dome. There's always rust where the liner rubs so get shot. Don't be tempted to blow the dust out as you work so that you can see what you've done. You'll get an eye full of rusty paint particles.
 0
0 -
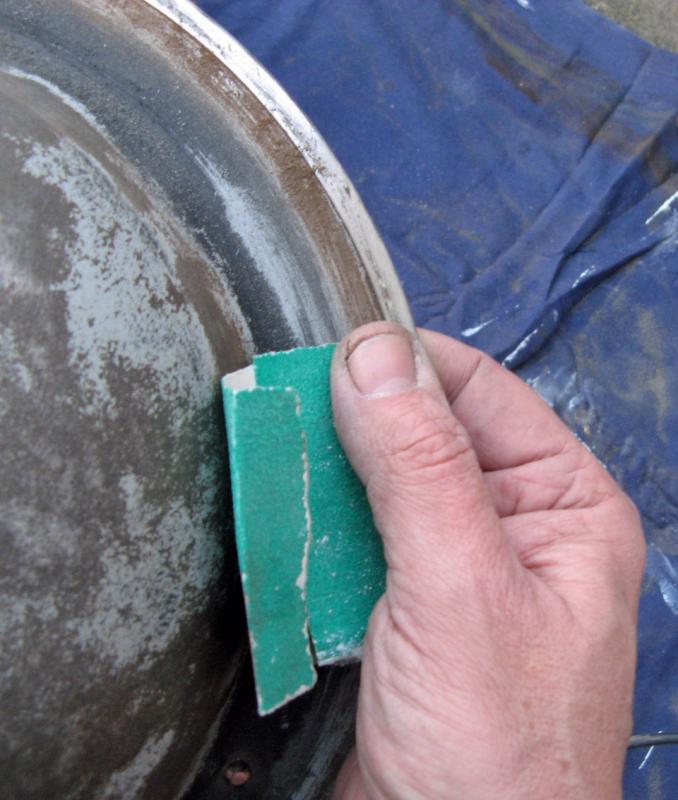
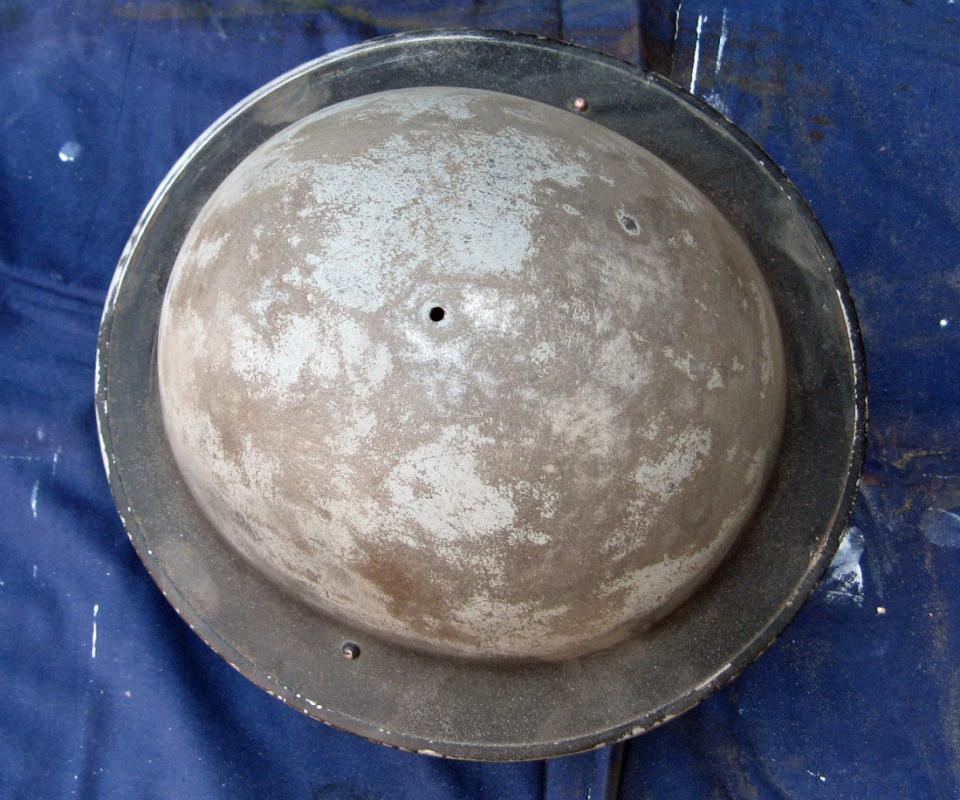
Wasn't too bad doing the dome. Now we're getting into the rim.
All of these helmets will have developed rust around the rims. So it's important to find it along the rim edge. You'll need to fold the sandpaper and get right in there pressing quite hard. Even if the paint looks good it will be hiding rust. You can see the brown rust being lifted by the sanding.
This is where I manage to split the ends of my thumbs and fingers. Hurts just like a paper cut which is worse than having your arm cut off and lasts for days. The doctors amongst you will know that I'm lacking in something. Probably not enough sex.

 0
0 -
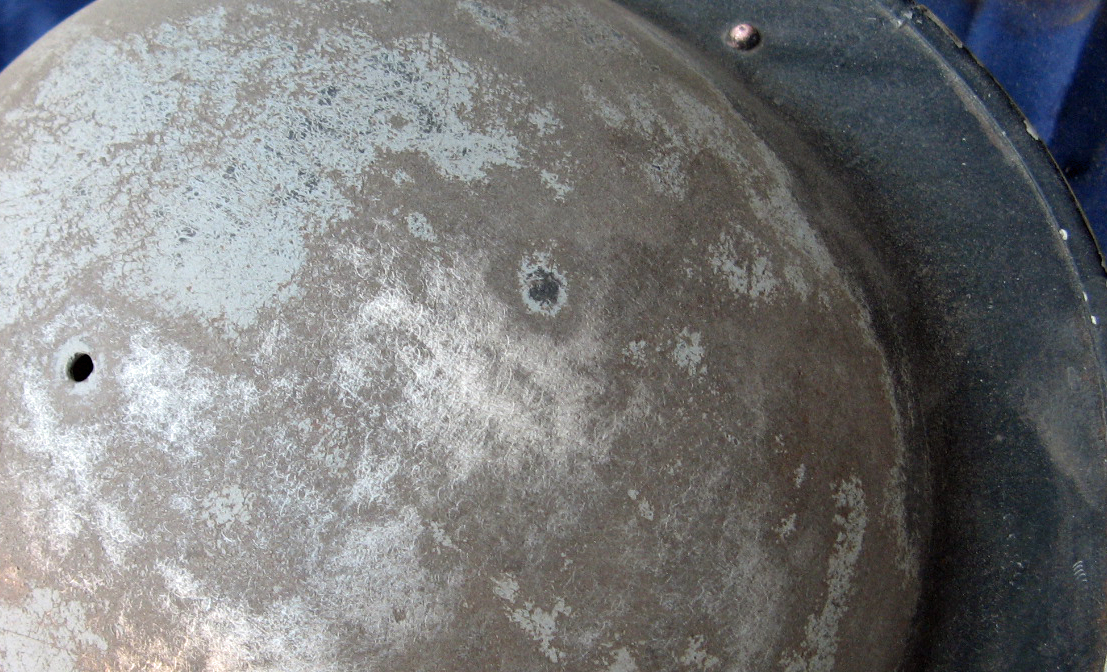
Sand the top coat of paint off and into the primer. There's no point in taking everything back to the metal, if the primer is on well let's use that for what it was meant to do.
The top coat of paint will be hiding rust and abnormalities. Even though I can't really feel it, the sanding has shown a dent. The top coat of paint has stayed on in a small spot even thought its been sanded across.
Easy to remove small dings, use a ball hammer (the ones with the rounded end, put the helmet on your grass in garden with the dent on the ground. Bash the inside of the dent lightly until you get the feel that the metal is moving. Keep having a look until the dent is mostly gone. You may then go back to a normal hammer on the top side to even out. You'll leave a patch in the grass but hey ho, must've been those pesky hedgehogs. Bigger dents can be sorted using the same methods but take it slowly and you may need a harder surface but not concrete or the patio (hedgehogs don't break paving slabs). If you can't get it perfect then you can always leave alone as we're going for a used look or you can use some body filler and sanding.

 0
0 -
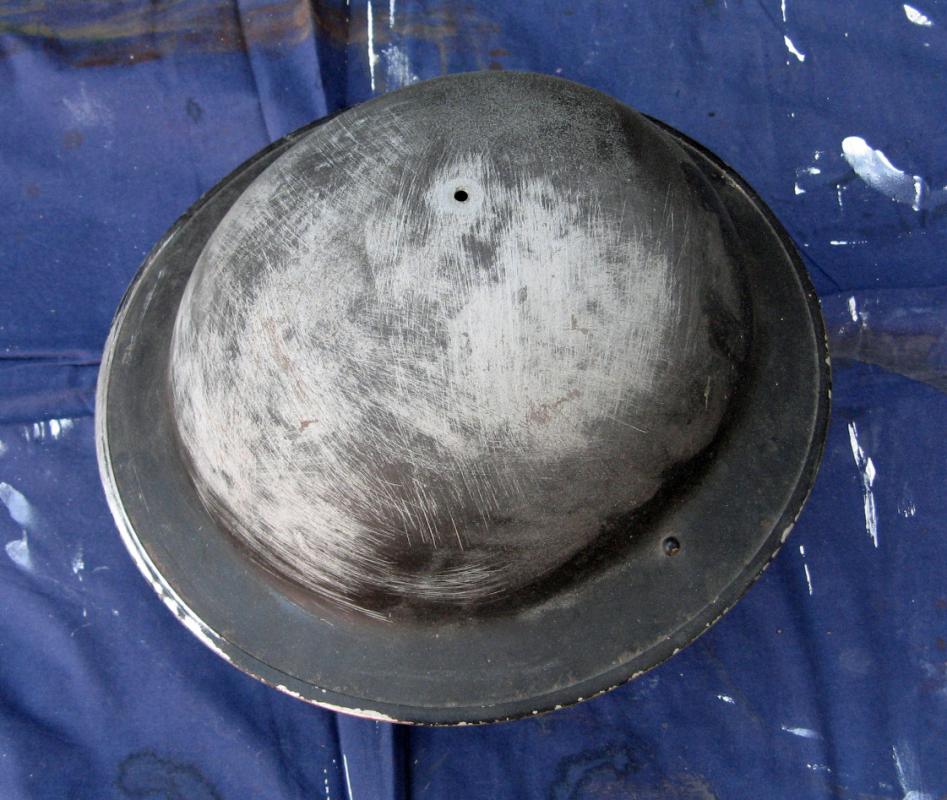
Right, helmet is in bits and we've put the bits somewhere we can find them again. Sanding now, oh goody gum drops.
Get outside as the Admin Staff WILL notice you've made a mess no matter how much you vacuum and wipe up. You will also need a dust mask as your nose will fill up with 'orrible black stuff that will give you a surprise when you blow your nose later on. (Why do we always look at what we've just blown into our hankies? I've never found anything other than bad stuff, what do we expect gold nuggets or something?)
I've found no quick way of doing this, just elbow grease. This helmet is in pretty good shape so it's relatively easy but the idea is to give the new paint something to adhere to. As with any painting you need to have a good foundation, balls this up or take short cuts and your paint isn't going to stay where you put it. The preparation for any custom work on cars, motorcycles or your braai will only be as good as the preparation. You can do the best custom airbrush job that'll end up on the floor if it hasn't a good foundation or protection (but that's later on).
Buy good quality sand paper, the cheap stuff isn't worth the money - you use twice as much, isn't constant and puts bits of sand into your project. Although we're not trying for a shiney custom bike tank here don't get carried away with 40 grade paper as it'll put scratches into the helmet and will be seen when you've finished. Some scratching is ok as we're looking for a helmet that looks used. Deep scratches obviously caused by heavy sanding around the rim doesn't look right.
So, take a deep breath and get stuck in. It's gonna be a couple of hours of annoyance.
 0
0 -
Hopefully this is going to be interesting and you can help with a bit of research.
We have a fairly regular 'show and tell' around the office. There's a fair bit of experience given that most have served their time in various units and quite a few interesting bits and bobs appear.
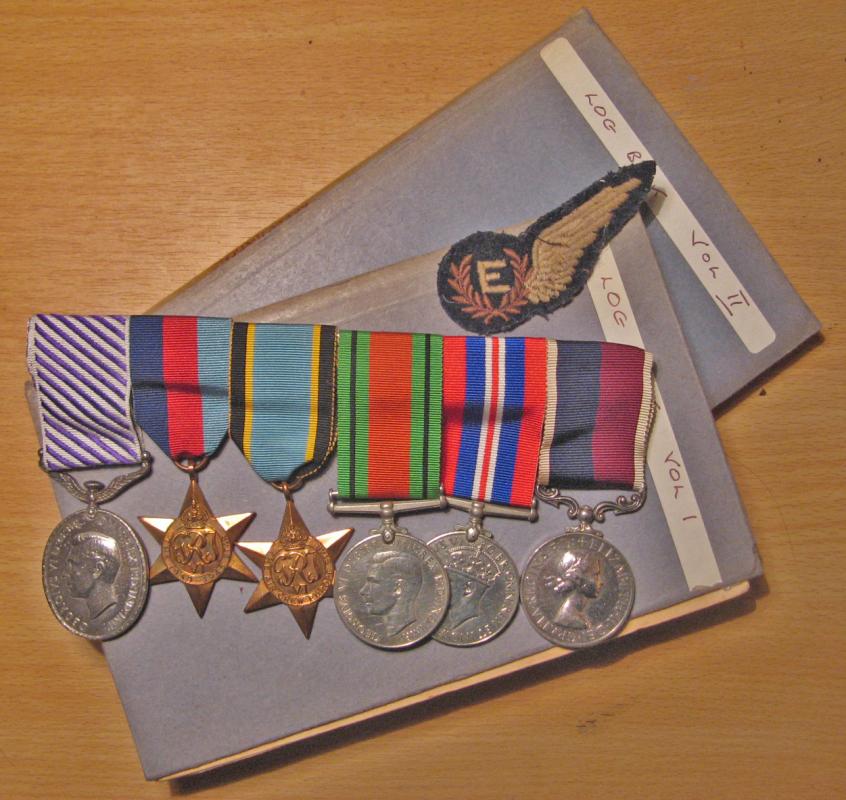
Here's one that appeared this week
I've still got a couple of items to photo - the Bomber Command clasp and his RAF transport command ID badge. And then there's his two volumes of log books to read through.
The group is to the father of a work colleague (I also have his Grandfather's WW1 medals which I'll get on another thread) - they are to 574021 Flight Engineer David Arthur Lawes.
He served in various sqns throughout WW2 and then on the Berlin airlifts.
I'd like to get some info to pass back as its another story of wishing that he'd discussed his father's service while he was still here. As I wished I had done.
All help would be appreciated.
 0
0 -
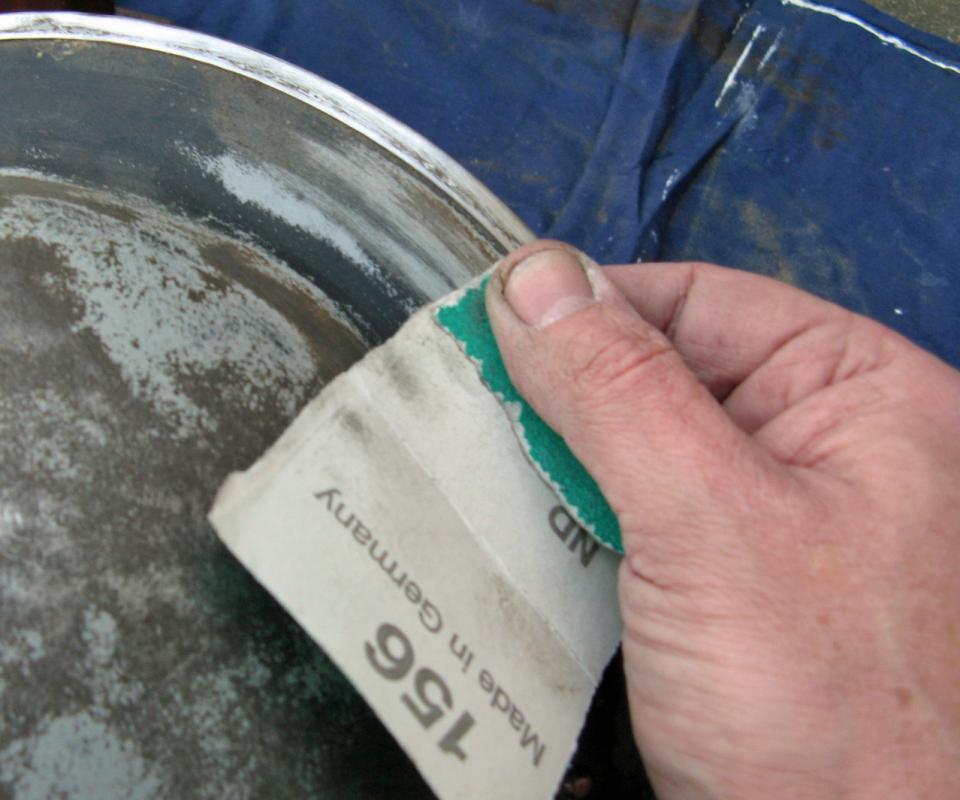
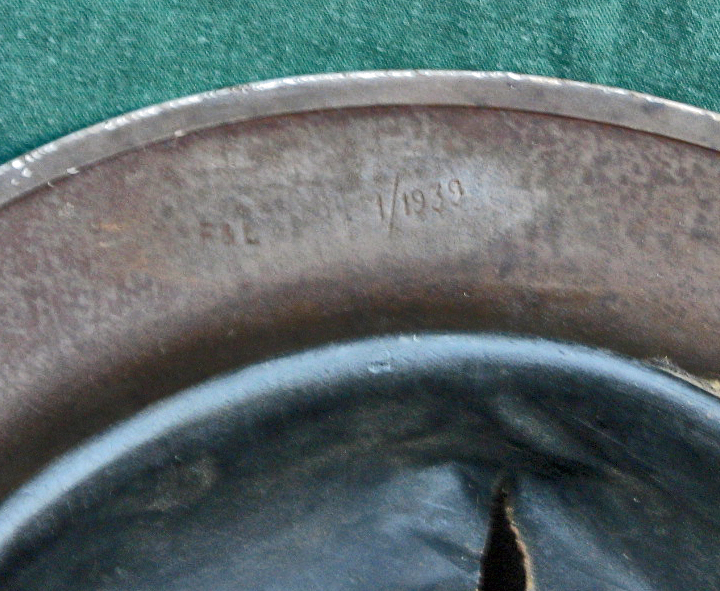
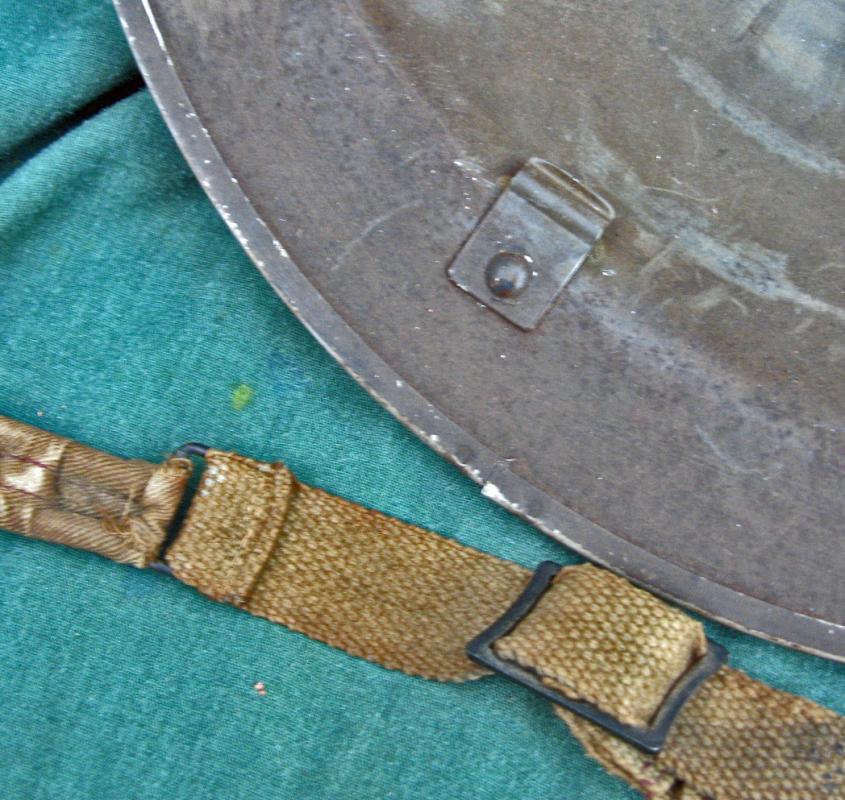
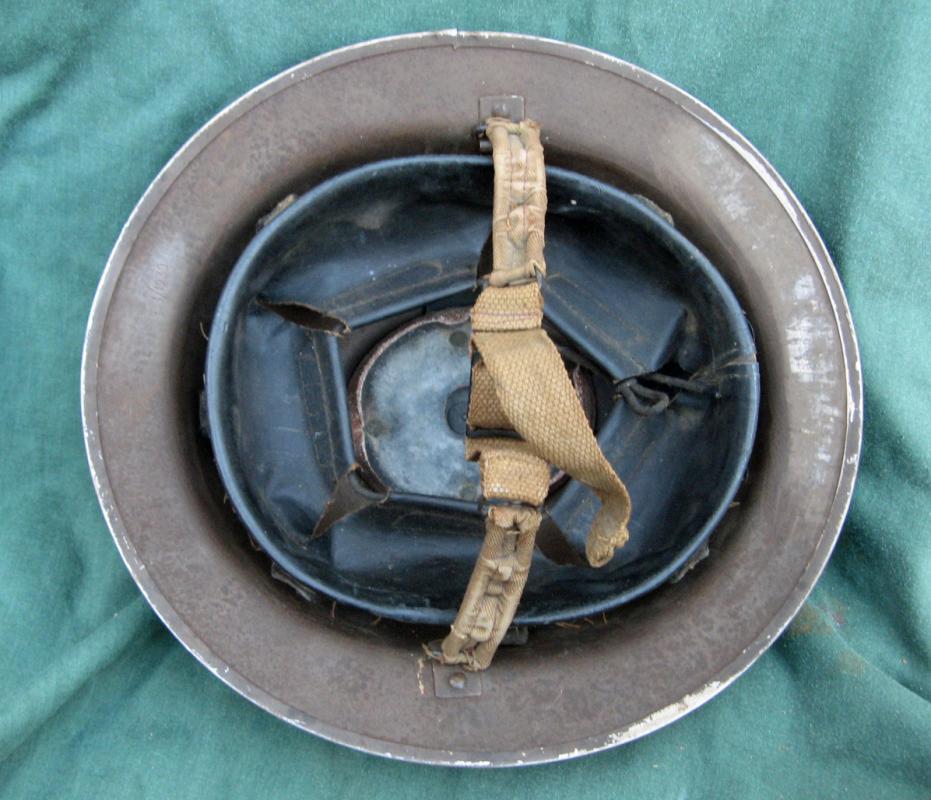
First thing to do is check for helmet and liner stamps.
This one is quite early for its fitting types. These types of helmets are usually stamped in the rim over the left ear but this one is stamped in the rear. The stamp reads 'F&L 1/1939' which shows the manufacturer as Fisher and Ludlow of Birmingham. I assume the 1/1939 is for January 1939 (the month is not normally stamped in later helmets). There is also feint remains of some paint under the rim which reads 'Cox Brothers' - probably the shop or factory. I should research this I suppose.
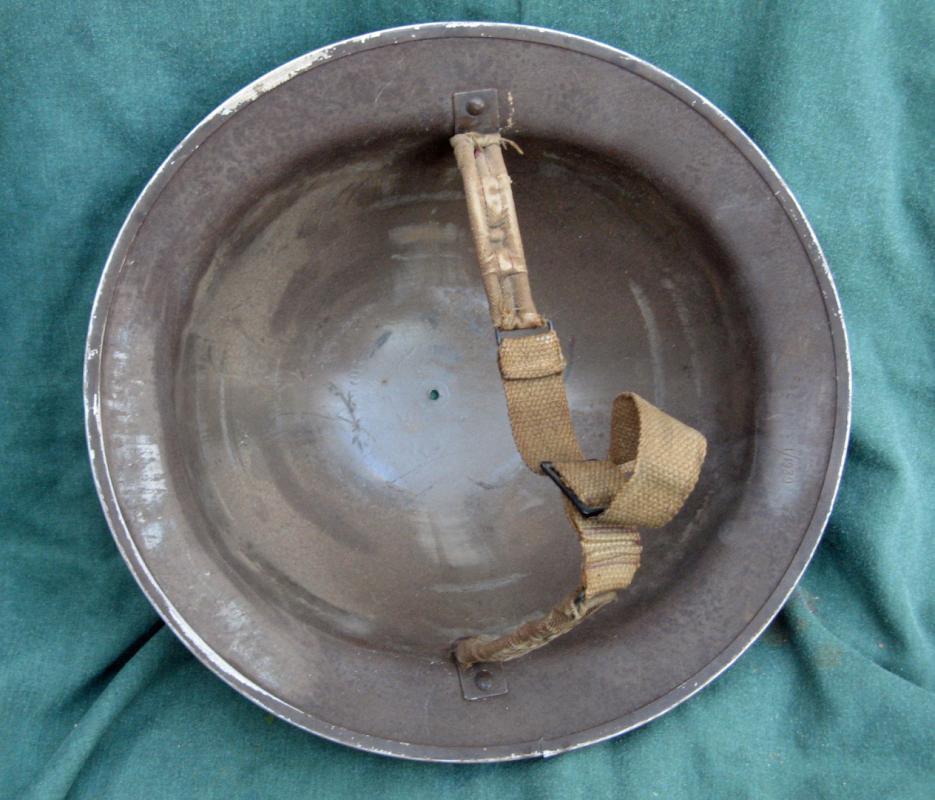
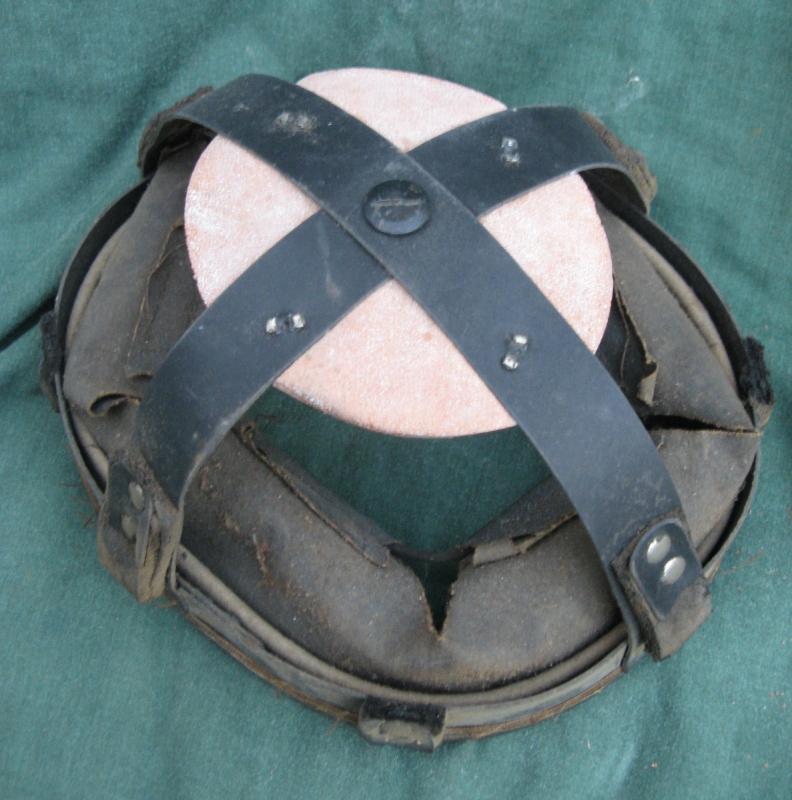
The liner has several; stamps in the cross pieces that join the crown to the head band. The manufacturer's stamp is 71/4 (size) VERO (Everett W Vero & Co London) and 1938.
Then take the thing apart as it's nearly impossible to paint with the liner and chinstrap in place without making a mess.
The liner is removed by unscrewing the crown nut and bolt. Sometimes pretty tight so be careful not to mess up the fixing with a rubbish screwdriver and stabbing yourself in the process. Screw the nut and bolt back into the liner or you'll be sure to lose it.
You'll need to use your screwdriver again to open up the retaining lugs to remove the chin strap. Just bend them a bit till the strap falls out. These will need to be pushed back in when you are finished and you wont want to use a hammer once your helmet is all nicely painted.
You can see that this helmet was originally an army brown colour and only the top of the helmet was painted black.

 0
0 -
Gents
As threatened, I'm putting together some methods, types of materials used and pictures to allow you all to have a go at painting stuff.
I'll try to remember to take pictures at each stage and give advice on how to mix colours, create an aged look and my 'sneak up on it' and 'painting by numbers' cheats. There is a point in learning how to draw and paint like every grand master but if you just don't have the 40 or so years I've spent learning then here's a few ways of just getting what you want.
I don't use any expensive materials or special tools - you may need to buy some smaller brushes than you have hanging around in the shed and you will need to visit the local kiddies art shop. The lacquer is the most expensive thing I use but it is easy (from a rattle can) and gives the right finish.
I will probably miss a few points so stop me at any time to ask questions and I'll try to steer you.
This will take several weeks to complete as I'm doing other stuff as well.
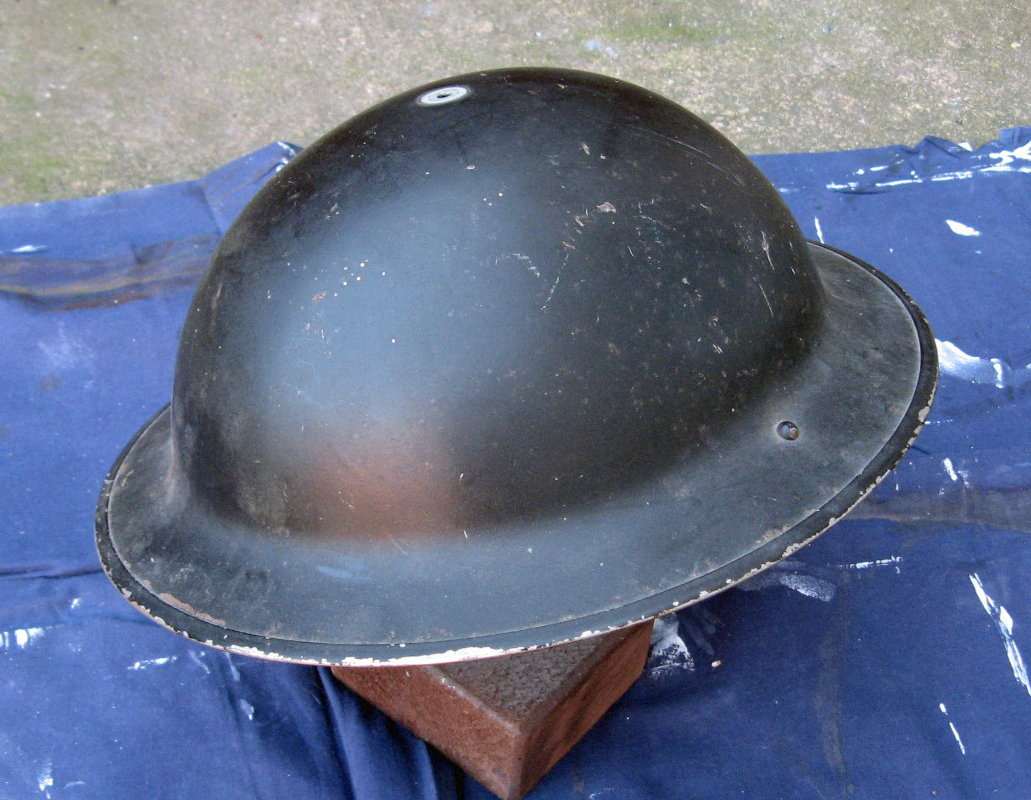
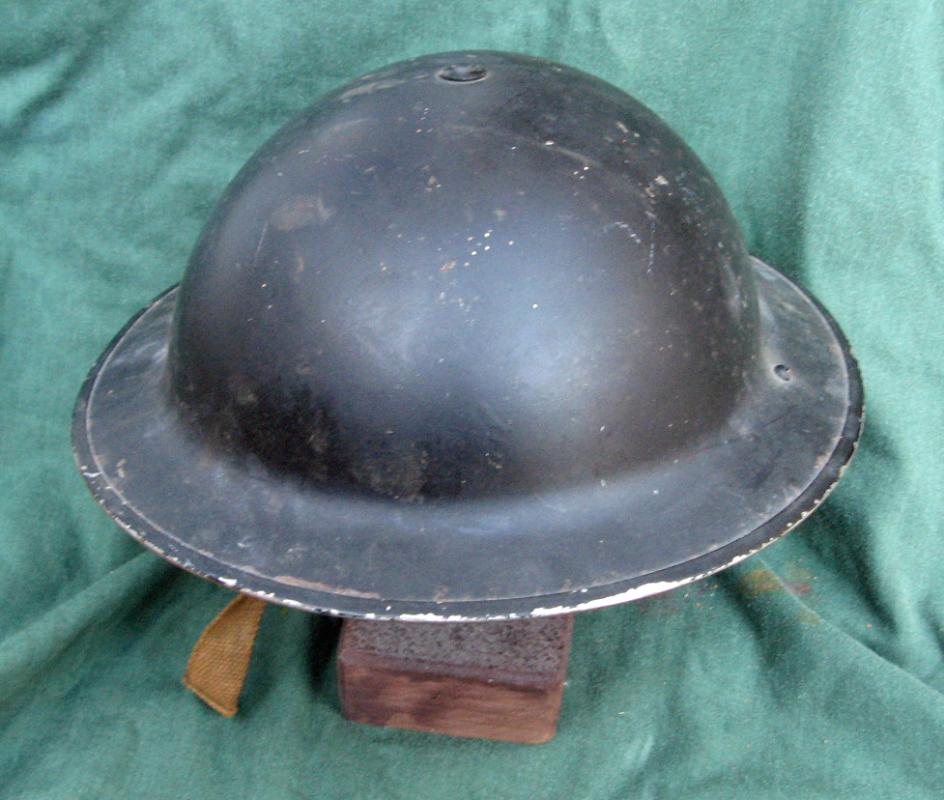
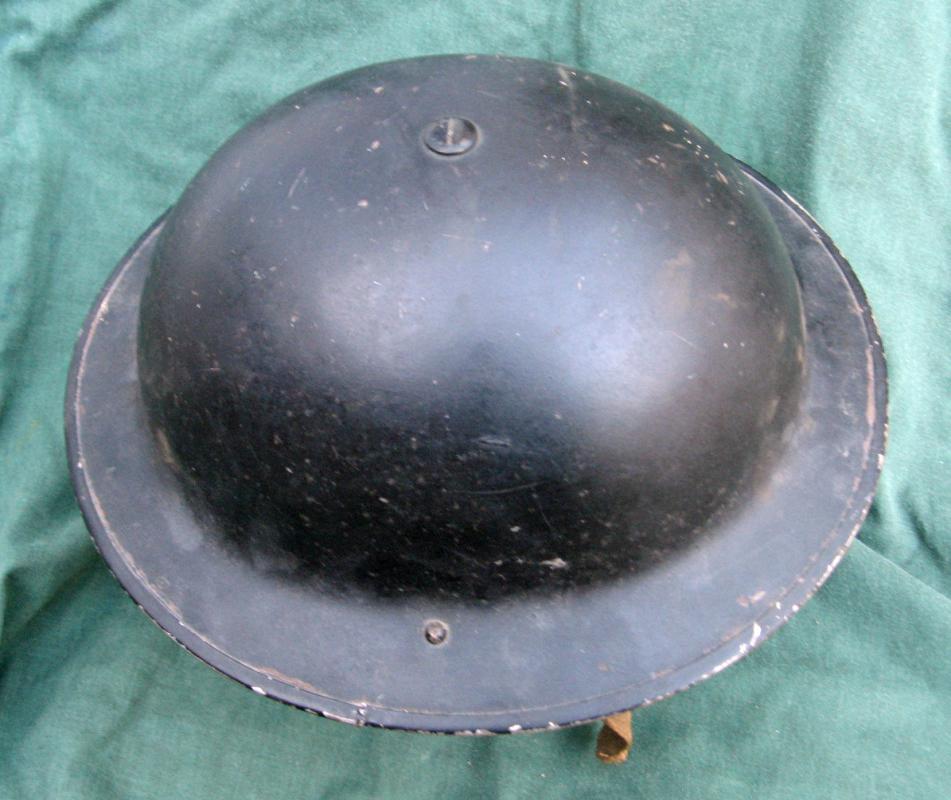
For this project I'm going to be using a Mk2 Brodie that I obtained off of Ebay for about £35 or so. As you know i work on all sorts of things which are mostly relics, this, however, is in pretty good nick so the purists amongst you will be incredibly annoyed at me.
I wont, therefore, be going through the restoration of a relic (I can do this later for those of you that are interested but it's really just the same as sorting those rusty paint bubbles on your car wing but with a bit less sanding and paint matching).
So, this helmet was a painted black, probably factory owned and was worn by some ARP type employee.
 0
0 -
The first All Blacks team (also known simply as 'The Originals') were the first New Zealand national rugby union team to tour outside Australasia. They toured Britain. France and the United States of America during 1905–1906. Their opening game was against Devon on 16 September 1905 whom they defeated 55–4. Such was the surprise that some newspapers in Britain printed that Devon had scored 55 points and not the All Blacks. They went on to defeat every English side that they faced, including a 16–3 victory over English county champions Durham, and a 32–0 victory over Blackhealth (Mervyn's old local team). They defeated Scotland, Ireland and England. The team's only loss of the tour was a 3–0 defeat by Wales at Cardiff Arms Park (which actually now ajoins the Millenium Stadium).
The loss was highly controversial with the All Black's wing Bob Deans claiming to have scored a try that would have brought them level. Dave Gallaher said that the referee had called the game correctly and was very accepting to the loss. They managed narrow wins against the Welsh club teams and went on to play France (who they obviously mashed). They returned to New Zealand via North America where they played two matches against Canadian teams as the US teams ran away after witnessing the Haka. Overall they played a total of thirty-five matches, which included five Tests, and only lost once—the defeat by Wales.
The 1905 All Blacks tour of Britain went on to achieve legendary status within the rugby world and New Zealand in particular. They scored 976 points and conceded only 59, and thus set the standard for all subsequent All Black sides.
 0
0 -
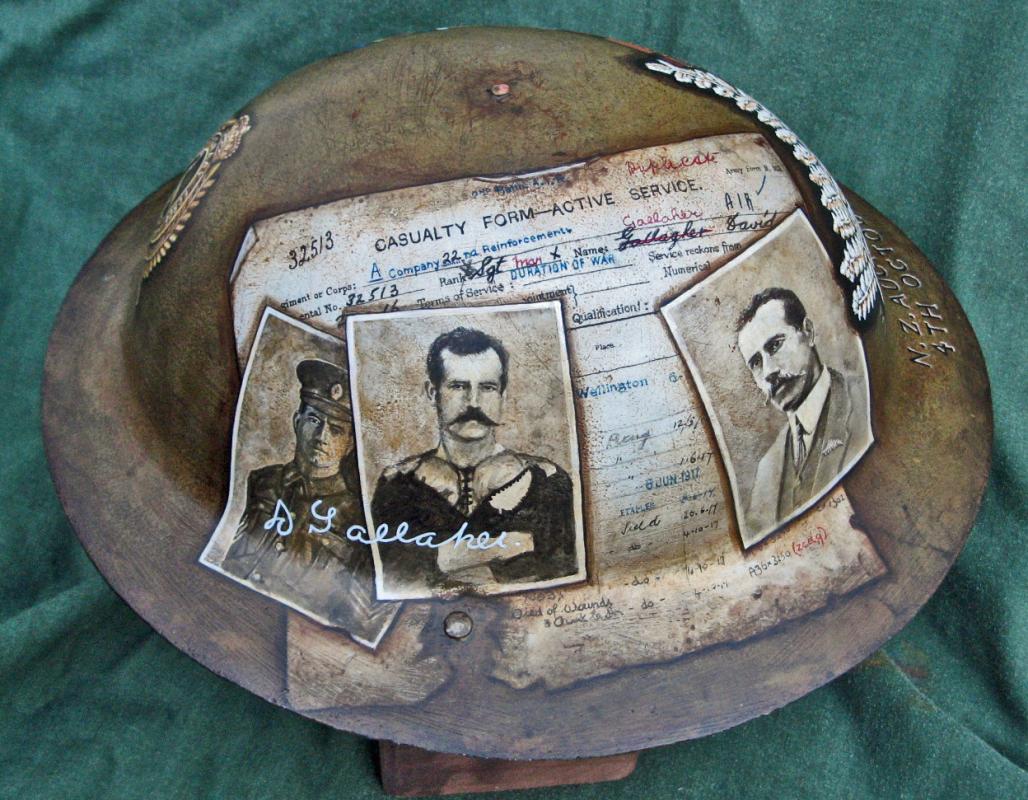
David Gallaher was five years old when his family moved from Belfast to the Bay of Plenty. He always claimed to be three years younger than he really was and when he enlisted to fight in the Boer war in 1901 he gave his age as 24 instead of 27. His gravestone at Nine Elms British Cemetery gives his age as 41 whereas he was actually nearly 44. (Just as there were very young victims of the war, a surprising number of New Zealand soldiers were in their thirties or forties and one, buried at Messines, was in his fifties.)
Captain of the highly successful 1905 All Blacks (the “originals”), Gallaher married in 1906 and had a daughter (Nora) in 1908. After his younger brother, Douglas, was killed in France in June 1916 he decided to enlist again. He became a sergeant with the 2nd Auckland Regiment on 1 June 1917 and was wounded in the face on 4 October. He died the same day at a field hospital in Poperinghe. In addition to Douglas, another brother of Gallaher’s, Henry, was killed on 24 April 1918. Both brothers were serving with Australian forces. Five Gallaher brothers served in the army: only two survived.
 0
0 -
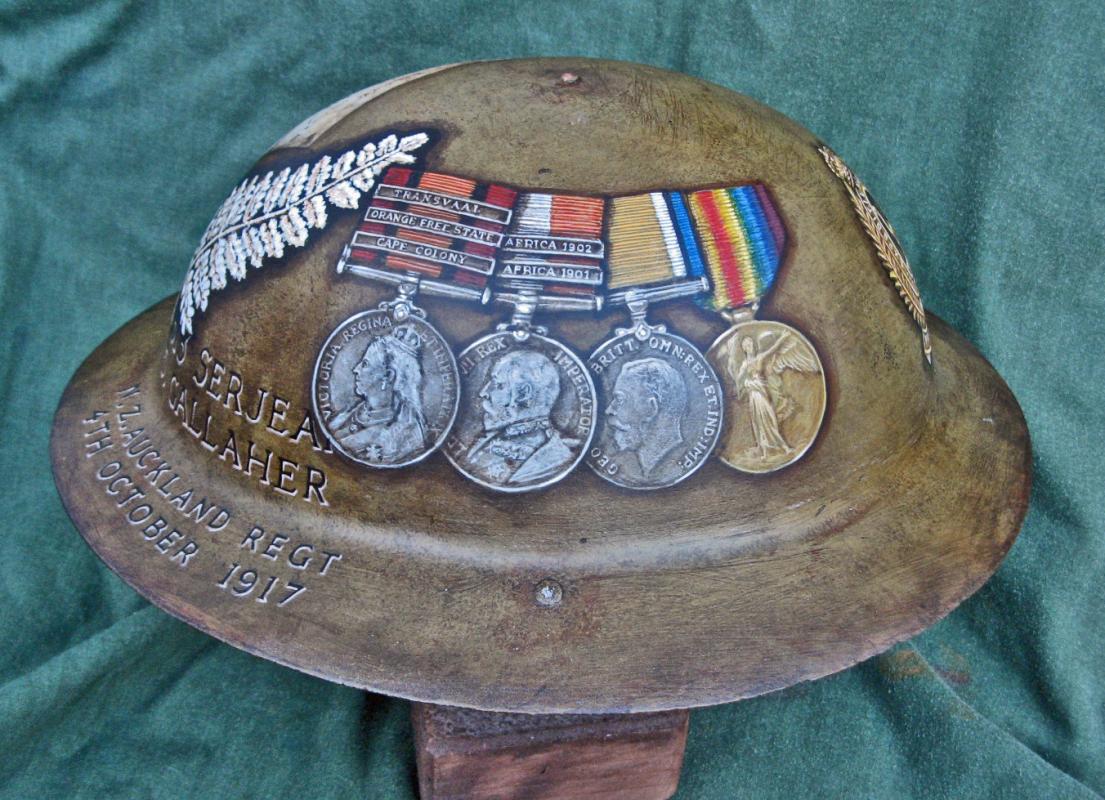
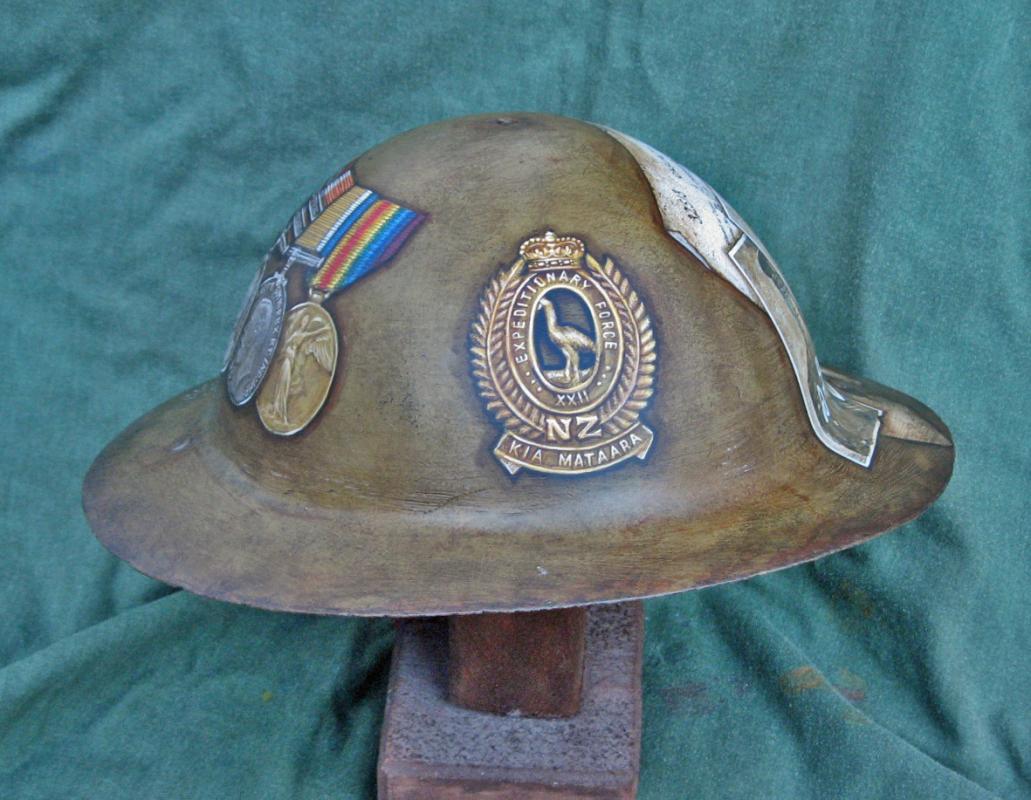
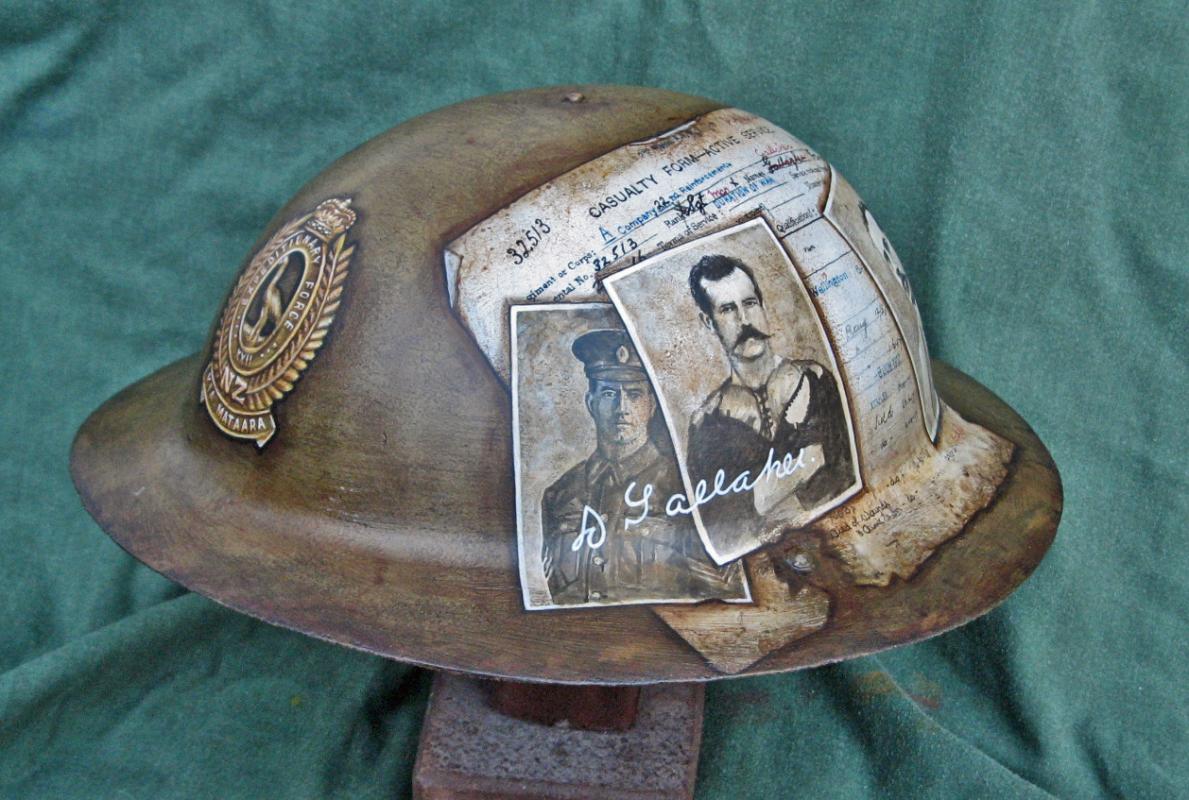
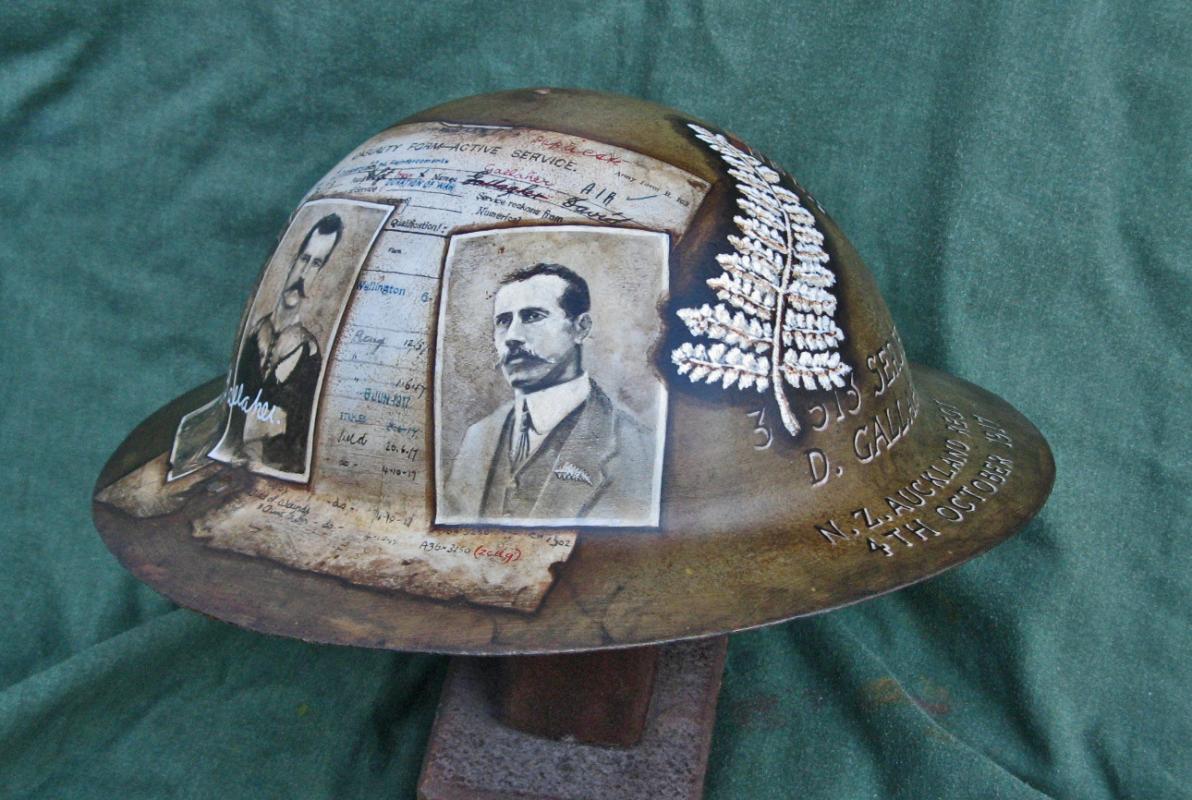
All set to do the instructional thread and will start in another place on the same channel.
Here's the just finished Brodie (Type B as it's non magnetic).
Obviously to commemorate Dave Gallaher who was the Captain of the 'Originals' or the very first team to be known as the All Blacks.
0 -
Thanks Gents
I accept all forms of down payments but prefer wives as they go back home to make the dinner

I've been asked by a few to do a 'how to' so my next project - a 1939 F&L Brodie MK2 - is going to be photographed all the way through with methods, materials etc. So that those, who would like to, can have a bash at bringing those old relics back to life. I'll also be taking you through the 'painting by numbers' methods to get your very own designs/photos onto a helmet so you can have a go at getting your granddad, his unit/regiment and his medals on there as well.
I'm fancying a Dunkirk commemoration one at the moment but may change my mind once I've finished off the few bits still under the paintbrush. So, any old end up, I'm hoping to start in a week or so.
Ideas of what to get onto the helmet - it is going to be British Army brown - would be greatly appreciated (don't suggest Chris helping a crashing train load of nuns while brandishing an FS fighting knife with Rachel Welsh under his arm).
It'd be nice to see some of yours.
0 -
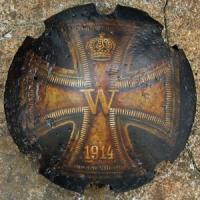
Eric
The white around the borders is ok. The eagle looks good to me as it's the 'no dot' winged version, which is correct for Quist and ET helmets. The foot also covers part of the swastika which is correct for this version.The only issue is that the swastika is not directly below the vent but the slippage of the decal - causing the white border may be the reason for it looking off centre. The decals were applied face down with the backing paper on top using a lacquer to 'glue' them to the paintwork, another coat of lacquer was then applied over the decal. A messy job and easy to slip the transfer as you couldn't really see what you were doing and as the appliers were handling hundreds of helmets in a day some ended up not quite true. Its pretty easy to chip off and see a modern day transfer.
0 -
Wow, I'd never heard of him. A warrior no doubt. Thanks for posting I'll have to go look him up.
0 -
Things have changed since then Mervyn
There's no pigeons left for that Mary Poppin's bird lady and the North side of the square has been closed off to traffic
0 -
The brass tipstave has "George Baker" engraved into the brass 'bashy' bit. The note doesn't say constable or special constable so I expect he just weighed in along with Brunel to protect all their slavery money.
My dentist says that the Captain of the cavalry was court marshalled for not ordering his men to open fire on the crowd. I've done no research on this but as his practice is next door to Customs House so I expect he has.
0 -
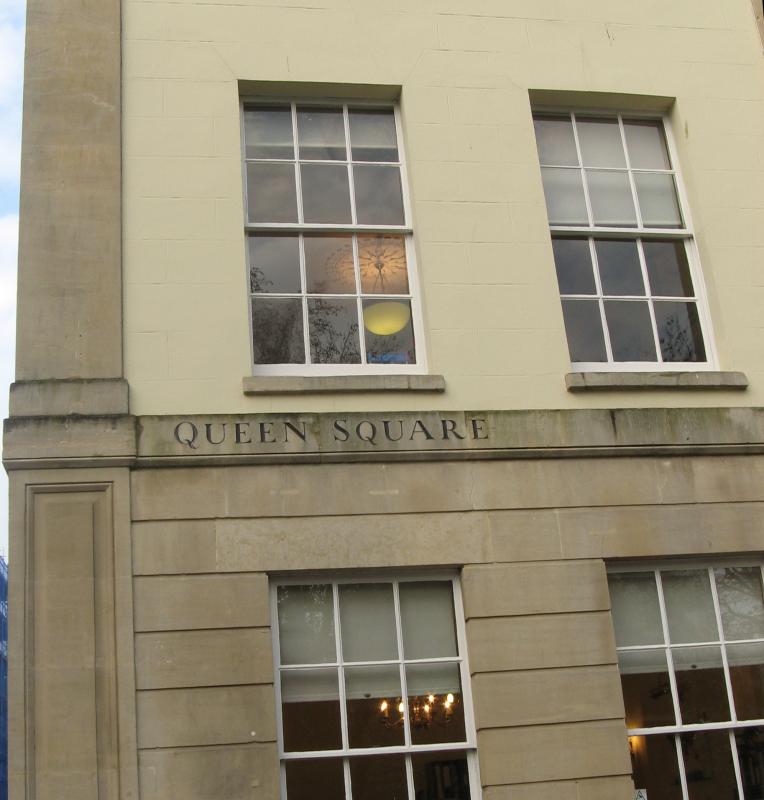
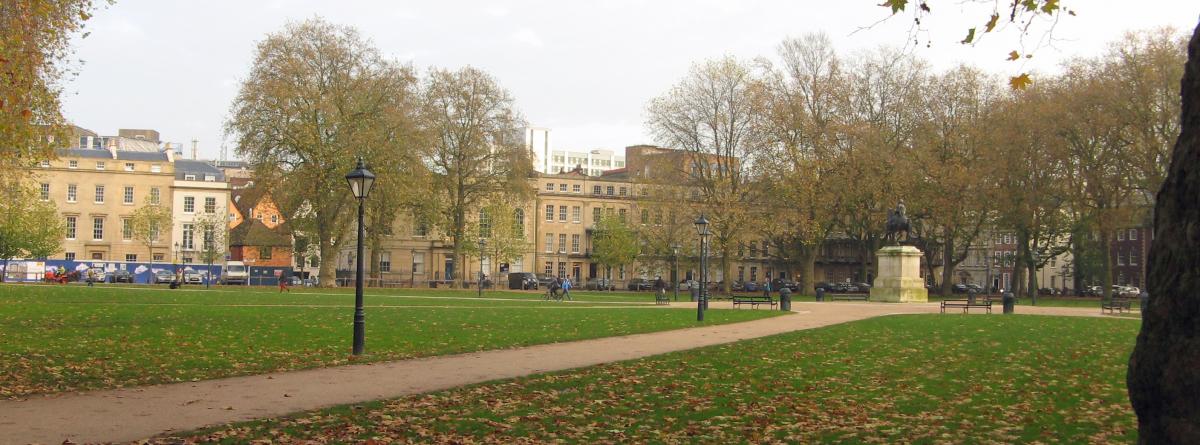
Here's Queens Square today
You can just make out Customs House on the far side, (right next door to my dentist - eeek)
 0
0 -
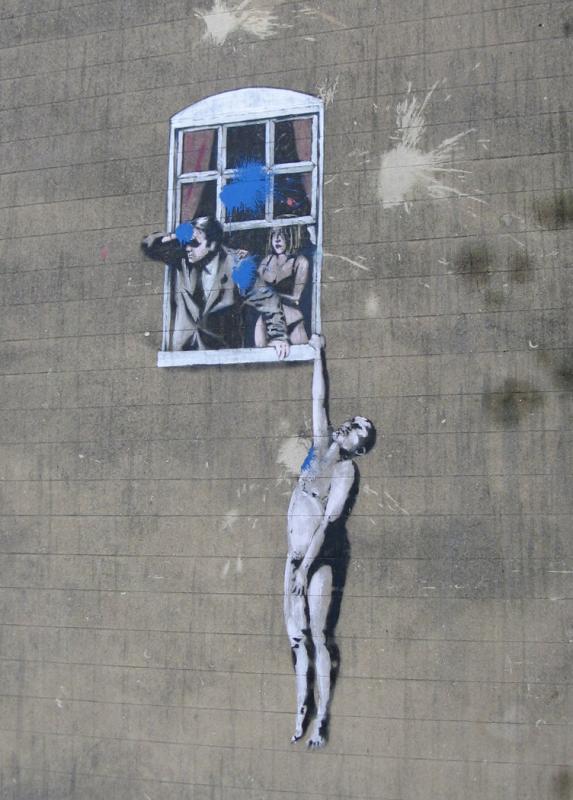
Mind you, a bit further into town another one of Banksy's doodles has been 'tagged' by others.
 0
0 -
Those eagled eyed amongst you may have seen the early 'Banksy' right in the middle. He didn't mind daubing his tag on other's works in those days.
 0
0 -
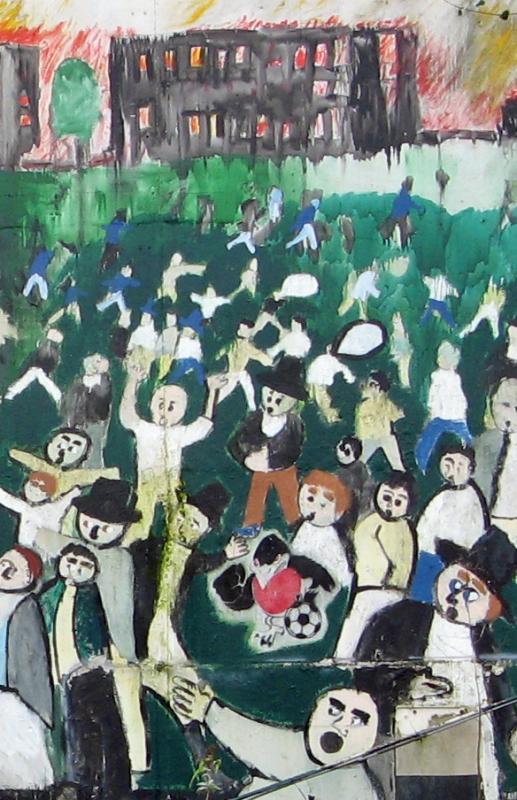
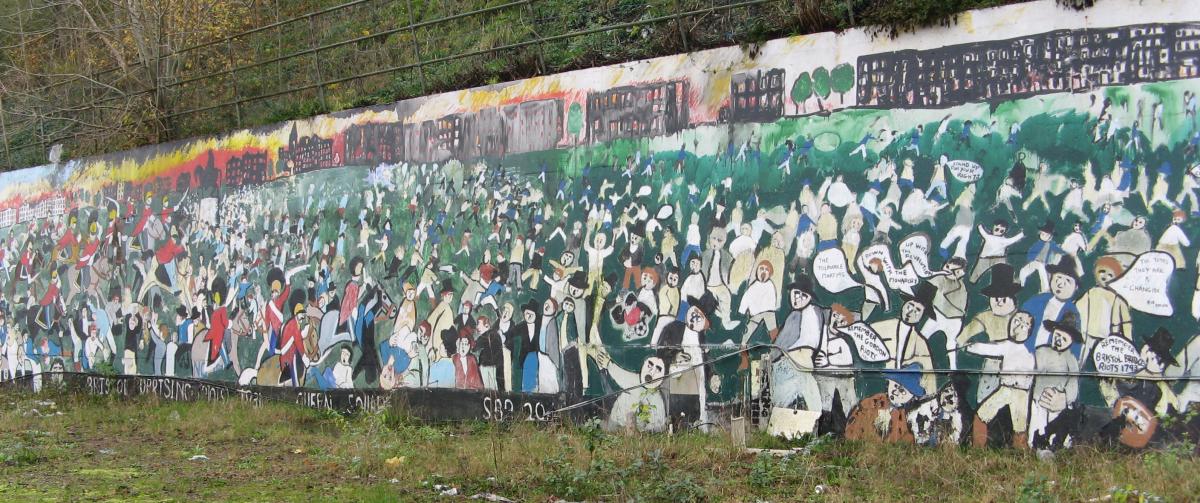
So, went for another walk into town today and took a photo of a mural of the Bristol Riots. It's on the Bath Road and shows Queen Square as the Customs House, Bishop's Palace etc were razed.
 0
0 -
Try a weenie dab of cellulose thinners
0 -
All fixed
 0
0 -
Gents
Not having a TV I hadn't seen this. Maybe all of the UK is already fed up with watching it. A friend sent it to me as he is part of the crowd in the background. Like a lot of Gents on here, he is involved in re enactment groups.
0 -
F/O John "Beryl" Boyle joined the RAF on a short service commission as acting P/O on probation on 24th October 1937. He was graded as P/O on 23rd August 1938 and rose to F/O on 23rd March 1940. He served briefly with 611 Squadron prior to being posted to 41 Squadron 'Seek and Destroy' at Hornchurch.
Probably claimed by 'the Star of Africa' Hans-Joachim Marseille then flying with I.(Jagd)/LG 2
0 -
Thanks Hardy was pretty difficult being so small and Frank well spotted
Thanks for pointing that out. It'll be getting changed tomorrow and I'll re-post.
0
Painting stuff
in Military Art
Posted · Edited by Spasm
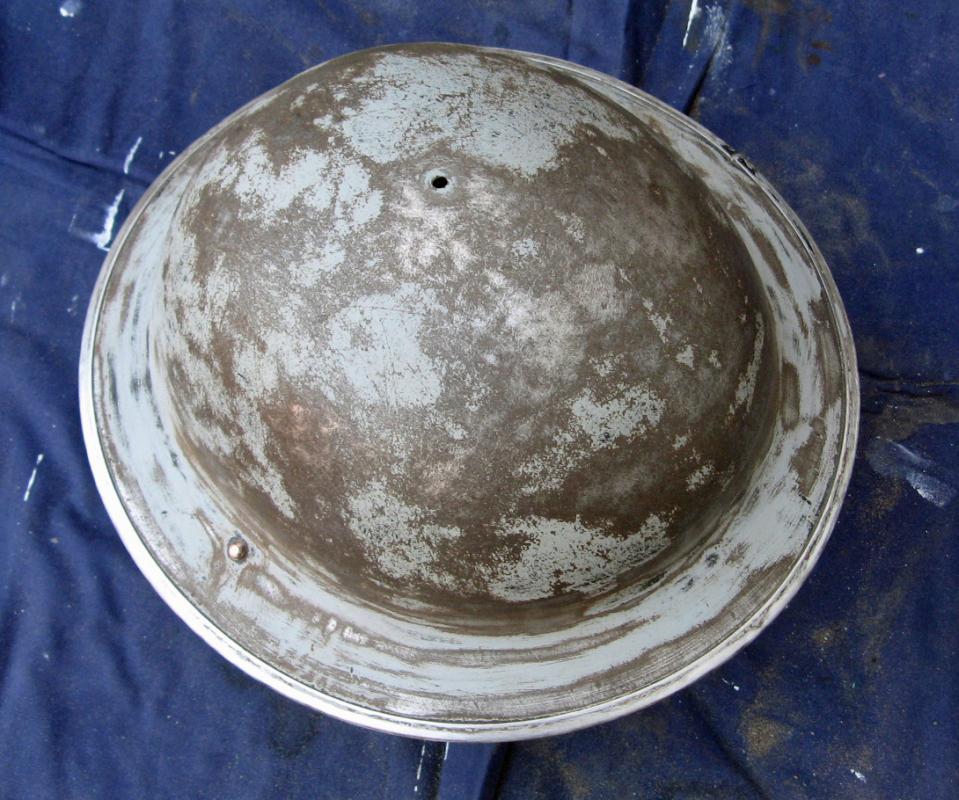
Have a feel round that its fairly flat and for rough bits. Phew, that's the sanding done.
Now to the treatment and protection. I use a rust cure product from Hammerite called Kurust. I think it's about a fiver from the car spares shop. This stuff converts rust into a sort of black hardness but wont penetrate beyond the surface. Any deep rust will need to be removed but we're ok on this helmet.
It's a sort of milky frothy liquid once shaken up. Use an old brush and brush on. Make sure you plaster it on and into the rim edge with a stiff brush. You're supposed to pour the cure rust into another container before you use it as rust contaminates the fluid as you dip in the brush causing it to turn dark. As I get through this stuff pretty quickly I just dip the brush into the original container. Get a couple of coats on allowing it to dry between coats. It dries pretty quickly, 15 minutes or so, on a nice day but it just sort of sits there in the cold. Don't use a heat gun as you want this to absorb into any rust. The more rust present the darker it will dry.
If you've got a lot of rust it's worth giving the helmet another sanding just to make sure you don't get any more rust appearing. Keep redoing until everything is stable.
The cure rust stuff is water soluble so clean under a tap and stash for the next project. If you use the brush again with paint it'll be discoloured.
Notice how the helmet has darkened as this stuff dries.