azyeoman
-
Posts
1,801 -
Joined
-
Last visited
-
Days Won
10
Content Type
Profiles
Forums
Blogs
Gallery
Events
Store
Everything posted by azyeoman
-
 This is an amazingly futuristic order. It wouldn’t be out of place in a science fiction film. I like the modernity of them. Does anyone know anything about the designer?
 -
American (US) Victory Medals
azyeoman replied to Kev in Deva's topic in Inter-Allied Victory Medals of the Great War
I understand there are some US WWI Victory Medals that are numbered. Does anyone have photos showing the numbers? Thank you in advance. -
Paper worth more than metal: St. Helene brevets
azyeoman replied to azyeoman's topic in Napoleonic Wars
I’m bumping this to see if anyone has anymore of these. All the best! -
redemption in the suicide club
azyeoman replied to dante's topic in Great Britain: Orders, Gallantry, Campaign Medals
Excellent thread and research. Congratulations on the reunite! -
I wonder if they’ll issue a campaign medal for genocide of the Uighurs? I am sure they decorated some politicians and some in the military for the assistance to the state for that. It would be interesting to read the commendations for those awards.
-
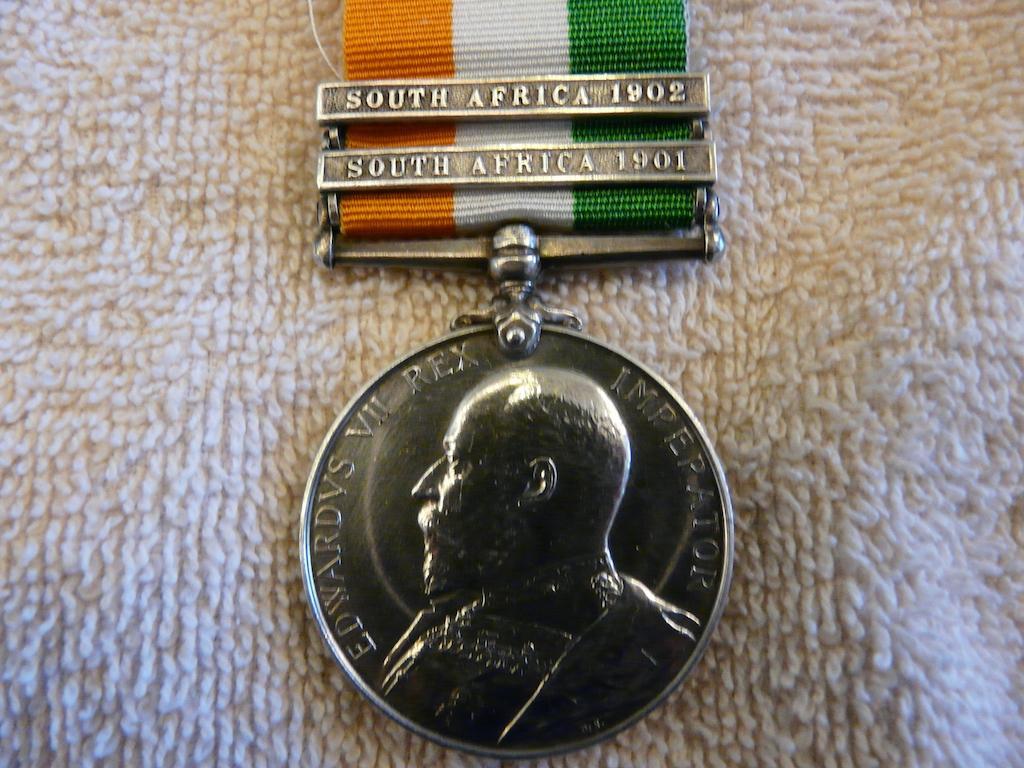
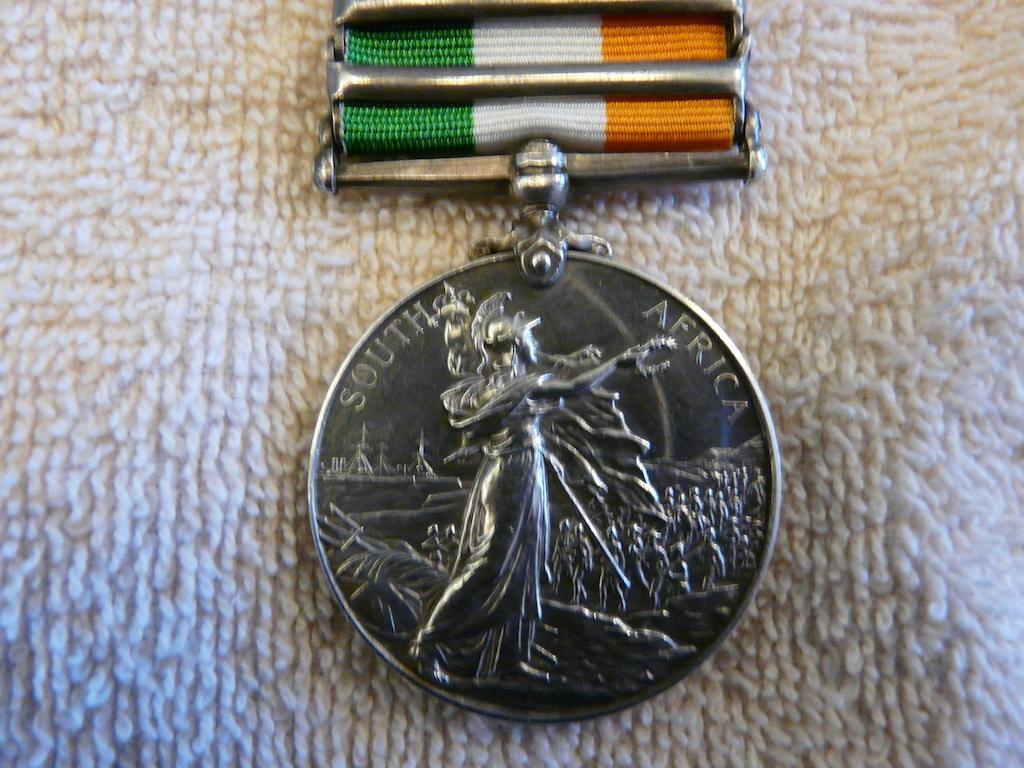
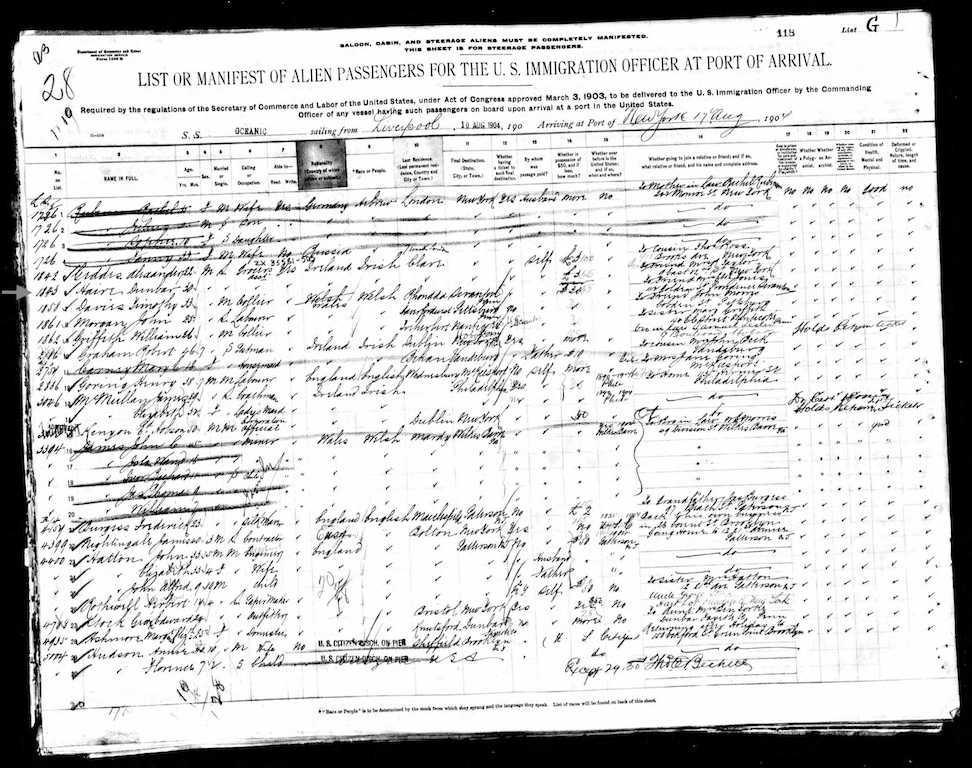
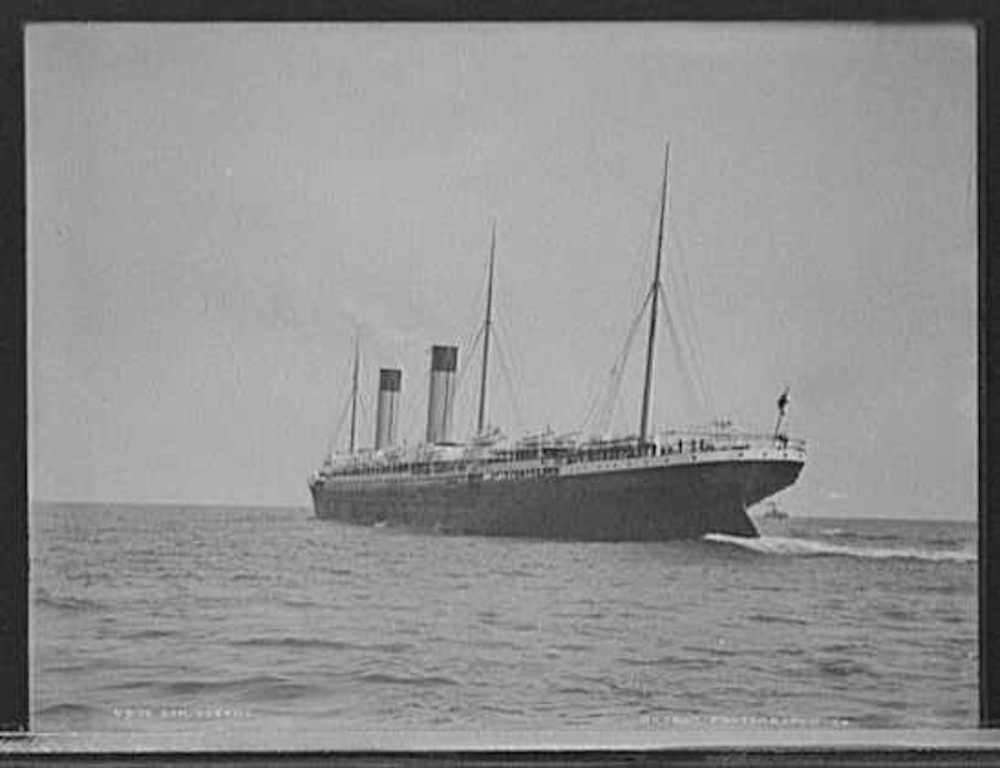
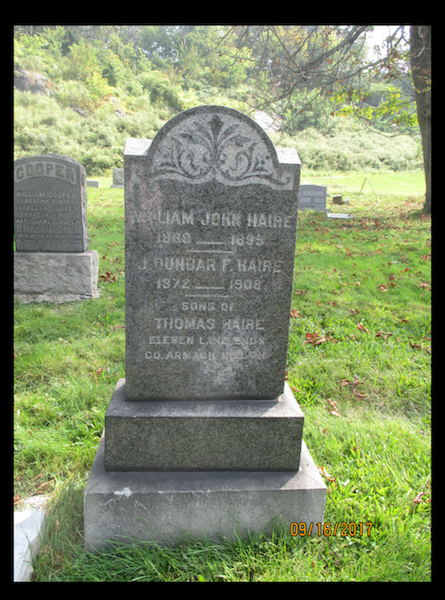
King’s South Africa, 2 bars, SA 1901, SA 1902, 1361 Trooper Dunbar Haire, Steinaecker’s Horse. Dunbar Haire enlisted in the regiment 25th April 1901, an Irishmen aged 28 who stood 5’ 9” tall. He earned the QSA, 3 bars, with Tugela Heights, Relief of Ladysmith & Transvaal, serving first in the Natal Police from 11/10/1899, until 11/6/1900, He was discharged from Steinacker’s Horse on 31/5/1902. His Medal was dispatched to Chicago, to the ‘Hills Hotel’ and Haire emigrated to the USA after the Boer War. He arrived at Ellis Island, New York City on 17th August 1904, to join his sister-in-law Mrs. R Taylor in New York. He died on September 18th 1908 in Manhattan, New York, aged 36. William Woolmore’s biographical notes on Haire from his book, Steinaecker’s Horsemen. "HAIRE Dunbar. Trooper No. 1361: Born Tangnee, Co. Armagh, Ireland on 17th June 1872. He joined the Natal Mounted Police as Trooper No. 2225 on 28th October 1898, was mobilised for war service on 11th October 1899 and discharged on 22nd April 1901. During much of this time he was a member of General Sir Redvers Buller's bodyguard. Enlisted in Steinaecker’s Horse at Pietermaritzburg on 25th April 1901-age 28, no occupation given, height 5'9", grey eyes, black hair. NOK: father, T. Haire, Tangnee, County Armagh, Ireland. After service in Swaziland he was discharged medically unfit at Pietermaritzburg on 24th June 1902, after cessation of hostilities. Qualified for the QSA medal with clasps Tugela Heights, Relief of Ladysmith & Transvaal and his KSA with the two date clasps issued from the Steinaecker’s Horse roll. " Haire Dunbar 1361 Trooper Served 25 Apr 01 to 24 Jun 02. Medically Unfit Source: Nominal roll in WO127 His full name was James Dunbar Finlay Haire and he is buried in Lot 557, Grave 1 in Machpelah Cemetery, Hudson County, New Jersey, USA. (see below photo) If anyone knows of his QSA with TH, RoL and TR clasps as issued to him = 2225 Tpr. D. Haire, Natal Mounted Police, please contact me as I'd like to reunite the pair. Information from the excellent AngloBoer War.com site. This corps was raised in June 1900 by Major F Von Steinaecker to operate in Zululand and on the Swaziland border of the Transvaal. Their leader had served as a lieutenant in the Prussian Army, but had subsequently been, for nearly twenty years, in South and South-West Africa. Before raising his 'Horse' he had done one of the most daring exploits performed in the course of the war. In November 1899 Steinaecker had enlisted as a private in the Colonial Scouts, a Natal-raised corps. He was soon promoted Squadron Quartermaster Sergeant, but in December he left the Scouts to command a small party serving under the Intelligence Department. The Colonial Scouts were disbanded in March 1900, and in that month Steinaecker, now a lieutenant, selected six men, of whom Scouts Duncan, Lawson, Gray, and Carmichael served with him for many months, Lawson finishing as a captain, and being present at the disbandment of the corps in February 1903. With this small party Steinaecker left Eshowe on 3rd April 1900, and rode or walked through Zululand and Swaziland, a distance of 500 miles. Their horses having died of horse-sickness, the party were on foot when the Transvaal border was reached. On their journey they had picked up a British settler, Holgate, afterwards a captain in this corps. He knew the country thoroughly, and as a guide in the last stages was invaluable. The party intended to attempt the blowing up of the great bridge at Komati Poort, but found it too strongly guarded. Steinaecker and three men now struck through the bush, swam the Komati river "when the crocodiles were off their feed", travelled all the night of 16th June, and on the 17th, after dark, placed nearly 100Ib of dynamite between the masonry and girders of a bridge at Malelane, forty miles up the line, and destroyed it. The fact that the Boers afterwards restored the bridge does not detract from the credit due to Steinaecker and his gallant men for their splendid piece of daring, which, strangely enough, was never recognised in despatches. Having returned to Natal, Lieutenant Steinaecker now recruited for his 'Horse'; and after having them equipped, he and his corps embarked on a warship and were landed through the surf at Kosi Bay, in the north corner of Zululand, not, however, without the loss of a boatload of arms and saddlery, the boat upsetting on the dangerous bar. Steinaecker's force now made their way to the Transvaal border, south of the Delagoa Railway. On 20th July 1900 he and a party of his men were successful in capturing Commandant Van Dam and another leader. When the armies of Lord Roberts and General Buller reached the eastern confines of the Transvaal, Steinaecker's Horse, now recruited up to 450 men, moved farther out into the very wild and unhealthy country which lies west of the Portuguese border. From Komati as a center they gradually extended their raids to the north and south for great distances, thereby denying to the enemy the use of the eastern lowlands for rest and recuperation. They also guarded closely the long eastern border against Boer dispatch riders and ammunition runners. In time the corps completely occupied and pacified the whole low veldt to the Olifant's river, holding over a dozen permanent posts scattered over a large province. The corps had now become one of the most complete and self-contained units in the country. They had their own intelligence, transport, workshops, etc and were able for over a year to work the Selati railway with their own men. In their eminently unhealthy district, Steinaecker's men had much most arduous and very dangerous guerilla campaigning; but being a corps specially recruited for such tasks, and having an admirable leader, they escaped serious casualties for a long time. In Lord Roberts' telegram of 14 November 1900, he said: "On the 8th inst, a party of Steinaecker's Horse, raised for service in the Komati Poort district, captured 16 Boers trying to cross from Portuguese territory at Nomahash, a place by which the Boers have been trying to get ammunition brought into the Transvaal". A day or two later 5 more were taken. At this time there were several encounters with dispatch riders, which almost uniformly ended in favor of the patrols of the corps. In July 1901 the corps met their first piece of bad luck. On the 22nd a party of about 100, many of whom were without horses, returned from a successful foray, bringing in some prisoners, stock, and a party of surrendered Burghers to Bremersdorp in Swaziland, a post which had been held by the corps for six months. They were followed by a force of Boers under Generals Oppermann, Smuts, and Grobelaar which many times outnumbered them. The detachment evacuated the town, hoping to get clear away; but on the 23rd they were caught up by the enemy, and after a running fight, in which they lost 4 killed and a greater number wounded and captured, were forced to abandon their baggage. Captain Greenhill-Gardyne was said to have conducted the retirement most ably. A party of the Yorkshire Regiment (Green Howards) made a very fine march from Komati Poort to assist, but did not arrive in time. Shortly after this Major Steinaecker surprised a laager and took 18 prisoners, and from this time onwards the corps had on many occasions severe fighting in localities where help was very far distant. On 7th August 1901 a post of 25 men on the Sabie river was attacked by a strong force of Boers. The post had been newly established, and the fortifications were not complete. The enemy, who numbered about 300, attacked vigorously and lost heavily. Commandant or General Moll was wounded in the attack, and was afterwards captured by a patrol of the corps. The defenders had Captain H Farmer Francis killed, several wounded, and the remainder captured. Captain Francis had served with the Imperial Light Horse throughout the siege of Ladysmith, and thereafter in the relief of Mafeking. His brother, also in the ILH, was killed outside Mafeking. At the end of August Captain Gardyne, in command of a small party, captured 11 Boers, some wagons, and much stock, 150 miles north of Komati Poort. In February 1902 Captain Holgate, the scout of the bridge destruction party, with 16 men, surprised and captured 18 of the enemy on the Swaziland border. Early in 1902 an extra squadron of Steinaecker's Horse was raised for service in the Pietersburg low veldt, in which district they did a lot of fighting under Colonel Colenbrander. On 16th April this squadron were heavily engaged, and lost 5 men killed and Lieutenant Robertson and 11 men wounded. Lieutenant and Paymaster J Hartley, who had been attached to Lord Methuen's column in the Western Transvaal, was killed in the disaster to that General's column on 7th March 1902. After the conclusion of the war Steinaecker's Horse, in somewhat reduced strength, remained in occupation of the eastern border until February 1903, when the South African Constabulary took over a number of the officers and men, and the others were disbanded. In 'Temple Bar' for July and August 1901 there are two admirably written articles, headed "A Byeway of the Boer War", by Captain Greenhill-Gardyne who was long attached to Steinaecker's, which give an excellent picture of the hard but most exciting—and to any lover of adventures most interesting — life led by Steinaecker's Horse. Their district was one in which few white men could live, as is proved by the fact that every regular regiment which had the misfortune to be stationed near Komati Poort lost more than 50 per cent of its strength through fever. The regulars were generally accommodated in tents or huts, but Steinaecker's men had often to lie out for weeks at a time in districts so wild that lions were a most real danger, —as in the Sabie river valley,—and more than one poor fellow was seized and carried off almost from the camp fire, while one was taken by crocodiles. Many of the corps did not see the railway for months on end, while some of the wounded had actually to be carried over 150 miles before reaching any sort of hospital. The Mentions gained by Steinaecker's Horse were as follows: — LORD KITCHENER'S DESPATCHES: 8th August 1901.—Lieutenant J A Baillie, on July 4th, having heard that two dispatch riders had crossed the Portuguese Border into Swaziland, followed them with one man by moonlight, and after a hand-to-hand fight killed them both and took dispatches. Lance Corporal W S Hains (Harris in Gazette), who accompanied Lieutenant Baillie, was also mentioned, and was promoted Sergeant by the Commander-in-Chief. 8th March 1902.—Troopers D E Wilson and F Hennessy, for most plucky rescue of the body of a comrade which had been carried off by a crocodile whilst bathing in Usutu River, 30th November. 8th April 1902. —Major F V Steinaecker. 1st June 1902.—Lieutenant W P Robertson for good service east of Pietersburg, 25th March to 21st April 1902. Trooper W W Griffin, killed whilst trying to take a wounded comrade to cover. 23rd June 1902. —Captain H F Francis (killed in action); Lieutenants J M Dallamore, D Buchanan. Captain A Greenhill-Gardyne, Gordon Highlanders, Adjutant attached (got Brevet-Major). Major von Steinaecker commenced the war as a private. His steps are worth noting—Squadron Quartermaster-Sergeant, Lieutenant, Captain, Major, DSO, Honorable Lieutenant Colonel in army. And more information… The Regiment was under the command of a German by the name of Colonel Ludwig Steinacker D.S.O., a former Lieutenant in the Prussian Army, who in only a few months’ time rose from a Private in the scouts to a Major commanding his own unit, he was only 1.5 meters tall but sported a large moustache and an even larger sword, he saw himself as the ‘Napoleon’ of the lowveld, regarded by a Boer General as ‘The Second Musolino’ and considered by Swaziland a ‘Soldier of Fortune’ and even dubbed the ‘Bushveld Bismark”, he sported extravagant uniforms of his own design, Silver Spurs, Naval style frock coat, heavily braided epaulettes. Him and his men were incredibly dangerous & ruthless, but had become one of the most complete and self-contained units in the country. Having their own intelligence, transport, workshops etc. The unit’s official task was to seal the border between Transvaal and Mozambique. The force additionally employed 300 blacks, mostly Thonga, in intelligence work inside Swaziland and along its borders, maintaining a small garrison of fifty men in Bremersdorp. The infamous unit included some of the finest shots in Africa, the most dangerous men Steinacker could gather, an assortment of desperadoes and vagabonds. including Kaffir Storekeepers, Smugglers, Spies and scoundrels of every description, including cowboys and mercenaries, paid 10 shillings a day plus pickles, fresh milk and whisky, they spent at least as much time enriching themselves by looting Swazi homesteads, ransacking abandoned white property and gun-running to Mozambique as they did resist the Boers. The Swazi Council declined to recognize the force as a legitimate British unit, refused to cooperate with its members and pressed for its withdrawal from Swaziland. Kitchener as this point had turned a blind eye to their actions with one of his aides noting that ‘No one thinks Steinacker is an Angel but he has his uses’ It is reported that ‘Their primary occupation appeared to be looting, and the kaffirs attached to it were used for scouting, fighting and worse. Many families in the northern part of Lydenburg had been attacked in lonely spots and on one occasion the white men on one of these marauding expeditions had allowed the kaffirs to murder ten defenseless people with their assegais and hatchets, capturing their cattle and other property.’ Not long after Trooper Haire joined the unit, this small unit of men had single-handedly terrorized Swaziland. They had then ‘imprisoned’ Prince Mancibane Dlamini on suspicion of Boer Sympathies. The Swazi Council had had enough of their antics and told General Botha that a group of British ‘robbers’ were operating in Swaziland without her consent. On 21st July 1901, the Ermelo commando led by Tobias Smuts crossed the Sqazi border and surrounded Bremersdorp, where Steinacker’s men were billeted. The commando soon overpowered the unit, took forty-one prisoners, captured a haul of firearms, seized four hundred cattle and fifty horses, they liberated Mancibane and proceeded to incinerate the town. After the war Steinacker had attempted to keep his unit going, but an unfortunate attempt to take part in the coronation parade in London of King Edward VII led to him being stripped of his command. He briefly returned to Komatipoor before attempting to farm cotton near Pilgrim’s Rest. There he lost everything, including his mind, Civilian life did not suit him. he was arrested by the police for planning to murder a former colleague but committed suicide by poisoning himself as he was being taken into custody.

-
This is an exceptional helpful thread. Thanks to all who added information!
-
How to read Japanese certificates masterclass ! !
azyeoman replied to Paul L Murphy's topic in Japan
This thread is exceptionally helpful. Thank you very much! -
This is an old thread and I wonder if there are any new and safer products for preserving and displaying medals. Any ideas?
-
That’s a wonderful AGSM. Congratulations. Have you been able to find anything out about the recipient?
-
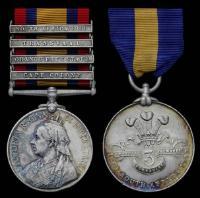
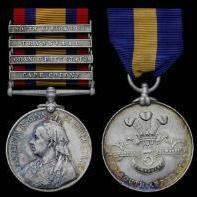
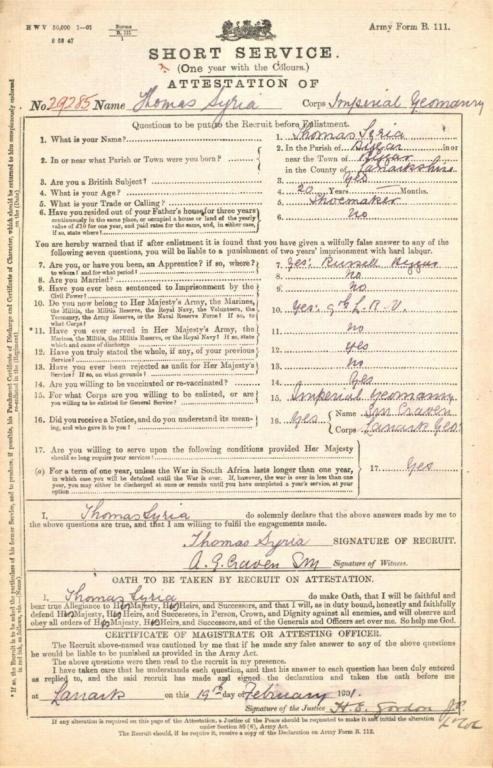
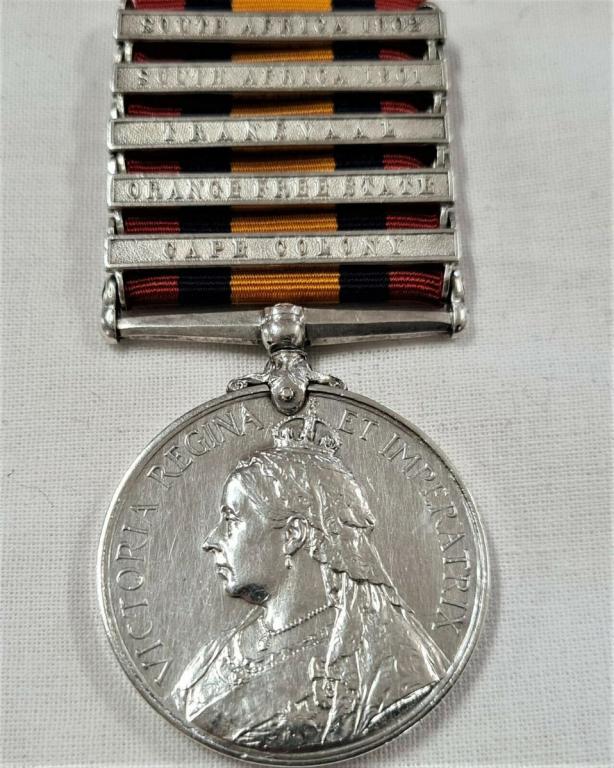
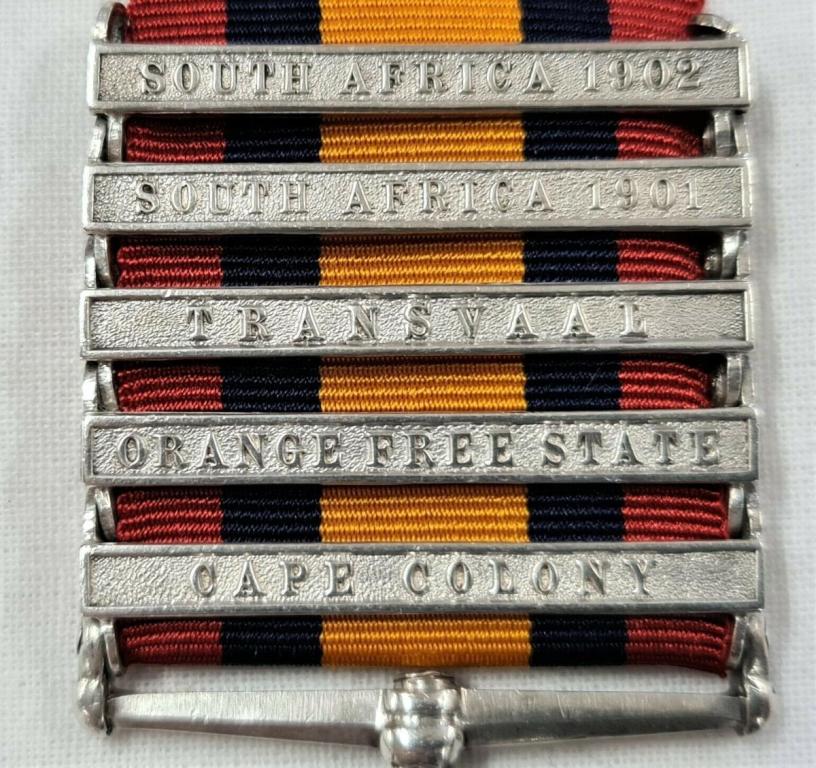
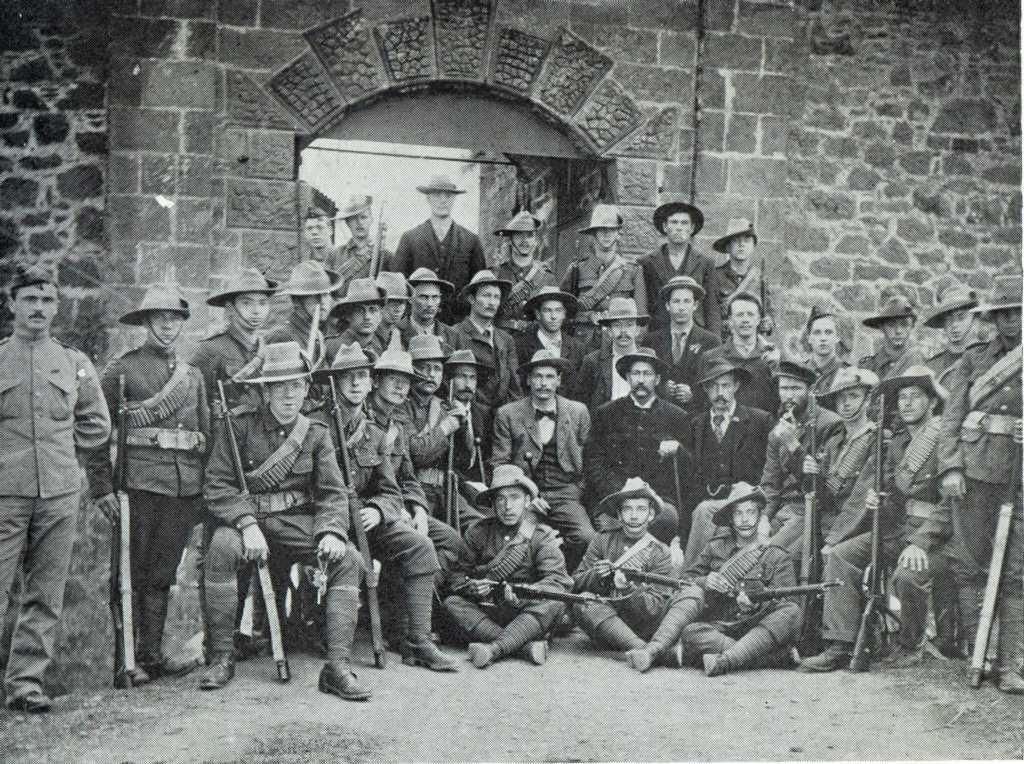
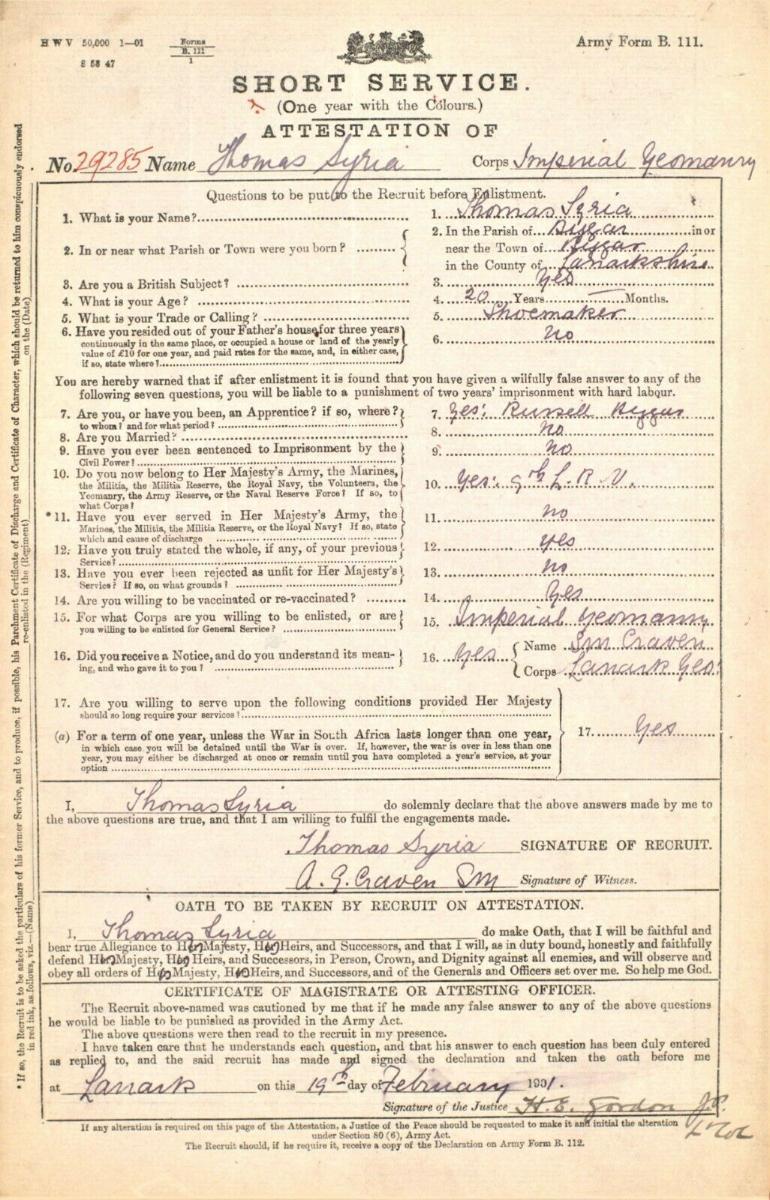
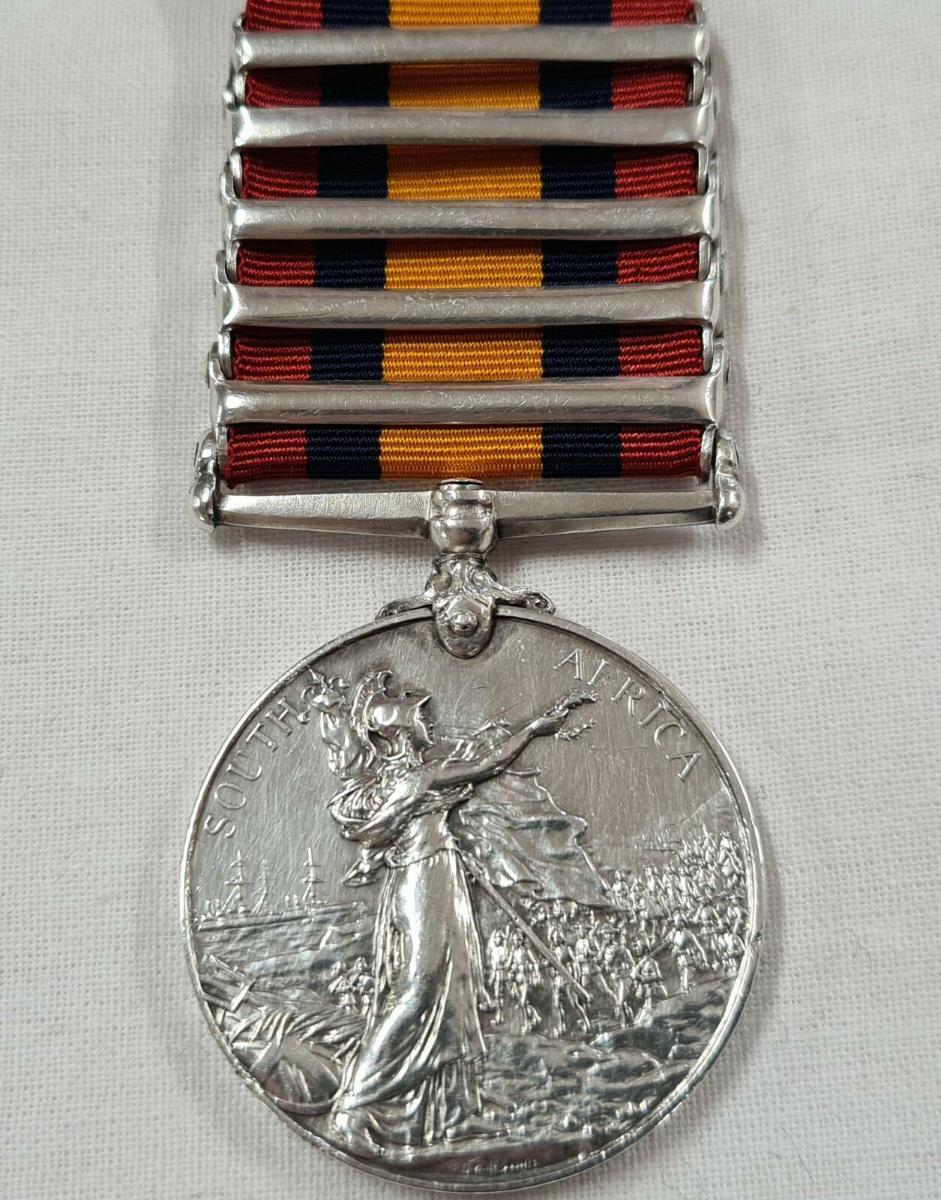
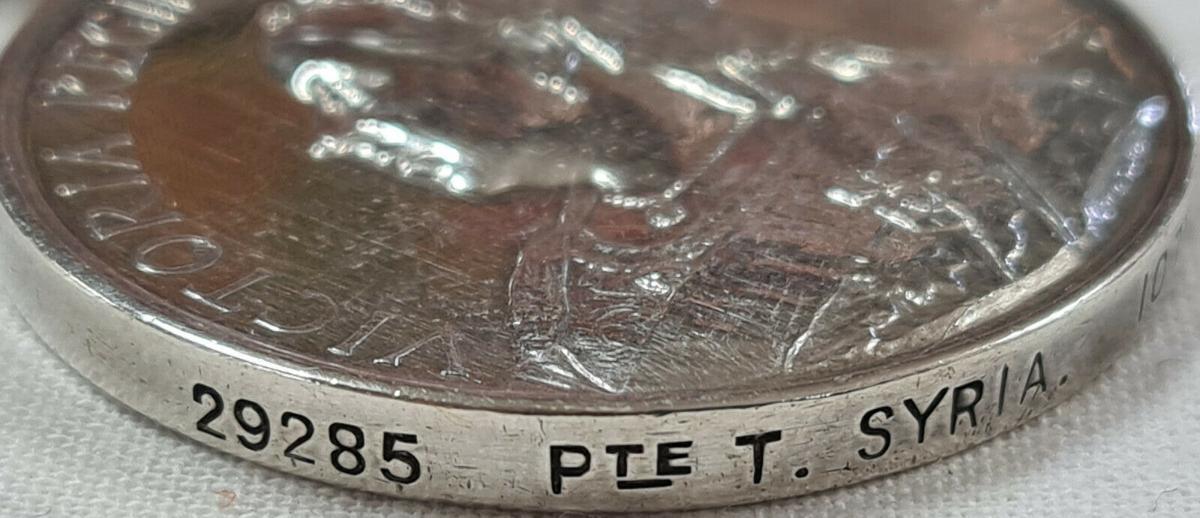
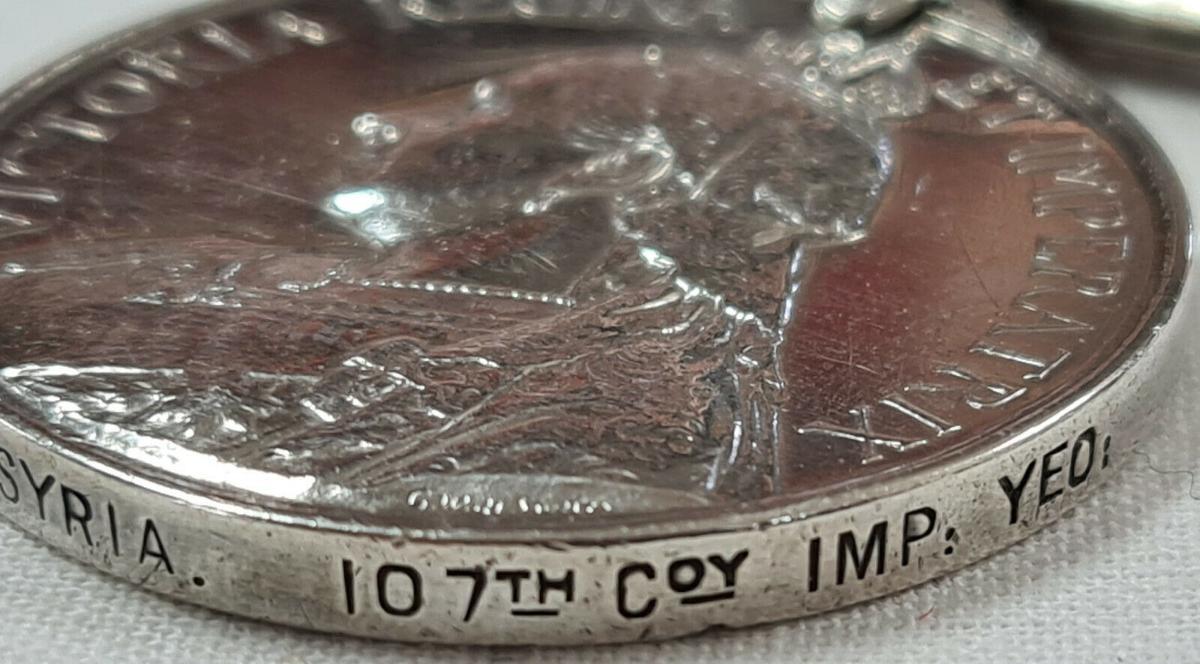
QSA: with 4 clasps: CC.OFS, TR, SA01, SA02 officially named to: 2985. PTE T. SYRIA. 107TH COY IMP. YEO. Thomas Foster Syria, was born at Biggar, Lanarkshire in 1881, a shoe maker by trade he was serving with the 9th Lanarkshire Rifle Volunteers when he volunteered for the Imperial Yeomanry for service in South Africa on the 19/2/1901 at Lanark. He was originally posted to the 17th Company, but was transferred to the 107th Company, 6th Battalion 17/04/1901. He served in South Africa 6/3/1901 – 4/8/1902. The roll records show he was captured at Brakspruit on 13/11/1901 and released. He returned home, and was discharged on 11/8/1902 in Aldershot. He died in Glasgow in 1945. Taken prisoner of war (P.O.W.) 13/11/1901: Captured at Palmietfontein Hill on 13 November 1901, Gazetteer refers: 'On 13, November 1901 Lt-Col WB Hickie based at the farm Brakspruit sent out a force of about 95 officers and men from the 103rd and 107th companies Imperial Yeomanry commanded by Major Haughton, IY to reconnoiter the hill in search of the enemy. Three miles from the hill Major Haughton sent four troops under Captain Woolf to occupy the hill while he remained behind with 1 and a half troops. Captain Woolf signaled back that there was a party of mounted men under a hill two miles to the right. As Major Haughton tried to identify these men he was attacked from the right rear by a large party of 300 Boers. They held the Boers off for 1 and a half hours before surrendering, elements of Captain Woolf's party were also captured. British losses were five men killed, four mortally wounded, 14 wounded and 70 captured.' In this action, the Boers lost 4 killed and 8 wounded. Another version reports: Meanwhile, Boer resistance continued in the western Transvaal. Lt-Col W B Hickie, with a force of mounted troops and infantry, totaling about 870 men, was engaged in covering the construction of blockhouses on the Schoonspruit. On 13 November 1901, Hickie lost heavily at the farm, Brakspruit, 32km north-east of Klerksdorp, when two squadrons of Imperial Yeomanry (drawn from the 103rd and 107th Coys, 2nd Bn, and the 107th Coy, 6th Bn, IY), whom he had sent forward to reconnoiter, were destroyed. Ten men were killed or mortally wounded, eleven were wounded, and 64 were taken prisoner. In this action, the Boers lost four men killed and eight wounded (Wilson, Vol II, p 856; Maurice & Grant, Vol V, pp 339-40, 348; Watt, 2000; and Amery, Vol V, p 229)


-
My Australian POW Collection
azyeoman replied to BustersPOWs's topic in Great Britain: Orders, Gallantry, Campaign Medals
Great photos! Wouldn’t it be nice to find the sword he had to go with it. It’s good that you have the Japanese paperwork on him too! -
My Prisoner of War Collection
azyeoman replied to POWCollector's topic in Great Britain: Orders, Gallantry, Campaign Medals
Hi Rob, i really enjoyed your post on Canadian Ernest Alexander and look forward to more posts in the future. All the best and happy holidays. I hope ‘22 is a great year for your PoW collection! All the best, John -
Hi Brian, I miss your posts? Are any more forthcoming? Hope so. Cheers, John
-
My Australian POW Collection
azyeoman replied to BustersPOWs's topic in Great Britain: Orders, Gallantry, Campaign Medals
Thanks for another informative post. Keep ‘em coming. Cheers! -
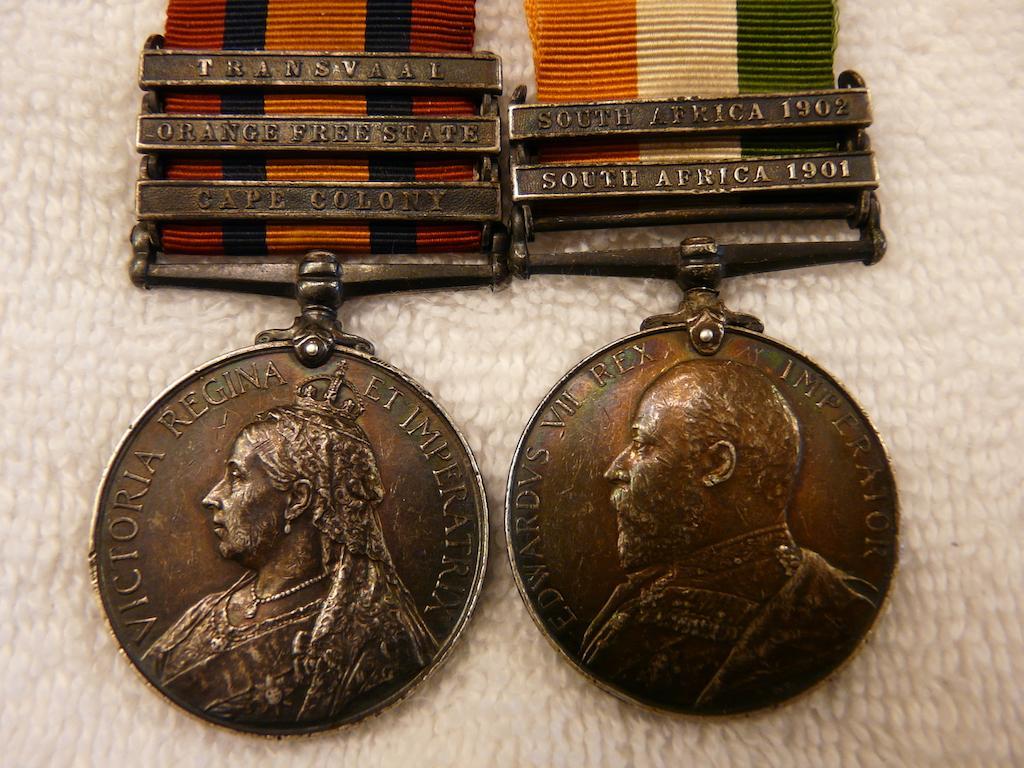
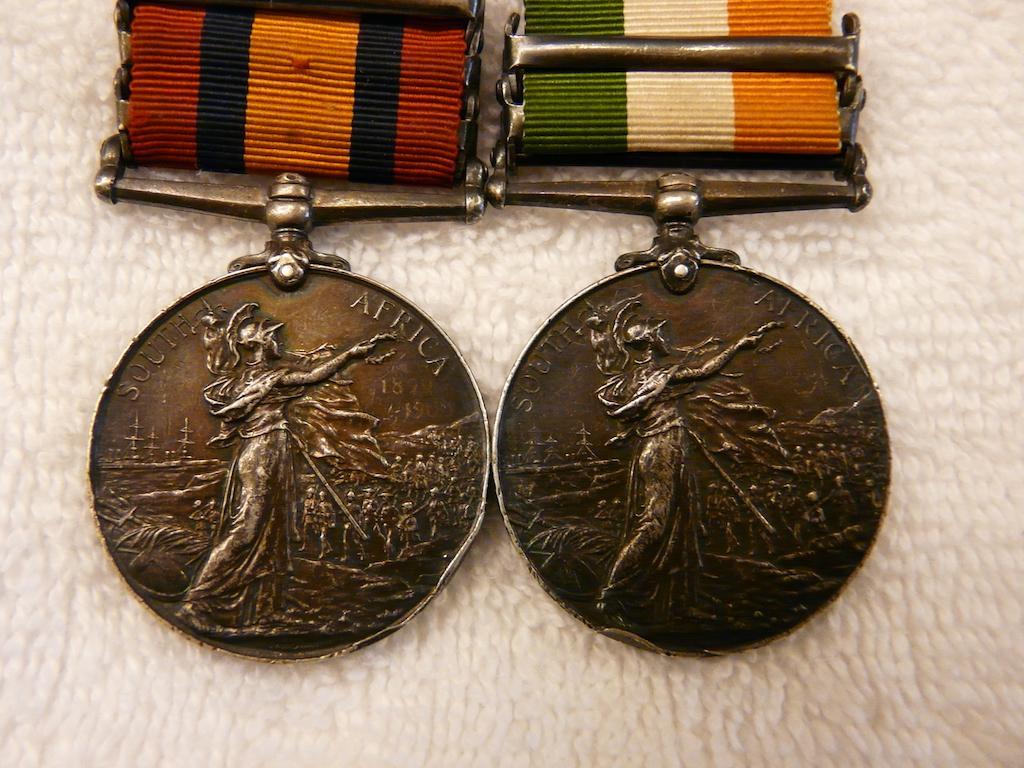
A new pair for an interesting battle, Mostert's Hoek (Reddersberg) QSA: CC, OFS, TR with 'Ghost Dates' visible. All bars confirmed on roll. Officially engraved in italics to 5299. J. RYAN. R. Ir. Rif. KSA: SA01, SA02 officially named in small impressed capitals to 5299. PTE. J. RYAN. RL. IRISH RIFLES. Pte. Ryan was captured on the 4th of April 1900 and released at Waterval on the 6th of June, 1900. On 3 April 1900, Captain McWhinnie and a column were on duty proclaiming the Queen's Peace and accepting the surrender of Boer farmers in the area of Reddersberg. When unexpectedly threatened by a large Boer Commando, Captain McWhinnie and his three rifle companies and one mounted company of the 2nd Battalion The Royal Irish Rifles (and one attached mounted company of the 5th Fusiliers), adopted a defensive position on a nearby feature which was too large for his small force to defend. The Boer Commander, De Wet, conscious of the superiority of his force, invited McWhinnie to surrender, and, on receiving a curt rebuff, began the battle. The Rifles had a very uncomfortable night with little food and water. At dawn on 4 April, the Boers closed in and overran part of the position. So close were the Boers to the Riflemen that when Bugler Longhurst attempted to dash five yards from an exposed position to a safer one he fell dead into his chosen spot with nine Boer bullets in his body. Later when the infiltrating Boers split what was left of the defensive position, Captain McWhinnie surrendered to the overwhelming enemy force consisting of 4,500 Boers and four artillery guns. The Rifles' losses totaled nine killed, 26 wounded and 388 taken prisoner, with the Fusiliers' casualties numbering some 14. When McWhinnie's force had been ordered towards Reddersberg, Field Marshal Lord Roberts had telegraphed General Gatacre about the emerging threat from De Wet's force. Gatacre failed to ensure the detachments threatened by De Wet's numerically superior force were withdrawn. Furthermore, when Gatacre's relief force was approaching, its forward scouts overlooking Reddersberg heard firing and instead of pushing on towards the fighting, Gatacre chose to retire. Although Kitchener countermanded Gatacre by ordering him towards Reddersberg it was too late for McWhinnie's doomed force. Gatacre, the commander of the disaster at Stormberg, was relieved of his command and departed for England several days later. For more information please see two posts above and the links below: www.angloboerwar.com/books/74-de-wet-thr...soner-at-reddersburg and www.angloboerwar.com/books/76-rosslyn-tw...ics-hoek-reddersburg
-
My Australian POW Collection
azyeoman replied to BustersPOWs's topic in Great Britain: Orders, Gallantry, Campaign Medals
Welcome to GMIC and it’s wonderful to see another PoW collector on board! This is a great post and I look forward y to more. -
Kimberely Star 1899-1900
azyeoman replied to a topic in Great Britain: Orders, Gallantry, Campaign Medals
One of my favorite medals. Here’s one that graces my collection. A confirmed one clasp Defence of Kimberely QSA, with two clasp KSA and Kimberley Star named to 399 Pte. W. Weir, Kimberley Volunteer Regiment. There were 307 one clasp DOKs awarded to the regiment.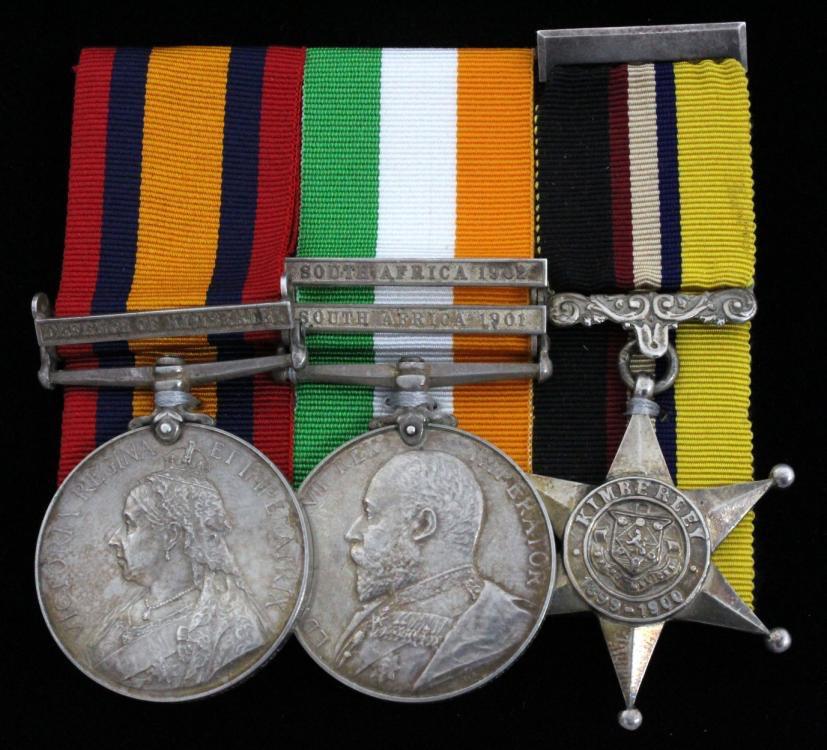
-
Hi Rob, There’s actually a lot of info on the British POWs as The grounds on which each person was taken prisoner was investigated. One of the publications from The Royal Commission on the War in South Africa contains the results of these enquiries. For the most part, prisoners were exonerated but in some instances the captives were later subject to disciplinary action. The Royal Commission on the War in South Africa lists all surrenders, gives brief details of the incident, numbers involved and the outcome of the investigation.
-
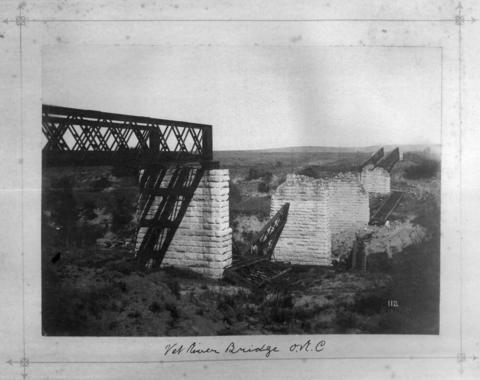
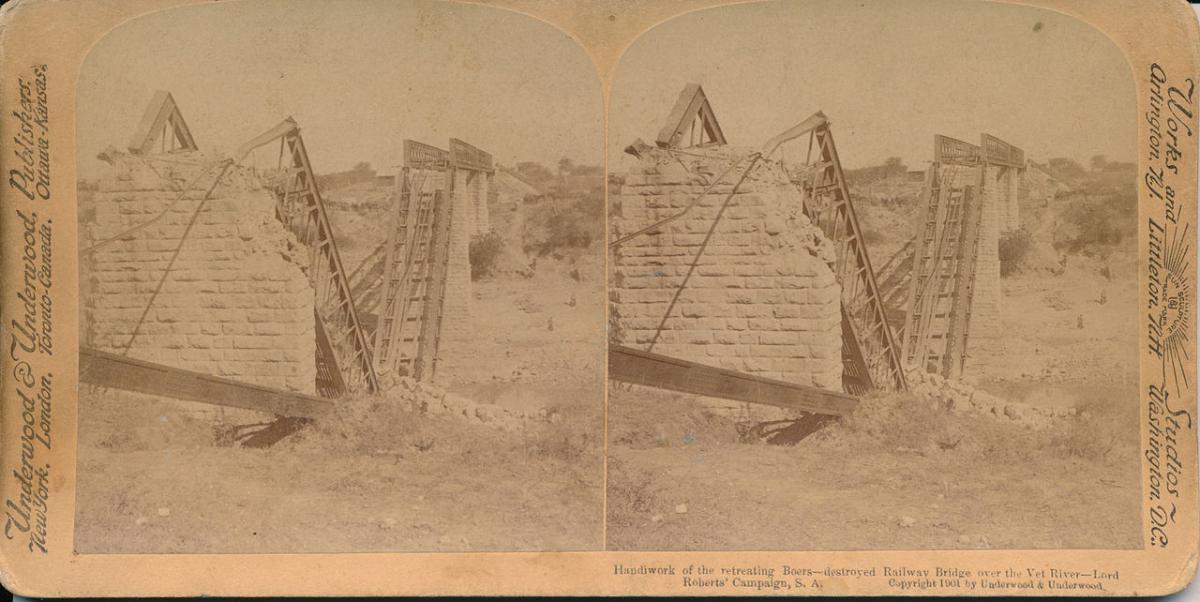
Further research shows that McKilligan, was Hardie & Hardie on his service papers as seen below. He was captured on 26 May 1900 at Vet River while scouting. It appears that he was issued a KSA with two clasps as either 4079 Pte. J. Hardie or Hardy.

1.thumb.jpeg.d1787758b11a3aea7530468ae142fa00.jpeg)
2.thumb.jpeg.4ba6e3ba21a1a6ba19002713d0f096eb.jpeg)
3.thumb.jpeg.8733a4f471a6e84abe6d08beb72d42cb.jpeg)
4.thumb.jpeg.6f7b668bdfdddbd2292f5a60d428ac19.jpeg)
-
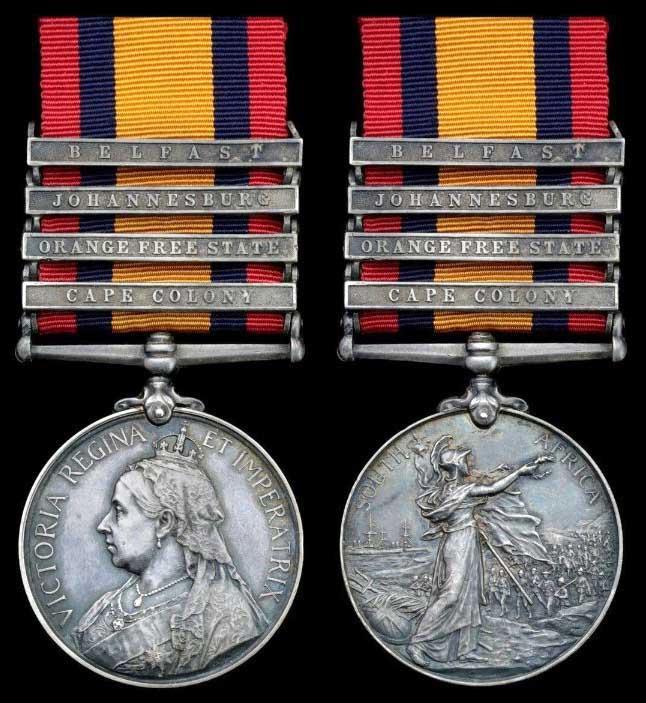
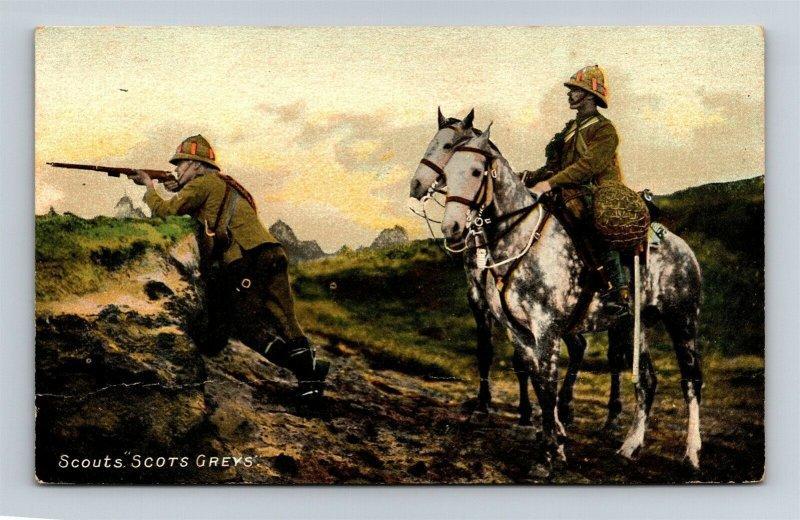
A nice and interesting QSA to a Scotts Grey. QSA: CAPE COLONY, ORANGE FREE STATE, JOHANNESBURG, BELFAST - Officially named to: ‘4079 PTE. J. MCKILLIGAN. 2ND DRAGOONS John McKilligan (Hardie) was a native of Dranie, Lossiemouth, Morayshire. He seems to have had a tough childhood, for by the time he was aged four he was living with his grandparents whose surname was McKilligan. Enlisting in Glasgow in 1895, he served with the 2nd Dragoons who arrived in South Africa in December 1899 and took part in the Relief of Kimberley. McKilligan did not get earn that clasp - possibly on account of illness. According to South African Surrenders (TNA WO108/372, refers), McKilligan on 27 May 1900:"Was captured when out scouting, his horse was killed and fell on him preventing his escape." 'Further proof of his capture comes from the list of released Prisoners of War published in The Times, with his release on 6 June 1900. Additionally, he is entitled to the King's Medal which was issued under the surname 'Hardie'. The medal may have been returned and the roll is unclear. Appears to be one of only four Medals with this combination of clasps issued to the regiment. Rolls confirm QSA issued as McKilligan
-
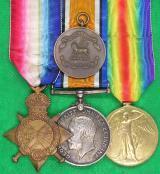
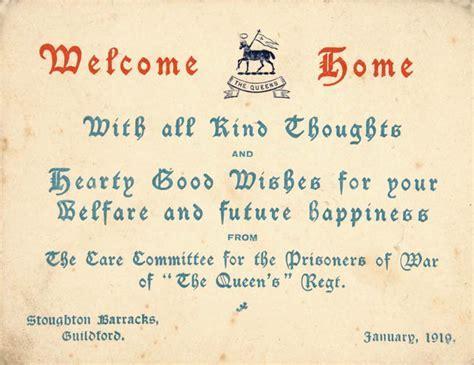
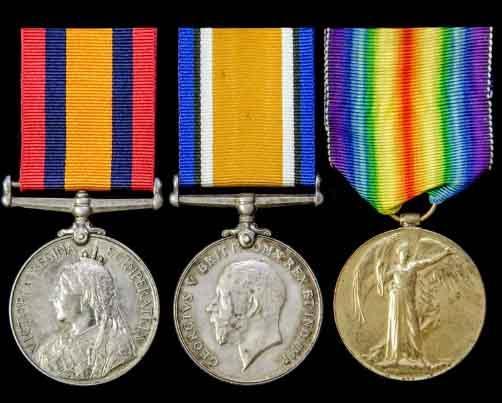
It's been a while since I added to the WWI section of the collection and today I was fortunate to find the following. WW1 1914-15 TRIO WITH RETURNED PRISONER OF WAR MEDAL, 8th QUEEN'S REGIMENT, PRISONER OF WAR AT LOOS 1915 1914-15 Trio: G-2035 Pte. F. C. Gatton, The Queen’s R. with regimental medal for returned prisoners of war Frederick Charles Gatton first left England on 31/8/1915. He was wounded and taken prisoner of war by the Germans on the second day of the battle of Loos (26-9-1915). His wife lived at 26 Junction Place, Croydon. He was discharged to the class Z army reserve 18/4/19. The 8th Bn. Queen's West Surrey Regiment was raised around the Guildford area during the push for regiments for the "new army" of Kitchner Battalions. Thus, the "G" in his service number. In training, "The 8th Queen's trained in machine gunnery, musketry, field maneuvers and "bomb throwing" at Herly for most of September of 1915. They frequently found that their instructors knew little more than themselves. Major H. J. C. Peirs wrote in reference to machine gun training that "the whole thing was a farce.” The battalion arrived in Bologne Sur-Mer, France on Friday 1 September, 1915. The 8th Queen's left their barracks at Herly on 24 September and arrived in Vermelles on Saturday, 25 September. The battle of Loos had begun that morning. Six divisions of British soldiers attacked and made gains along the line despite strong German defense and the clumsy use of chlorine gas by their own forces. The 8th Queen's experienced the trenches of the Western Front for the first time the night of 25 September. Sergeant Walter Hitchcock, of B Company wrote, "we marched into the line, and a lot of people had never seen a dead man. There was got soldiers [sic] were hanging on the wire, you know, where they had been killed the day before and hadn't been taken off. Well, we got into the trenches and we were told to make ourselves comfortable" The battalion was in the trenches west of La Rutoire Farm, where they were under shellfire for the first time. They arrived at the jump-off position at 2:00 AM and endured shelling for the rest of the morning. It intensified at 8:00 AM. Their attack was meant to capitalize on gains made the day before.the battalion moved into the line the night of the Saturday the 25 September, and was a part of the 72nd Brigade, 24th Division, 3rd New Army. They would attack with the 3rd Brigade, 1st Division on their left, and the 21st Division on their right. The 72nd brigade was tasked with taking Hill 70 South of Hulluch. The Battalion received verbal orders to attack and went over the top at 11:00 AM. It was "a beautiful sunny day" and the men walked forward "As though we were going partridge shooting." Years later, Major Peirs admitted to "considerable mental disturbance" in response to being exposed to enemy fire for the first time. The 8th Queen's advanced in support of the 8th West Kents, deployed in lines of platoons in extended order. The W. Kents and E. Surreys attacked in the first line and we and the Buffs were in support and consequently were not under the same intense fire. All but one officer of the West Kents would be killed, wounded or captured in the attack. But, Colonel Fairtlough was killed almost immediately and command of the Battalion was passed on to Major Peirs. Private Lintott of the 8th Queen's wrote, "Our Major was magnificent" and "He led us with a cigarette in his mouth, his walking [stick] in one hand and his revolver in the other. He is a jolly good fellow and brave too." Artillery fire was severe during the initial part of the advance, but abated after about 800 yards. German machine gun batteries opened on the 72nd Brigades flanks they crossed Lens-Le Bassee Road. The disciplined Battalions were raked by enfilading fire, which inflicted heavy casualties. Barbed wire entanglements that were four feet high and twenty feet deep halted the advance. British Artillery was supposed to have destroyed the wire. None of the Battalions had been provided with wire cutters. The 8th Queen's hunkered down in a wheat field south of Hulluch for two hours, unable to pass the barbed wire. The men were told "We don't go back. We'll wait here. We'll see what happens." German machine gun batteries took advantage of the Brigade's exposed position and deployed on their flank. The redeployed German machine gun batteries forced the men from their precarious position, and they retreated towards the Lone Tree, many describing it as a "stroll." The Battalion Diary notes, "There appeared to be no panic; the men walked back still under machine gun and shrapnel fire." All organization was lost as the Brigade retreated to its starting point. The men of the 8th Queen's, scattered across the battlefield, passed the night in misery. One man wrote that it was, "the worst night I've ever had in my life. It was cold, we had nowhere to lie down - I got under a GS wagon and tried to get some sleep." The 8th Queen's eventually regrouped at their starting point along with the rest of the Brigade. Reinforcements took their place in the line and they marched back through Vermelles. In total, the 8th Queens lost 12 officers and 409 other ranks killed, wounded, missing or captured. The Battle of Loos shifted the Western Front by a few miles, with gains made by both the British and French Armies. However, the most important shift occurred in the rear and in the ranks. General Haig replaced General French as the commander of the British Expeditionary Force, and the British New Armies, which the 8th Queens was a part of, had seen their first action. General Milford praised the men of the 72nd Brigade, writing, "You were an example of determination to carry out your task not only to the New Armies but to seasoned troops who could not have done better that you did." So, in short, Pte. Frederick Charles Gatton trained and saw one battle in which he was wounded and captured. His soldiering days were spent more as a PoW, but he survived his wounds, the flue pandemic and being in a PoW camp to join his wife, and eventually live in Croydon. In January 1919, he attended the Welcome Home Dinner at Stoughton Barracks in Guilford and presented the Welcome home medal/fob. The welcome-home medal to the Queen’s Royal West Surrey Regiment is very scarce. There was a reception in January 1919 in Guildford for 270 repatriated PoW other ranks from the Queen’s Royal West Surrey. (See the invitation below). These men were awarded this small commemorative medal (fob) that could be worn on a watch-chain A list of those attending in the Surrey Advertiser shows most of the men came from places within the regimental recruitment district or from within Surrey. In total there were about 1,200 other ranks of the Queen’s who were PoWs. Gatton is listed on the left side of page 60 of the PoW list (or page 29 of the online list) as follows: Gatton FC Frederick Charles Pte 8th 2035 Croydon Surrey 60 Right QRWS/1/5/1 On the 1939 register he is still living in Croydon and was a 55-year-old “jobbing gardener” living at 5 Junction Road, Croydon This is a nice group that goes along with one of the above WWI pairs and Welcome-Home Fob. For more information on the Surrey PoW War Relief Fund see: https://www.surreycc.gov.uk/culture-and-leisure/history-centre/marvels/queens-prisoner-of-war-relief-fund
-
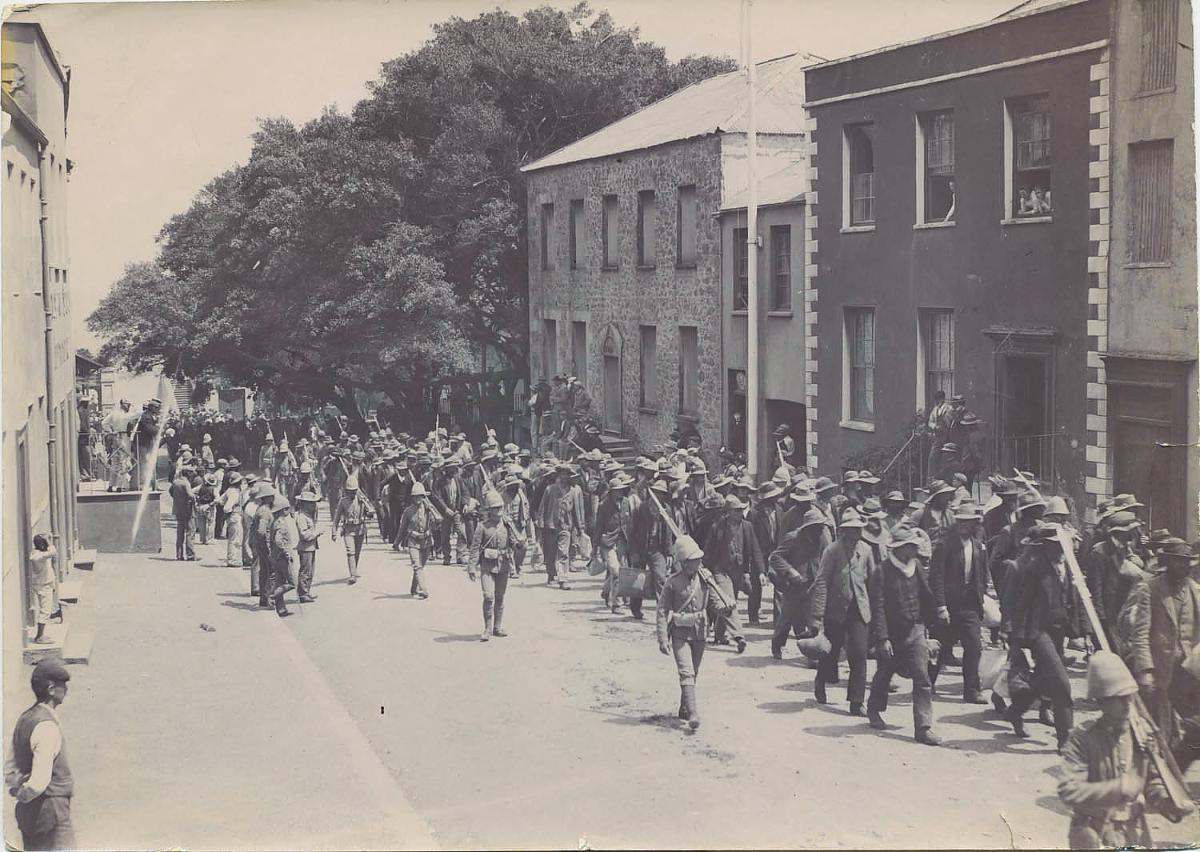
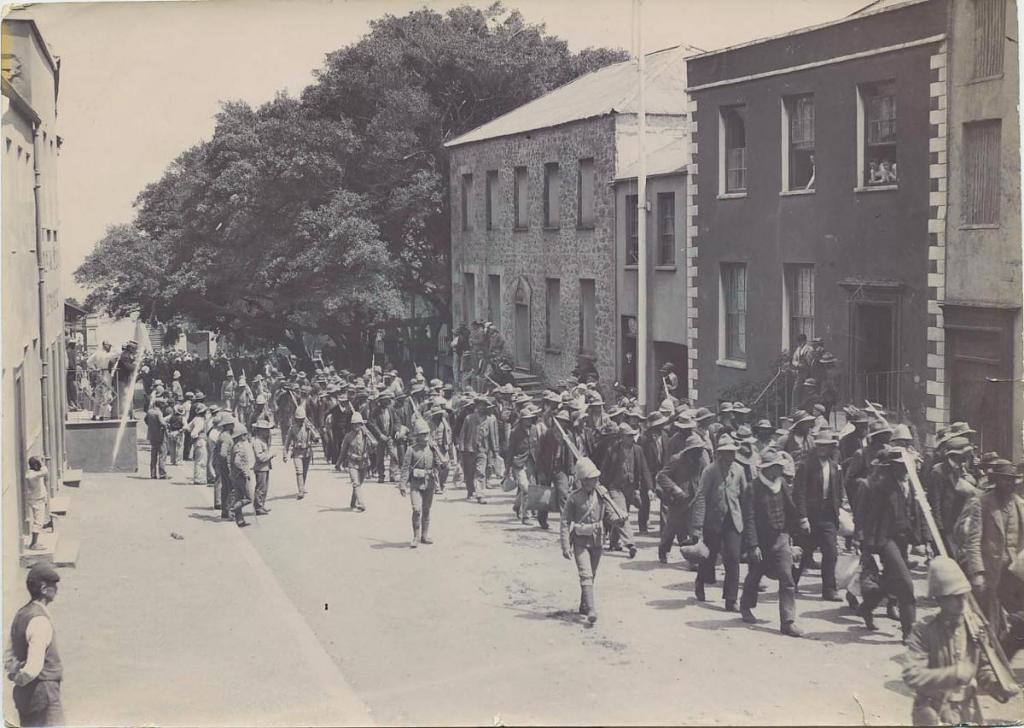
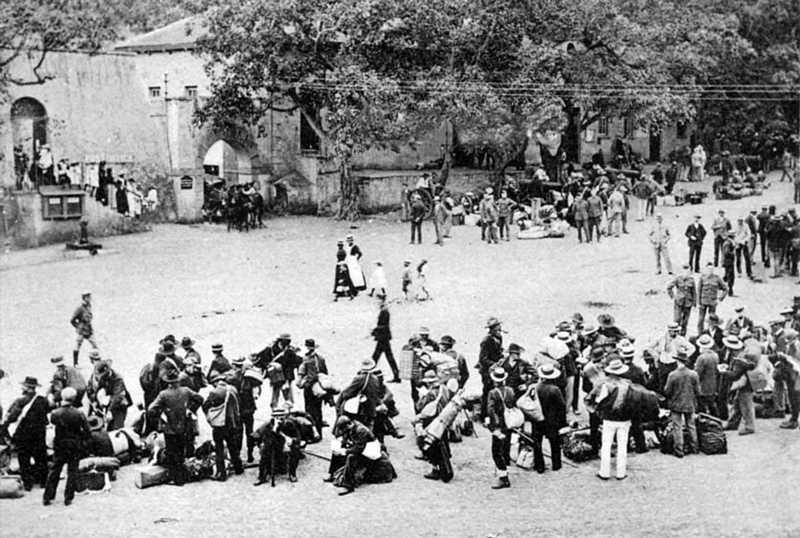
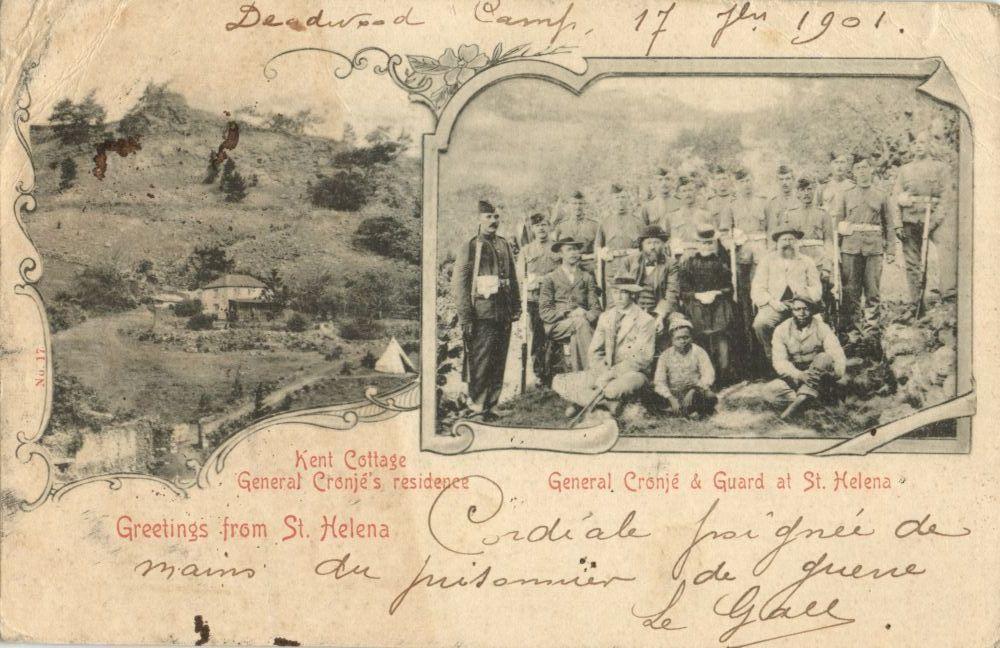
Something a bit different, but essential for a Boer War PoW collector. Claspless QSAs were issued to guards at the British PoW Camps. There were also men who were guards who had clasps, but they were men who had served in the campaign in S. Africa before going to St. Helena. South Africa Boer War Prisoner of War Guard on Saint Helena and Great War Group awarded To Private W. Allchin, 3rd Militia Battalion, East Kent Regiment - The Buffs, Later A Driver With The Army Service Corps. Group of 3: Queen’s South Africa Medal 1899-1902, no clasp; (6056 PTE. W. ALLCHIN. E. KENT REGT.); British War Medal and Victory Medal; (T-19613 DVR. W. ALLCHIN. A.S.C.) William Allchin saw service as a Private (No.6056) with the 3rd Militia Battalion, East Kent Regiment - the Buffs, and was present during the Boer War on service in Saint Helena guarding the Boer prisoners of war, as a result of which he qualified for the medal without clasp. Allchin then transferred to the Army Service Corps on 1st September 1902, and later service with this unit during the Great War as a Driver (No.T-19613), initially with the 19th Infantry Brigade Train out on the Western Front from 3rd September 1914, as part of the Supply and Commissariat Staff, but then went on to see service with a Horse Transport Company.
-
My Prisoner of War Collection
azyeoman replied to POWCollector's topic in Great Britain: Orders, Gallantry, Campaign Medals
Such an important story that everyone should know and of course never forget. Thank you for sharing! -
My Prisoner of War Collection
azyeoman replied to POWCollector's topic in Great Britain: Orders, Gallantry, Campaign Medals
Great addition to your collection. PoW groups and medals to New Zealanders are not easy to come by. It's great you've got a photo and his soldier's pay book. Cheers, JL


1.jpeg.bc77c7fc974ce857b20bd7545b36cef7.jpeg)
2.jpeg.06b07340f3de2f10ae346207fe354bab.jpeg)
3.jpeg.e8809c00e743c8757fd5b62dc648ecb6.jpeg)
4.jpeg.b40465683977d7155259b2cb3e5b2345.jpeg)